Introdução

  1. KQAeJNIvdlpfV23F
    KQAeJNIvdlpfV23F
    fsVjGRMO2XdGIFsc
    QMjASJtHGFeSv1vN
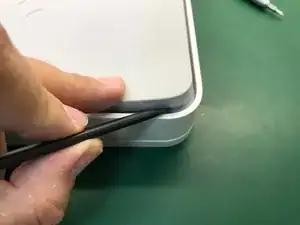
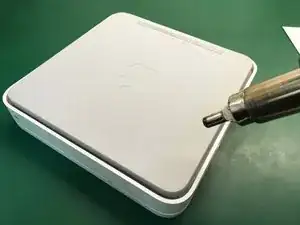
    • Colocamos la unidad boca abajo y despegamos la tapa inferior de goma. Es mejor comenzar por una esquina.

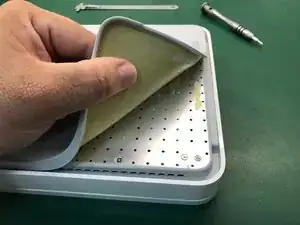
    • Calentamos la tapa para poder despegarla. Lleva mucho pegamento bajo toda la superficie. Tened paciencia y mucho cuidado.

    The rubber tears real easy with age so carefully work your way inwards from each corner.

    AndreasT -

    Just happen to me :/

    Ben Capehart -

  2. aJjpOhVcUvTKADOk
    aJjpOhVcUvTKADOk
    J3OanBkVnRRxqm1P
    hY1Zt2cDQKQJfC2e
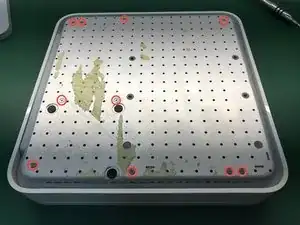
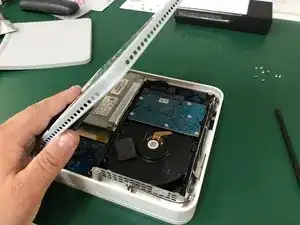
    • Quitamos los 10 tornillos Phillips #00 que sujetan el soporte metálico inferior de la Time Capsule.

    • Abrimos hacia la izquierda dejando los conectores de red en ese lado. No abrir del todo para evitar romper el cable del ventilador.

    thanks for doing this guide.

    1. remove hash sign (#) before the 10. “Remove the 10 Phillips...

    2. second bullet - “Do not open all the way to avoid…

    Brian McNiff -

    I agree!

    Good Job!

    Ben Capehart -

    That warning on the amount of opening seems unnecessary in my experience. At least my lid can be opened fully. In any case, such warnings ⚠️ need to be put in red, well in evidence so that users read them beforehand and not after.

    RetroFixer -

  3. unywhdvB2nALZmrK
    unywhdvB2nALZmrK
    ZfKe1PqetIZKuxFB
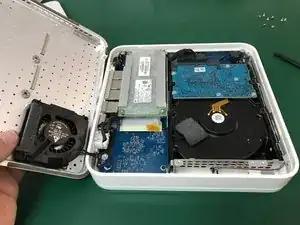
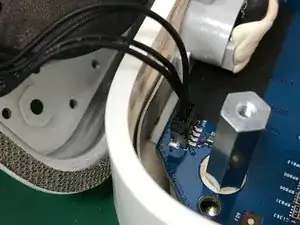
    • Con la punta de un spudger quitar con cuidado el conector del ventilador y retirar la tapa inferior metálica.

    This is the part where in my experience you need a warning ⚠️. The connector and the socket may be dusted and baked a bit, making it very hard to remove them without detaching the connector from the board.

    RetroFixer -

  4. mNNWHLuGvhMZIhUF
    mNNWHLuGvhMZIhUF
    HlHicyNmh6gihWKy
    rCWxwJ3UCM5bJZKp
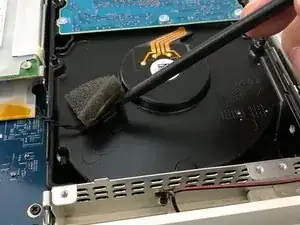
    • Podemos observar el sensor de temperatura sobre la superficie del disco duro.

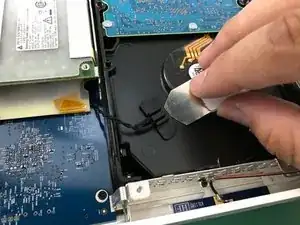
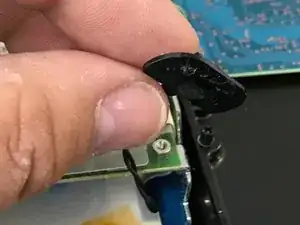
    • Con cuidado despegamos la cinta que cubre el sensor de temperatura.

  5. wpgoqgLPFfQYiVUo
    wpgoqgLPFfQYiVUo
    6FyUqNnLPghjhUoT
    • Despegamos el clip que retiene el sensor de temperatura y retiramos ambos.

  6. MfB1jNiGjOiuDjPS
    MfB1jNiGjOiuDjPS
    Nv3C2WUxH3xQ53hA
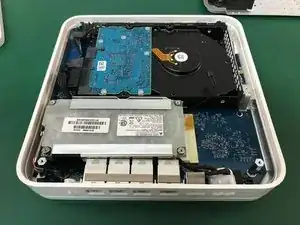
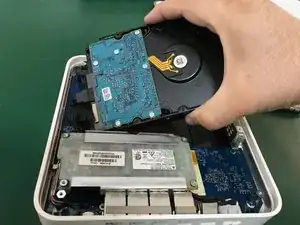
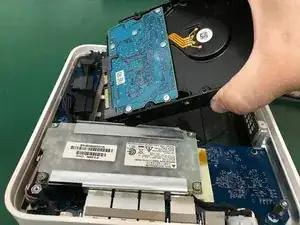
    • Levantamos un poco el disco duro sin tirar demasiado para no provocar daño en los conectores de corriente y de datos del disco duro. Retiramos el conector de alimentación del disco duro

    • Retiramos el conector de datos del disco duro.

  7. 4CVnxkRJXJNevBEU
    4CVnxkRJXJNevBEU
    UCsJxtCIxfSWDbgu
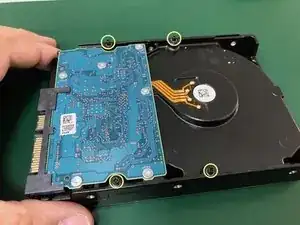
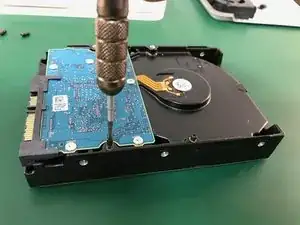
    • Una vez que tenemos ya el disco fuera de la Time Capsule quitamos los 4 pilares con cabeza Phillips #00 y los colocamos en la nueva unidad.

    A #1 Philips works a lot better on these

    Heath Kehoe -

    Not gonna lie, I used a eye glasses repair kit screwdriver.

    kilereeds -

    Wow worked perfect! Thanks! But funny thing is I wanted to remove the hard drive to upgrade my Windows 11 Home PC and I just used dos kill disc to wipe it to 0’s

    kilereeds -

    Hello there, is this SATA II or SATA III HDD?

    Tomas Fiala -

    the #00 philips wouldn't turn the 4 screws in the hard drive (step 7) and I ran the risk of stripping either the head of the screws or the screwdriver itself, but the work around was use a pair of pliers to turn the screws from the outside first, loosening them enough you can use the screw driver. Torx screws would be a lot better here

    Matt Cowan -

Conclusão

Para reensamblar tu dispositivo, sigue estas instrucciones en orden inverso.

David Medrano

Membro desde: 22/12/13

1840 Reputação

15 comentários

I replaced a dead drive in about 30 mins following these instructions. The steps are clear, straight forward and the photos were extremely helpful. Many thanks as I now have a renovated AirPort Time Capsule.

Peter Long -

I just replaced the 2 TB WDC Green with a WD Red Pro 4 TB with this guide in less than 30 min. Except for the fan cable it was a cake walk.

Alex Senger -

Successfully upgraded my A1409 to a Western Digital - WD100PURZ - 5400 RPM Class SATA 6 Gb/s 256MB Cache 3.5. There are two additional steps: (a), there is a rubber strip around the original drive that reduces noise and protects the drive, gently remove from the original drive and place on the new drive; (b) once the rubber strip is on the drive, it is hard to get into place, angle the drive towards the connector side, and press in.

Brunob00 -

12 TB WD RED (inbuilt version WD120EMAZ) just confirmed for 1409 (G4 version).

you are welcome

AD G -

Hola. Reemplacé el disco con toda facilidad pero, desgraciadamente, la Utilidad AirPort no lo está reconociendo ni consigue borrarlo para activarlo. El HD nuevo es un WD Red de 10 TB. Si alguien puede ayudarme a resolver el problema, agradezco mucho.

I MM -

Hi. Is it possible to upgrade this to an SSD?

Bobby Barbour -

Yes, you could also use an SSD, just follow the same procedure.

Idrees -

How to Clone or Copy data to a new hard drive?

Ben Capehart -

4 TB WD Green drive replacement. 30 minutes start to finish, backup just started after formatting the disk. DO NOT forget to format the disk first. Disk format can be done from within the Airport Utility. Don't forget to remember that password!

jay Snoke -

It's not formatting the installed WD Red WD101EFAX which I've installed. Any help or suggestions?

Evgeny Kozlov -

Take it out then Try formatting it on Mac and then re-install it and try formatting again.

Ben Capehart -

This was super helpful. I used the microwaveable ifixit gel opener to loosen the glue on the rubber pad. Starting from one side and wedging a metal pry tool underneath as I moved about 1-2 inches at a time, reheating every few inches. Worked perfectly, no rips or tears on the rubber.

I mounted an SSD with VHB tape left over from another project, it holds drive securely against the side of the drive mount.

During reassembly, the glue on the back is still tacky enough to hold the rubber on, but a few small pieces of VHB tape in the corners helped.

It’s actually useful again, and very handy for my legacy Macs. Thanks for posting this!

Daniel PCRR -

Any guide / advice on the largest HDD that has been used, want to upgrade my 2Tb one... probably 4-8Tb

Anthony Clarke -

Thank you for the guide. I have replaced faulty hard drive to the new one with no problems.

Artur Pędziwilk -

Do you think an SSD could speed up the backup, or is it better to maintain an HDD with 5400 RPM or 7200 RPM? Is there a limit to the SATA buffer speed?

riccardo delfanti -