Introdução
Guia tipo pré-requisito exclusivo para abrir um iPhone 8, permitindo acesso a componentes internos para reparo ou substituição.
-
-
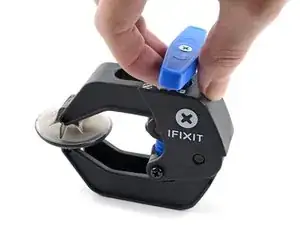
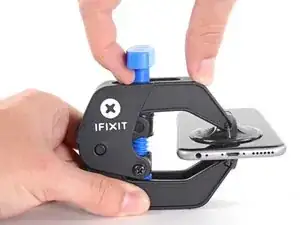
Puxe a pega azul para trás para destravar os braços do Anti-Clamp.
-
Deslize os braços pela borda esquerda ou direita do seu iPhone.
-
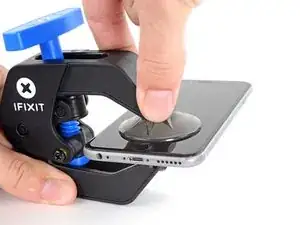
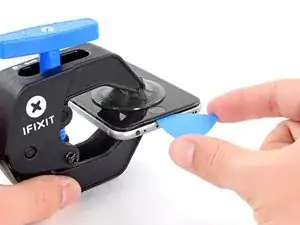
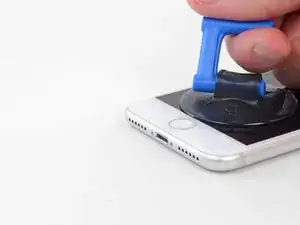
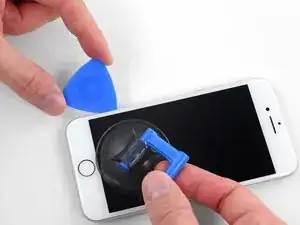
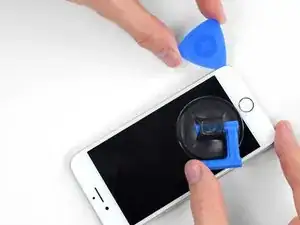
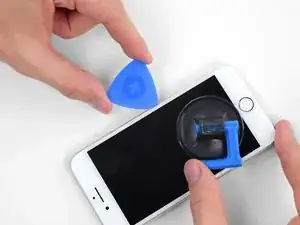
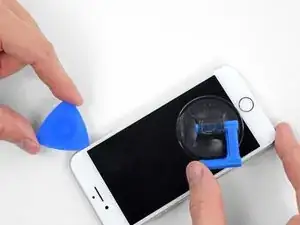
Posicione as ventosas próximo à borda inferior do iPhone, diretamente acima do botão home - uma pela dianteira e a outra pela traseira.
-
Aperte as ventosas uma contra a outra para aplicar sucção na área desejada.
-
-
-
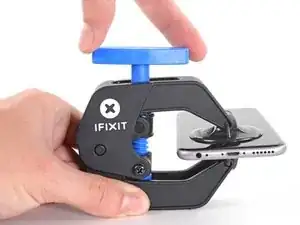
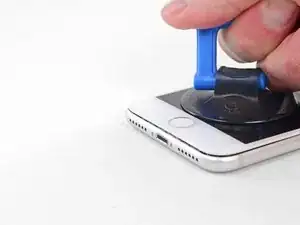
Puxe a pega azul para a frente para travar os braços.
-
Gire a pega 360 graus no sentido horário até que as ventosas comecem a se esticar.
-
Certifique-se de que as ventosas permaneçam alinhadas uma com a outra. Se elas começarem a ficar desalinhadas, solte um pouco as ventosas e realinhe os braços.
-
-
-
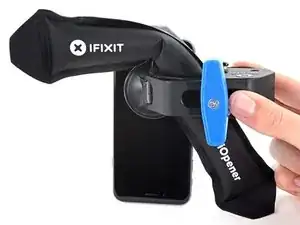
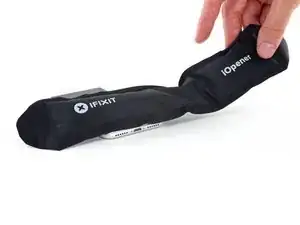
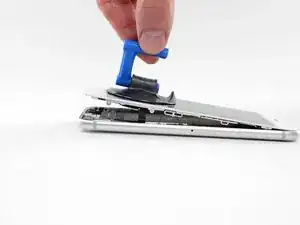
Aqueça uma bolsa térmica iOpener e passe-a pelos braços do Anti-Clamp.
-
Dobre a bolsa térmica iOpener de modo que ela fique sobre a borda inferior do iPhone.
-
Aguarde um minuto para que o adesivo tenha a chance de se soltar e apresentar um vão para a abertura.
-
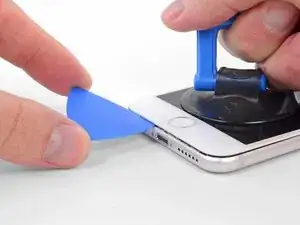
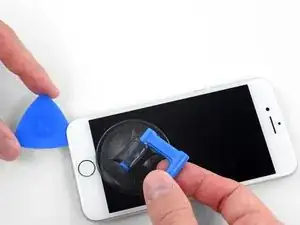
Insira uma palheta de abertura no vão.
-
Pule as próximas três etapas.
-
-
-
O aquecimento da borda inferior do iPhone ajudará a amolecer o adesivo que prende a tela, facilitando a abertura.
-
Use um secador de cabelo ou prepare uma bolsa térmica iOpener e aplique-o(a) na borda inferior do iPhone por cerca de 90 segundos para amolecer o adesivo que se encontra por baixo.
-
-
-
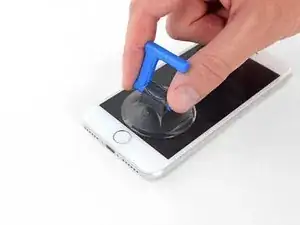
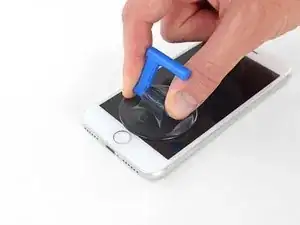
Aplique uma ventosa de sucção na metade inferior do painel dianteiro, imediatamente acima do botão home.
-
-
-
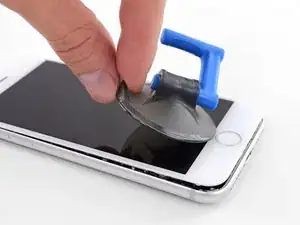
Puxe a ventosa para cima com pressão firme e constante para criar um pequeno vão entre a tela e a moldura.
-
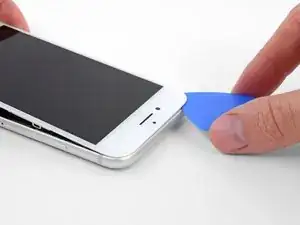
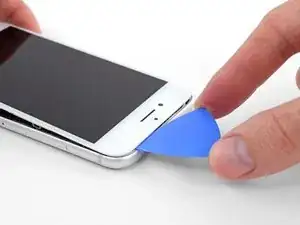
Insira uma palheta de abertura no vão.
-
-
-
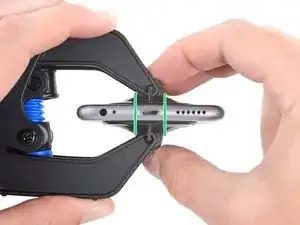
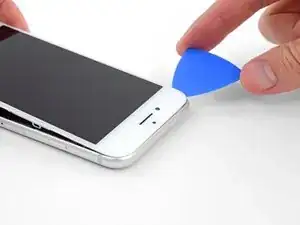
Passe a palheta de abertura a borda esquerda do fone para cima, começando pela borda inferior e indo em direção aos botões de controle de volume e ao seletor de mudo, cortando o adesivo que mantém a tela no lugar.
-
Pare próximo ao canto superior esquerdo do visor.
-
-
-
Insira novamente a sua ferramenta no canto direito inferior do iPhone e deslize-a ao redor do canto e subindo pela lateral direita do fone para separar o adesivo.
-
-
-
Puxe com cuidado a ventosa de sucção para erguer a borda inferior da tela.
-
Puxe a ventosa de sucção pela pequena lingueta para removê-la do painel dianteiro.
-
-
-
Passe uma palheta de abertura por debaixo da tela, circundando o canto esquerdo superior e ao longo da borda superior do fone para amolecer o último adesivo.
-
-
-
Deslize o conjunto da tela ligeiramente para baixo (afastando-o da borda superior do fone) para desengatar os clipes que o mantêm preso à estrutura traseira.
-
-
-
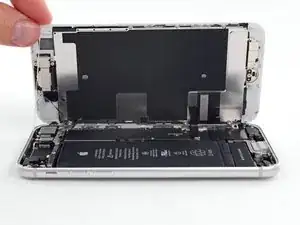
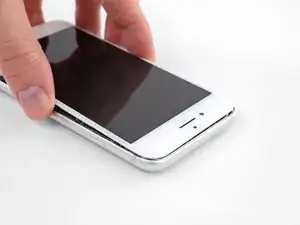
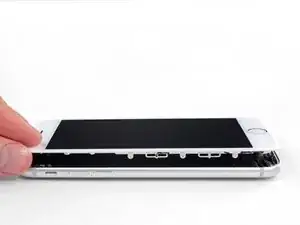
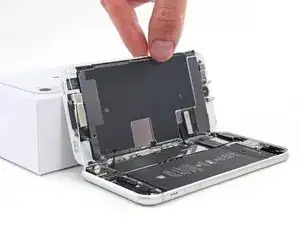
Abra o iPhone virando a tela para cima pelo lado esquerdo, como se estivesse virando a contra-capa de um livro.
-
Apoie a tela em algo para deixá-la de pé enquanto você executa os trabalhos no fone.
-


Para a remontagem de seu dispositivo, siga essas instruções na ordem inversa.

just how long are those screws- i turn and turn and turn and the lift off is soooo slight, seemingly insignificant…
An. Jahnke -
I would recommend, from the very beginning, dumping all tools out of the kit (if you got it) and using that white paper tool box as a tray to organize the screws and braces in. It’s nice to work over because it catches screws well and makes it easy to see them if you drop any.
Johnny Emrica -
That’s a great idea thank you
Mohamed Dekkiche -
Screw to the left of the charging port will not come out. Screw on the right came out no problem. Any ideas?
Bill Maher -
Maybe the screw is stripped…
Gabriel-Science -
I already replaced my iPhone 8 battery with one from iFixit and honestly I wasn't impressed. It worked well for a few months, but then I started noticing the peak performance capability dropping significantly thereafter. I followed the initial charging instructions to a tee and only let it drop below 20% once a month. Normal everyday use for me... no intense apps like games, etc. I considered having Apple do it this time around, but for these older models they don't keep the batteries in-stock and you have to give them your phone for up to a week. So in the end, I opted to try another battery from iFixit instead. Hopefully this one will last longer.
tripmusic -
Does it lasted longer ?
Gabriel-Science -
How with the gigantic kit do I not have a 3 1/2 pentalobe driver the very first screwdriver I reach for and that I need is not in any of these kits. What’s up with that?
Michael Stephens -
Same problem. The kit comes with a screw driver, but not for this pentalobe screw. This is a problem.
Yuji Ishitsuka -
I had to search what screwdriver bit I had to use from the ifixit toolkit; it's the P2 bit. (Maybe it's more obvious if you bought the battery kit, because it only has one type of pentalobe screwdriver.)
Nathaniel Zielstra -
Definitely P2 bit
Megolina -
I drained my battery completely before I did this thinking it might help prevent a fire if I accidentally puntured it. I don't know if that is the case... but figured it couldn't hurt.
Megolina -
Very clear steps, I’ll try this soon.
Julio Ramos -