Introdução
Guia tipo pré-requisito para o conjunto do visor.
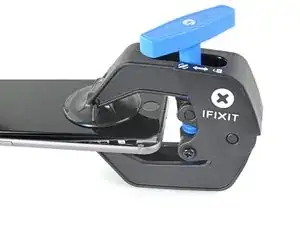
Ferramentas
-
-
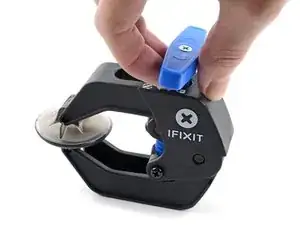
Puxe a pega azul para trás para destravar os braços do Anti-Clamp.
-
Deslize os braços pela borda esquerda ou direita do seu iPhone.
-
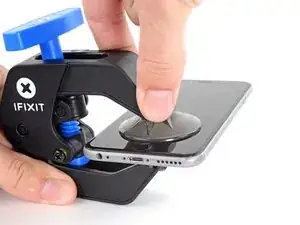
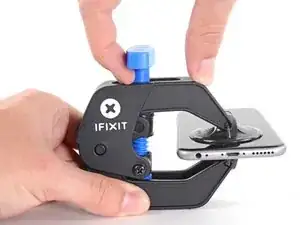
Posicione as ventosas próximo à borda inferior do iPhone, diretamente acima do botão home - uma pela dianteira e a outra pela traseira.
-
Aperte as ventosas uma contra a outra para aplicar sucção na área desejada.
-
-
-
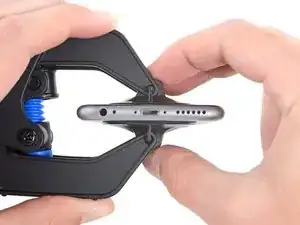
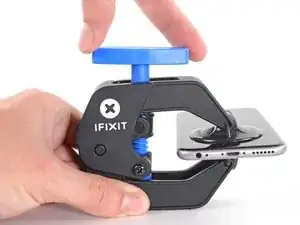
Puxe a pega azul para a frente para travar os braços.
-
Gire a pega 360 graus no sentido horário até que as ventosas comecem a se esticar.
-
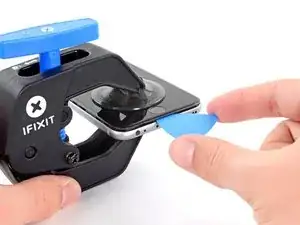
Insira uma palheta de abertura sob a tela quando o Anti-Clamp tiver formado um vão grande o suficiente.
-
Pule as próximas três etapas.
-
Conclusão
Para a remontagem de seu dispositivo, siga essas instruções na ordem inversa.

I found that the single suction cup from the kit worked very well. It didn’t take that much force to separate the front panel from the phone. I think any suction cup that you are able to get a firm grip on will probably work as well. There isn’t any adhesive holding the front panel in. It just snaps in and out. If you have a cracked screen and no screen protector, it may be hard to get a good suction seal. If that’s the case, someone else here suggested applying clear tape to the front glass to get a good surface for applying the suction cup. In my case, I already had a screen protector that was still intact so the suction cup sealed easily.
fiftysomething -
WORKED PERFECTLY… easy, no harm at all…. thanks a lot
carlos restrepo -