Introdução

Este é um guia do tipo pré-requisito exclusivo! Este guia é parte de outro procedimento e não se destina ao uso isolado

  1. ByiiAO26RDQLNDGS
    ByiiAO26RDQLNDGS
    BdJkXeHW4RxNU42g
    • Para sua segurança, descarregue a bateria abaixo de 25% antes de desmontar o telefone. Isso reduz o risco de um perigoso incidente térmico, se a bateria for acidentalmente danificada durante o reparo. Se a bateria estiver estufada, tome as devidas precauções.

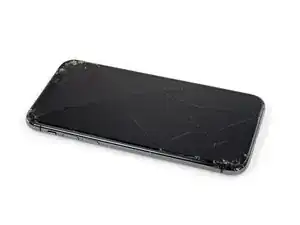
    • Desligue o iPhone antes de iniciar a desmontagem.

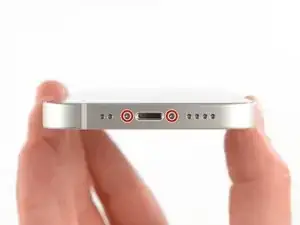
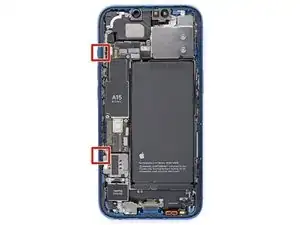
    • Remova os dois parafusos pentalobe P2 de 6,8 mm que se encontram na borda inferior do iPhone.

    • A abertura da tela do iPhone comprometerá as vedações impermeabilizantes. Tenha à mão vedações de reposição antes de prosseguir com esta etapa ou tome cuidado para evitar a exposição a líquidos se você montar o iPhone novamente sem substituir as vedações.

  2. pvyofbGR6QDZLwuT
    pvyofbGR6QDZLwuT
    uHpIXSCwsv5aX6k2
    qDfr6bv6XxVSWXYb
    • Se o seu iPhone tiver uma tela rachada, mantenha as rachaduras sob controle e evite danos corporais durante o reparo colocando fita adesiva sobre o vidro.

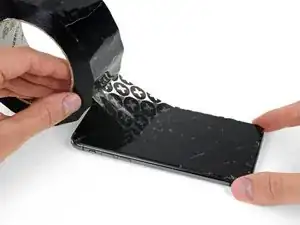
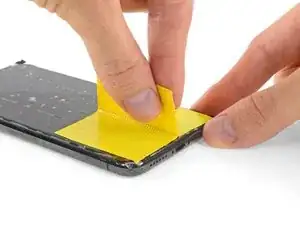
    • Coloque tiras sobrepostas de fita adesiva transparente sobre a tela do iPhone até que toda a superfície fique coberta.

    • Use óculos de segurança para proteger seus olhos de qualquer vidro que possa ser liberado durante o reparo.

    • Se não conseguir fazer com que a ventosa grude nas próximas etapas, dobre um pedaço de fita adesiva resistente (como fita adesiva vedante) na forma de uma pega e levante a tela com ela.

    • Se tudo mais falhar, você pode colar a ventosa na tela com supercola.

    Yes, tape to cover the cracks. Guess what also loses adhesion when you apply heat to it,&&^&^$^ tape.

    dylan brune -

  3. nomKPGPYQmVXKkY4
    nomKPGPYQmVXKkY4
    u2VWMGNpSNEWhWhn
    wdIbZZ2ZcndTbHWn
    • As próximas três etapas demonstram o Anti-Clamp, uma ferramenta que projetamos para facilitar o procedimento de abertura. Se não estiver usando o Anti-Clamp, pule três etapas para um método alternativo.

    • Para obter instruções completas sobre como usar o Anti-Clamp, consulte este guia.

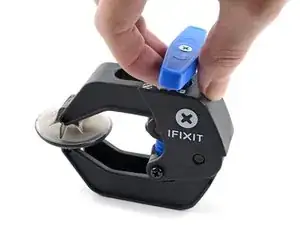
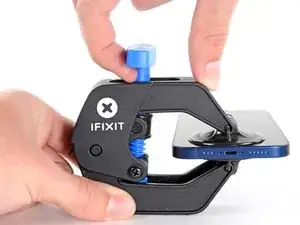
    • Puxe a pega azul para trás para destravar os braços do Anti-Clamp.

    • Deslize os braços pela borda esquerda ou direita do iPhone.

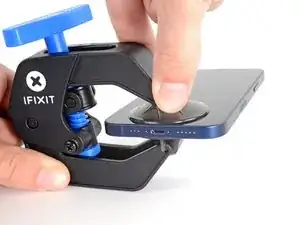
    • Posicione as ventosas próximo à borda inferior do iPhone - uma pela frente e a outra pela traseira.

    • Aperte as ventosas uma contra a outra para aplicar sucção na área desejada.

    • Se você achar que a superfície do iPhone é muito escorregadia para o Anti-Clamp se prender, você pode usar fita para deixar a superfície mais aderente.

  4. QAZAG12HZt4ymkfM
    QAZAG12HZt4ymkfM
    hqqQq1tU46iiXLQv
    XG1WOiVw4haPnbZL
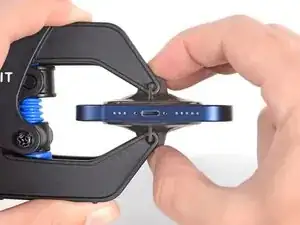
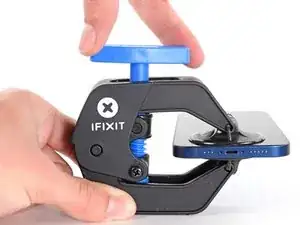
    • Puxe a pega azul para a frente para travar os braços.

    • Gire a pega 360 graus no sentido horário ou até que as ventosas comecem a se esticar.

    • Certifique-se de que as ventosas permaneçam alinhadas uma com a outra. Se elas começarem a ficar desalinhadas, solte um pouco as ventosas e realinhe os braços.

  5. QImf2HMVTecJsNYY
    QImf2HMVTecJsNYY
    PdUh3NIj6JOFRBEW
    x1dkLGaMEDFJ2MaR
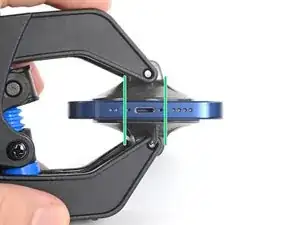
    • Apoie o iPhone em algo sólido, como um livro de capa dura, para que ele fique parado (sem que você precise usar uma das mãos para segurá-lo) e paralelo ao piso; isso vai facilitar o trabalho nas etapas a seguir.

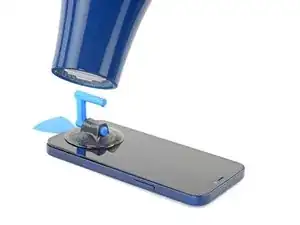
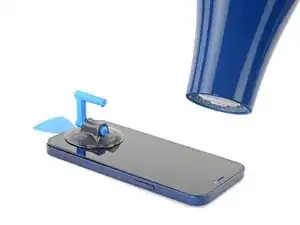
    • Com um secador de cabelos, aqueça a borda inferior do iPhone. A tela deve se sentir um pouco quente demais para ser tocada.

    • Para obter instruções completas sobre como usar um secador de cabelos, confira este guia.

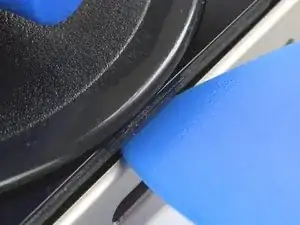
    • Aguarde um minuto para que o adesivo tenha a chance de se soltar e apresentar um vão.

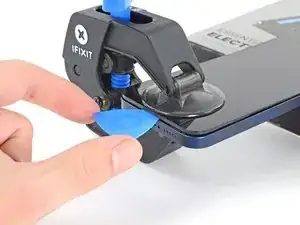
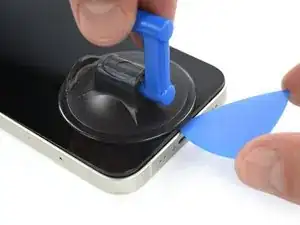
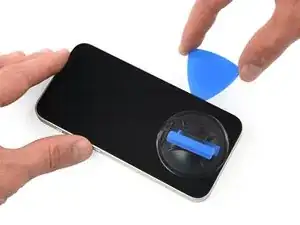
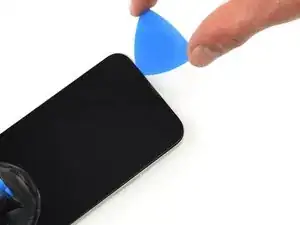
    • Introduza uma palheta de abertura sob a moldura plástica da tela quando o Anti-Clamp criar um vão suficientemente grande.

    • Se o Anti-Clamp não formar um vão grande o suficiente, aplique mais calor na área e gire a pega um quarto de volta.

    • Não gire mais do que um quarto de volta de cada vez e espere um minuto entre cada volta. Deixe que o Anti-Clamp e o tempo façam o trabalho por você.

    • Pule as próximas três etapas.

    Make sure as you are prying the screen that the thickness of the screen looks like it does in the picture. Be very careful to slice the adhesive between the bezel and the device not between the screen and the bezel as I did.

    Reed -

    i shouldve bought this tool... now i ripped the cable to the screen cuz the screen came off easier than i thought. now i gotta buy a new screen lol since i was just trying to replace the back shell...

    Hayabusa 530 -

    Same problem as noted above. The screen separated from the bezel and I couldn't tell until it wouldn't fold open as described. So, make sure the thickness at the separation is NOT just that of the glass screen. It should also include the surrounding metal plate, the "bezel". You can tell by comparing yours to the photo.

    Locke Wilson -

    Noted as above, didn't realize there is a metal assembly that should come off with the screen until I got to a point where it didnt look like the guide or the video.

    Vishal Mansuria -

    ほかの方も記載している通り、ピックをさす際に細心の注意が必要です。有機elのパネル自体の張り合わせが強くないため誤って差し込んでしまうと簡単に壊れてしまいます。有機elパネルは高価なため安価な液晶スクリーンにグレードダウンすることになってしまいました(t_t)

    aosiro -

  6. DXVJqMSTNoNsgZmT
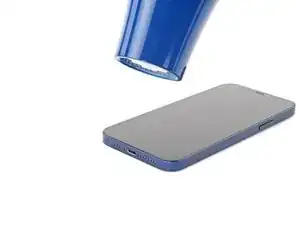
    • Com um secador de cabelos ou uma pistola de ar quente, aqueça a borda inferior do iPhone por 90 segundos ou até que a tela fique um pouco quente demais para ser tocada.

    • Nunca deixe o secador de cabelos agindo em um único ponto por um longo período de tempo.

  7. gc1DbP6iqYjfWshi
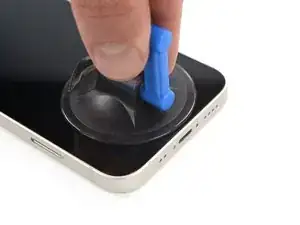
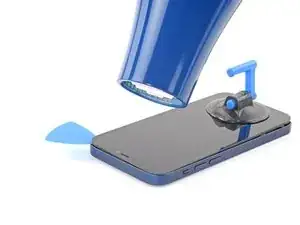
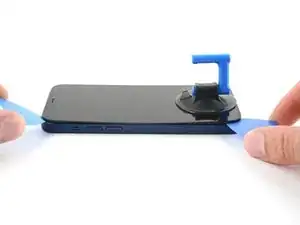
    • Se estiver usando uma ventosa de sucção simples, aplique-a na borda inferior do telefone, evitando a borda do vidro.

  8. e1dK1xEJxTfcVLKq
    e1dK1xEJxTfcVLKq
    VPQXZHseIw6MBrKx
    6nnBtHV1qYbWeVbN
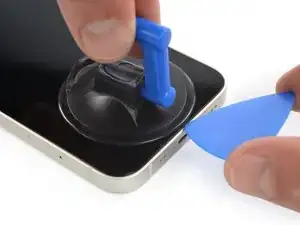
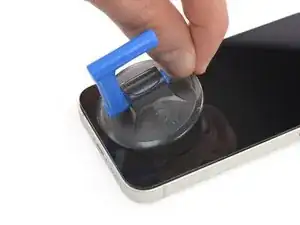
    • Puxe a ventosa para cima com pressão firme e constante para criar um pequeno vão entre a tela e a estrutura.

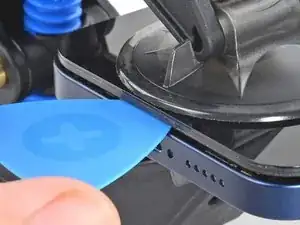
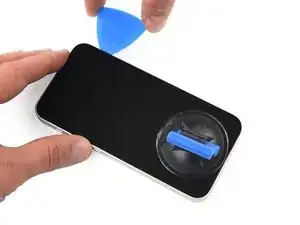
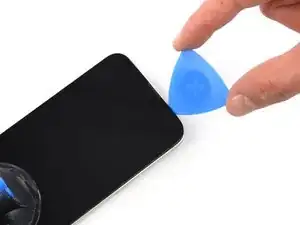
    • Introduza uma palheta de abertura no vão sob a moldura plástica da tela.

    • O adesivo impermeabilizante que mantém a tela no lugar é muito forte; a formação dessa abertura inicial requer uma quantidade significativa de força. Se estiver com dificuldade para abrir um vão, aplique mais calor e balance a tela para cima e para baixo para amolecer o adesivo até criar um vão grande o suficiente para a ferramenta.

    Take care on this step: it's possible to delaminate the glass from the frame holding the screen and vital components together. If you're not aware, you could continue working away (as I did) delaminating the entire glass from the frame only to discover you've messed up. The entire assembly is about 1mm thick and visually looks like two layers (as shown in the last photo here).

    Brent L -

    I broke my screen here. There is a seam in between the glass and the components. Don’t stick your pick in there or it will break. Stick it below the black bezel

    ecwskier -

    As with Brent above, I managed to separate the glass from the frame. Didn't realise until I was at step 18 below. Everything felt fine and looked unbroken until it was too late. So; the glass / screen could be 2x as thick as you think.

    David Wall -

    I’m grateful for the words of caution. I really had to take my time on this step. Actually had to reheat the phone multiple times without any success. Then I tried using an alcohol wipe along the edge of the phone, squeezing the wipe to allow some of the alcohol down along the edges. That was the magic touch that finally let the adhesive loose. Patience is the word.

    wade walters -

    I was doing the heating - pulling process but at a certain point, the screen cracked. Now I can't pull anymore and my screen is destroyed even though it can still work. I don't really know how to repair this...

    matthieu tremblay -

    Even though I read the comments, I crashed the screen. I inserted the plectrum carefully and instantly slipped between the screen and its board. I might have not heated the device enough as I used the iOpener.

    I would highly appreciate a better instruction here and a closer zoom on the removed screen.

    sbb -

    I too delaminated the glass from its surrounding plastic bezel, even after reading all the comments. I highly recommend finding a video of this process. The screen/bezel unit is held together by an adhesive gasket- just like the bezel-to-frame adhesive. So it seemed I was doing the exact right thing. The plastic bezel includes retention structures for the top sensors and lens cavities, so when I got that far I realized something was wrong. If you're like- but wait what are all these structures you're referencing- then find a video. It would be great if ifixit would produce or link such a video, and/or better macro photos.

    Michael Szetela -

    Another broken screen here, just happened about ten minutes ago so I believe my memory is still fresh - when pulling on the suction cup to create a gap on the bottom edge, I believe the only gap that appeared was the one that was behind the glass. I don't believe I "created" the gap by inserting my pick in the wrong place, the gap was there when I pulled on the suction cup. So right now I'm not sure how I could have avoided this. Maybe by heating it up more?

    goblazers -

    Did the same thing as many people here. I did not insert the pick deep enough and accidentally cracked the screen by getting in between the glass and the screen itself.

    Albert Svendsen -

  9. ZEWwUd1VKFpLNHnH
    ZEWwUd1VKFpLNHnH
    vxW4gGTiscfcZjjd
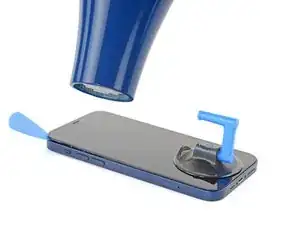
    • Com um secador de cabelos, aqueça a borda direita do iPhone (a borda com o botão liga/desliga) por 90 segundos ou até que a tela fique um pouco quente demais para ser tocada.

  10. utIUPTVOaPOp1Ifx
    utIUPTVOaPOp1Ifx
    O3sVLQxU3UtCbveS
    JyIfEVAZUhSNvJaA
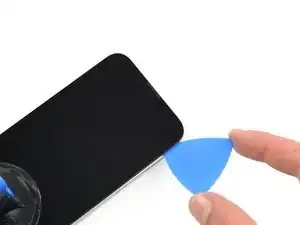
    • Passe a palheta ao redor do canto inferior direito e ao longo da borda direita do iPhone, cortando o adesivo que segura a tela.

    • Não introduza a palheta mais do que 3 mm, caso contrário você poderá danificar componentes internos.

    • Deixe a palheta no canto superior direito antes de continuar.

    This procedure cracked my screen. Do not move too fast with the pick, and make sure to heat it before hand. Not sure what else can be done to prevent a cracked screen here

    Kristo Jorgenson -

    cracked my screen to. The pleck sliped cause I was to afraid to damage something intern so it sliped out and cracked the display.

    Tariguz -

  11. 3YUMT2CHgElg5VOQ
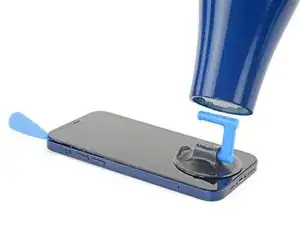
    • Com um secador de cabelos, aqueça a borda superior do iPhone por 90 segundos ou até que a tela fique um pouco quente demais para ser tocada.

  12. ZCG5NVqdocby1GPW
    ZCG5NVqdocby1GPW
    OMva3FZdafurBsCc
    FhZtShTebyNBx4BB
    • Passe a palheta de abertura ao redor do canto superior direito do iPhone para separar o adesivo superior.

    • Não introduza a palheta mais do que 3 mm, do contrário você poderá danificar os sensores superiores.

    • Deixe a palheta no canto superior esquerdo antes de continuar.

  13. xO2l2HZJc1muXP11
    xO2l2HZJc1muXP11
    C5gwyDhXaAymJMeD
    • Com um secador de cabelos, aqueça a borda esquerda do iPhone por 90 segundos ou até que a tela fique um pouco quente demais para ser tocada.

    iPhone 13Mini H.S. a cette étape .

    Macé -

  14. LeorCMl1FMcbETas
    • Há cabos sensíveis ao longo da borda esquerda do iPhone. Não introduza a palheta aqui, pois você pode danificar os cabos.

    Wo ist die "linke Seite"? (Blick auf das Display?) Was bedeuten die roten Quadrate auf dem Bild vom geöffneten Gerät? Zur Orientierung wäre es passend, die Lage der Lautstärke + bzw. - Tasten anzugeben.

    anyone nobody -

    Yes, they mean the “left side” as if you’re looking at the display (which is already removed in this photo, of course). If you enlarge the photo, you can just barely see the two volume buttons protruding out slightly from the edge (as well as the ringer-off/mute switch just above them).

    I’m not sure what the red squares are indicating either. Maybe they’re showing something relevant to another repair guide where they use the same photo…

    (Probably terrible Google translation):

    (Wahrscheinlich eine schlechte Google-Übersetzung): Ja, sie meinen die „linke Seite“, als ob man auf das Display schaut (das auf diesem Foto natürlich bereits entfernt ist). Wenn man das Foto vergrößert, kann man die beiden Lautstärketasten, die leicht aus dem Rand herausragen, gerade noch erkennen (sowie den Klingelton-Aus-/Stummschalter direkt darüber).

    Ich bin mir auch nicht sicher, was die roten Quadrate bedeuten. Vielleicht zeigen sie etwas Relevantes für eine andere Reparaturanleitung, in der dasselbe Foto verwendet wird …

    Chris -

    Immediately ripped left cable here. Have done iFixIt repairs many times. Very disappointed!!

    Seth Kaplan -

  15. yFckTkxJQV1LwVUA
    yFckTkxJQV1LwVUA
    DrfwXaAUvrJ3qpBH
    • Insira uma segunda palheta de abertura no canto inferior esquerdo do iPhone.

    • Faça movimentos de vai-e-vem com as duas palhetas simultaneamente, até que os clipes da borda esquerda se soltem.

    • Aumente gradualmente a força do movimento.

    • Se estiver tendo dificuldades para separar o adesivo, reaqueça a borda esquerda.

    In my opinion, twisting the picks is setting yourself up for disaster. Done too hard, even slowly, and the potential energy buildup in the display at the clips could send the display flying fast enough to rip the cables you’re trying to protect. Unfortunately there is no real good way that I know to open the left side. I managed with only slight difficulty to open it by sliding the puck as you would on the other edges, but being very careful to do it slowly, paying particular attention to how deep the pick is inserted and how far up from the bottom to slide before getting too close to the cable. You can slightly lift the screen enough to see where the cable is so as not to damage it. When you’ve slid the pick close enough that you don’t feel safe sliding it any more there should be enough of a leading gap that you should be able to put another pick in in front of the first on the other side of where the cable is. Once you do that the last clip is right there around mid way up from the bottom of the phone.

    Thousand Sunny -

  16. A6WHmMQGKB6oxNDa
    • Puxe a pequena saliência da ventosa para removê-la do painel frontal.

  17. GLQiEdBCG6FcV6lm
    GLQiEdBCG6FcV6lm
    3YqSYNiGN2RQrZrM
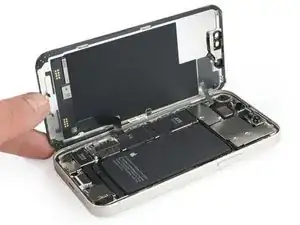
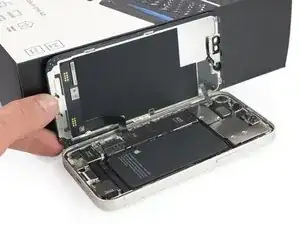
    • Gire o iPhone de modo que a borda direita fique virada para você.

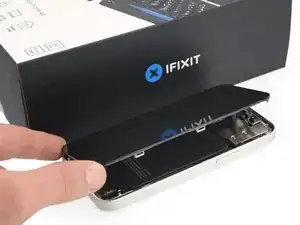
    • Abra o iPhone elevando o lado direito da tela e deixando o lado esquerdo embaixo, como se fosse virar a capa de um livro.

    • Não tente separar totalmente a tela ainda, pois vários cabos planos frágeis ainda a conectam à placa lógica do iPhone.

    • Apoie a tela em algo e deixe-a escorada enquanto executa trabalhos no telefone.

    • Durante a remontagem, retorne a tela para a posição deitada, alinhe os clipes ao longo da borda superior e pressione cuidadosamente na borda superior antes de encaixar o restante da tela. Se ela não se encaixar facilmente com um clique audível, verifique a condição dos clipes em torno da tela e certifique-se de que eles não estejam tortos.

    Frame of the screen ripped apart from the rest, I was using hot air gun with my newly acquired Anti-Clamp tm

    Jobas -

Conclusão

Para a remontagem de seu dispositivo, siga essas instruções na ordem inversa.

Adriana Zwink

Membro desde: 18/12/19

64390 Reputação

0 comentários