Introdução

Guia tipo pré-requisito exclusivo para abrir o iPhone 12 mini, permitindo acesso a componentes internos para reparo e reposição.

  1. JVwauFGp15pboki4
    JVwauFGp15pboki4
    6ZrVNyXTV2DYTb13
    • Antes de começar, descarregue a bateria do iPhone abaixo de 25%. Uma bateria de íons de lítio carregada pode pegar fogo e/ou explodir se for perfurada acidentalmente.

    • Desligue o iPhone antes de iniciar a desmontagem.

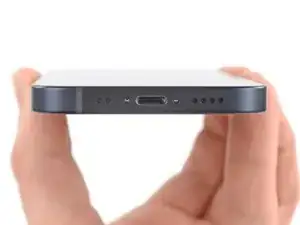
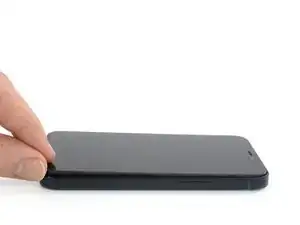
    • Remova os dois parafusos pentalobe de 6,7 mm na borda inferior do iPhone.

    is it oem apple battery, because at some photo shows(Ifixit) and another shows (apple) ... wait your answer?

    karim -

    BEWARE! This screen isn’t the same as older iPhone models’ screens. The iPhone mini 12-screen comes with a thin plastic frame around the screen on its back. Thus, make sure you don’t insert the pick in between the screen and its plastic frame, as you’ll seperate the screen and leave the plastic frame still sitting in the phone’s metal housing (this cost me 100 dollars…). Carefully heat the sides of the metal housing and do not heat directly on the glass, as doing so will potentially loosen the glue from the plastic frame stuck to the screen. My suggestion is that you watch a video of this repair as this step-by-step-guide is undercooked.

    Dan -

    This is an excellent comment. Following this step-by-step guide to the letter will break your screen; it's by far the worst iFixit guide I've seen to date.

    Dormouse -

    Yup, that’s what happened to me. I will be reading the comments next time

    pinballnc -

    Ive finished mine and Soooo absolutely dont do this yourself🙌🏽 unless your a mechanic because first of all they didnt send me all of the right tools🤗 and secondly the battery they gave me has an overly large component so it wont fit into my phone. And the absolute HASSEL i had to go through to even just get the package was insane it was a whole month of struggling just for the stuff to not even be right, in conclusion will NEVER order from here again..🤗

    Chanell -

  2. 1CjogrubnNxIGvrd
    1CjogrubnNxIGvrd
    pXY5VoUJ1hFuERqR
    Q1eZoASRSIbOibcj
    • Se o seu iPhone tiver uma tela rachada, mantenha as rachaduras sob controle e evite danos corporais durante o reparo colocando fita adesiva sobre o vidro.

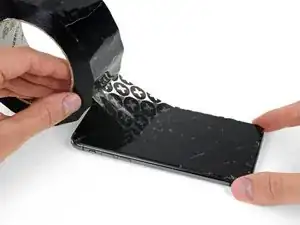
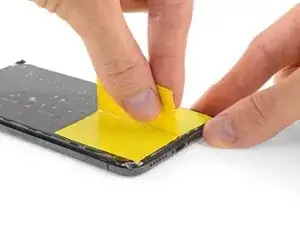
    • Coloque tiras sobrepostas de fita adesiva transparente sobre a tela do iPhone até que toda a superfície fique coberta.

    • Use óculos de segurança para proteger seus olhos de qualquer vidro que possa ser liberado durante o reparo.

    • Se não conseguir fazer com que a ventosa grude nas próximas etapas, dobre um pedaço de fita adesiva resistente (como fita de vedação para dutos) na forma de uma pega e levante a tela com ela.

    • Se tudo mais falhar, você pode colar a ventosa na tela com supercola.

  3. 5SDAKLhJ2tKixZi2
    5SDAKLhJ2tKixZi2
    ptSQJmqMjcBBW1st
    Rb3dmudH5T5hUrmc
    • As próximas três etapas demonstram o Anti-Clamp, uma ferramenta que projetamos para facilitar o procedimento de abertura. Se não estiver usando o Anti-Clamp, pule três etapas para um método alternativo.

    • Para obter instruções completas sobre como usar o Anti-Clamp, consulte este guia.

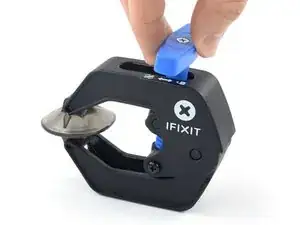
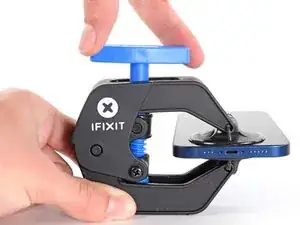
    • Puxe a pega azul para trás para destravar os braços do Anti-Clamp.

    • Deslize os braços pela borda esquerda ou direita do iPhone.

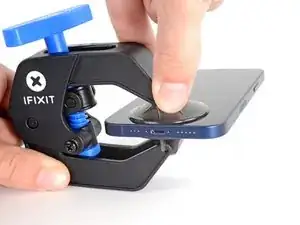
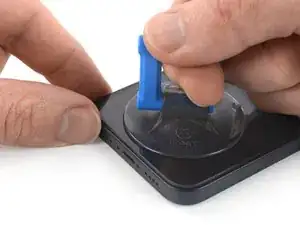
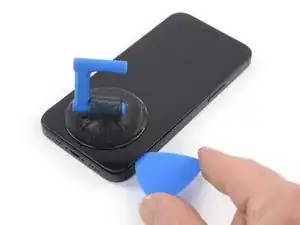
    • Posicione as ventosas próximo à borda inferior do iPhone - uma pela frente e a outra pela traseira.

    • Aperte as ventosas uma contra a outra para aplicar sucção na área desejada.

    • Se você achar que a superfície do iPhone é muito escorregadia para o Anti-Clamp se prender, você pode usar fita para deixar a superfície mais aderente.

  4. FsT3FA5QaEWxaiEg
    FsT3FA5QaEWxaiEg
    1idtRJHPlsFJBJES
    xf6uNSGb6GPTDJQd
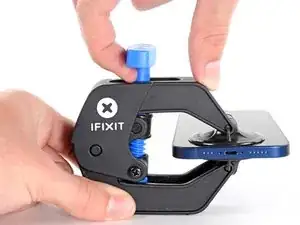
    • Puxe a pega azul para a frente para travar os braços.

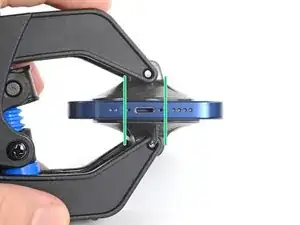
    • Gire a pega 360 graus no sentido horário ou até que as ventosas comecem a se esticar.

    • Certifique-se de que as ventosas permaneçam alinhadas uma com a outra. Se elas começarem a ficar desalinhadas, solte um pouco as ventosas e realinhe os braços.

  5. DpZCL6axAepLaTCc
    DpZCL6axAepLaTCc
    atEF2NMTghnIiSsM
    ALaITu6uDhQqZvXN
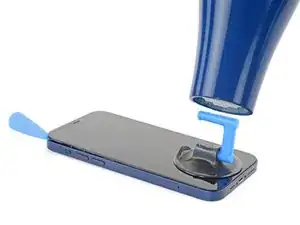
    • Apoie o seu iPhone sobre algo resistente como um livro de capa dura, de forma que ele repouse paralelo ao chão sem a ajuda das mãos; isso facilita o trabalho nos próximos passos.

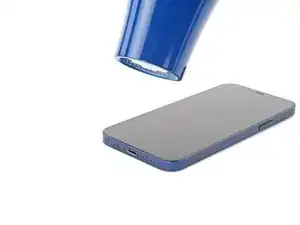
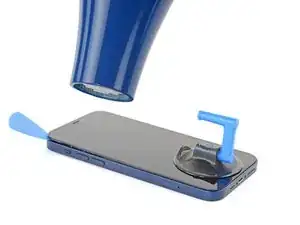
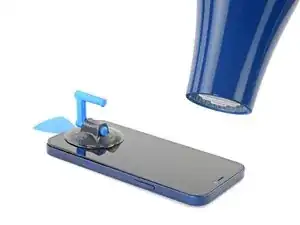
    • Com o secador de cabelo, aqueça ao longo da borda inferior do iPhone. A tela deve estar ligeiramente quente demais para se tocar.

    • Para obter instruções completas de como utilizar um secador de cabelo, consulte este guia.

    • Aguarde um minuto para que o adesivo tenha a chance de se soltar e apresentar um vão para a abertura.

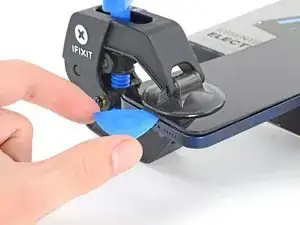
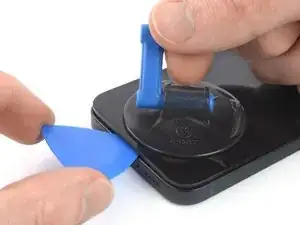
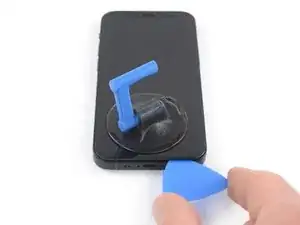
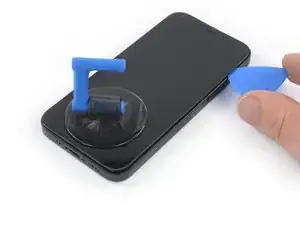
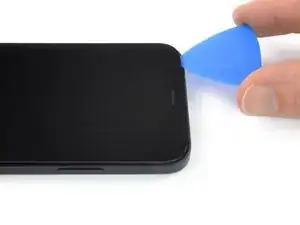
    • Insira uma palheta de abertura sob a moldura de plástico da tela quando o Anti-Clamp formar um vão grande o bastante.

    • Se o Anti-Clamp não formar espaço suficiente, aplique mais calor na área e gire a pega um quarto de volta.

    • Não gire a pega mais do que um quarto de volta de cada vez e espere um minuto entre cada volta. Deixe que o Anti-Clamp e o tempo façam o trabalho por você.

    • Pule as próximas três etapas.

  6. qIfcdOsDsjmJl2VY
    • A abertura da tela do iPhone comprometerá as vedações à prova d'água. Tenha à mão vedações de reposição antes de prosseguir com esta etapa ou evite a exposição a líquidos se você remontar o iPhone sem substituir as vedações.

    • O aquecimento da borda inferior do iPhone ajuda a amolecer o adesivo que prende a tela, facilitando a abertura.

    • Use um secador de cabelo ou uma pistola de ar quente para aquecer a borda inferior do iPhone por 90 segundos ou até que a tela esteja um pouco quente demais para ser tocada.

    • Nunca deixe o secador de cabelo num só ponto do fone por muito tempo.

    • Se você tiver dificuldade durante o procedimento de abertura, o mais provável é que o adesivo já esfriou. Aplique mais calor para amolecer mais o adesivo.

    you need to clarify that you're heating the metal frame, not the glass. I gently heated the glass front with a heat gun and proceeded to pull the display apart, destroying it. :-(

    Jim Harger -

    Don't heat up the display for too long or else you could destroy the display like I did. Now I have a phone with a giant white stripe. So don't be a fool like me. 1 to 2 minutes is enough!

    K T -

  7. MKV3OGqZaxNHEhUc
    MKV3OGqZaxNHEhUc
    hHhDVWStBbPQpiZN
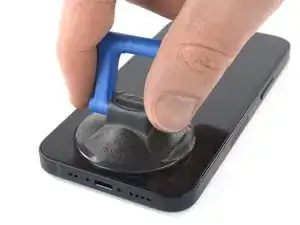
    • Se estiver usando uma ventosa de sucção única, aplique-a na borda inferior do telefone, o mais próximo possível da borda.

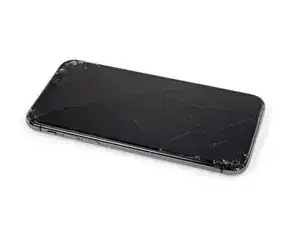
    • Se a sua tela estiver severamente rachada, cobri-la com uma camada de fita adesiva transparente poderá permitir que a ventosa adira. Como alternativa, uma fita adesiva muito resistente pode ser usada "em vez" da ventosa. Se tudo o mais falhar, você pode colar a ventosa na tela quebrada com supercola.

    I would recommend starting with a bottom corner, not the bottom middle. If the adhesive isn't softened enough, you will pull the middle out but the sides will still be stuck on, causing extreme flex to the panel and damage to the panel down the middle (white bars down the middle in a worst case). I did this to my phone.

    Drew Kosir -

  8. nQTSoddbEVTMfZHR
    nQTSoddbEVTMfZHR
    KlrDYepF3DQrMwU5
    jdiUyLciFyBYDGOm
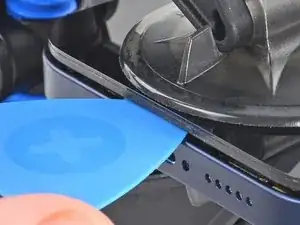
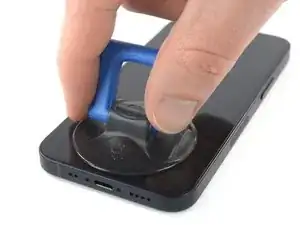
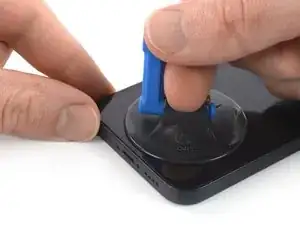
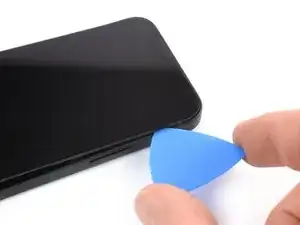
    • Puxe a ventosa para cima com pressão firme e constante para criar um pequeno vão entre a tela e a estrutura.

    • Insira uma palheta de abertura no vão sob a moldura plástica da tela.

    • O adesivo à prova d'água que segura a tela é muito forte; a formação dessa abertura inicial requer uma quantidade significativa de força. Se estiver com dificuldade para abrir um vão, aplique mais calor e balance gentilmente a tela para cima e para baixo para amolecer o adesivo até criar um vão suficientemente grande para inserir a ferramenta.

    I ended up separating my screen rather than getting under the scren casing.. BE CAREFUL TO MAKE SURE YOU ARE UNDER THE PLASTIC PART - otherwise you just ruin your screen... No mention of this precaution here and as a result, my phone is more broken than when I started

    Tyler Ludwig -

    Hi, I don’t get it. Should the plastic part stay with the display or with the phone?

    Paul -

    The plastic frame should stay with the display.

    Carsten Frauenheim -

    Be sure you see two layers: glas and plastic (Step 6, Clamp, last picture). You have to go underneath the plastic frame otherwise you are tearing your displayglas off the frame and destroy your OLED!

    Johnny RS -

    Broke the screen. Too bad. I've done maybe 5 battery replacements before. But this one is very very tight. Got a new phone. :P

    Gilles van Leeuwen -

    Same thing, I broke my screen too. I think the warning should be in all caps and show more clearly where is the right place to put the pick and where is not — without the need to click on the link.

    Judging by amount of people who reported it here (and should also account for those who didn't bother to report), I'd say that there is a problem with instructions.

    It is honestly not so hard if you know what does mistake looks like and that it is possible to separate the screen so easily from the frame. I repaired more than a dozen phones — screens and batteries — and this is the first time I made such a mistake that costs 100+euros.

    Axel Mort -

    something, broke my screen by inserting the pick in between. also wish the hair dryer has pointed to the side rather than the display. damaged my display after replacing battery, so my phone is more broken than when I started

    Ghalia Naseer -

    I had the plastic and glass break and separate, without even using the pick, it separated while I was just trying to create the small gap.

    This was despite heating it for 5 minutes, till the screen was too hot to touch. They really need to have a video tutorial showing the full process so people can see exactly what mistakes to avoid making.

    I am now not sure if it is worth putting anymore money into this phone, since a $90 fix is now $250 due to my now newly broken screen.

    Akiller47 -

    I gave up. Even after heating it for 5 minutes and the iPhone being really hot, I didn't manage to lift it for even a fraction of a mm. I pulled so hard that the suction cup almost went loose. And yes...the screws were removed. :) It is my wife's iPhone and I didn't want risking cracking the frame by pulling harder or heating it even more. I repaired a lot of iPhones in the past, but this is a step too difficult and risky for me.

    Joost van Breukelen -

    Separated my display either. The magnified picture of the plastic frame should be on this page, not hidden behind a link. And this procedure is very special in comparison with other iPhones. It's the first time I broke an iPhone when replacing the battery.

    Stefan Theurer -

  9. bv1agNYR2AZSRh4i
    bv1agNYR2AZSRh4i
    QKZUYPEDGXwEWFW2
    • Com um secador de cabelo, aqueça a borda direita do iPhone (a borda do botão de Ligar) por 90 segundos ou até que a tela fique um pouco quente demais para se tocar nela.

    The pictures show the left side. I know that the left side is the correct one to heat, but for others it might be confusing. 😊

    Donát Viosz -

    @dviosz You mean the right edge! The picture shows the left edge but the right edge is the correct one to heat. As described in the text next to it. Opening the phone from the left will damage it!

    catchMyException -

    Yeah, sorry, you are right! (tried to make something less confusing and created more confusion by accident… 😃 )

    Donát Viosz -

    THIS ONE HERE (lolz)

    weebeast -

  10. A1oBwCyETfZ3eBwg
    A1oBwCyETfZ3eBwg
    nOJW3MH4vbghr4vJ
    kLNvCWTAVyBPWgjF
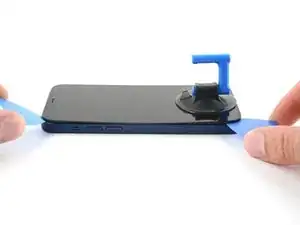
    • Deslize a palheta de abertura pelo canto inferior direito e ao longo da borda direita do iPhone, cortando o adesivo que fixa a tela.

    • Não insira a palheta mais do que 3 mm, pois isso pode danificar componentes internos.

    Be very careful your tool does NOT go in between the screen and the screen frame but rather in between the screen frame and the phone frame. If not you will damage the screen and need a new one. This has happened to MANY people. The screen is attached to the screen frame with an adhesive that can also be accidentally pried apart if not done carefully. This is probably more likely if your tool is too thin, if you dont heat enough, or dont suction and pull enough to create a big enough separation between the screen frame and the phone frame.

    Ezra Gilbert -

    Yes, this happens to me, too. It took a long time until I could remove the screen using a heat gun with a heat gun set to 120°C (after trying first with 90° and 100°). Now the right side of the display shows white stripes and the touch doesn't react. -> New display necessary...

    Bernd Löhr -

    same as @bernd lohr.

    Ghalia Naseer -

  11. jlAuMwmQ6WRMXnpn
    • Com um secador de cabelo, aqueça a borda superior do iPhone por 90 segundos ou até que a tela esteja um pouco quente demais para ser tocada.

  12. luVslv2EJDPHjdFY
    luVslv2EJDPHjdFY
    bhGJkCcPB6iwKJWR
    tMyUCZXybbOw6SsY
    • A borda superior da tela é fixada por cola e clipes.

    • Insira sua palheta por debaixo do canto superior direito do painel da tela.

    • Deslize a palheta pelo canto superior direito. Os clipes poderão oferecer alguma resistência.

    • Não insira a palheta mais do que 3 mm, pois isso pode danificar o conjunto de sensores do painel frontal.

    • Puxar gentilmente o conjunto do painel frontal em direção à borda inferior do telefone facilita um pouco essa etapa.

    • Deslize a palheta ao longo da borda superior e corte o adesivo restante que esteja segurando a tela.

    Be carefull with the sensory group. I put a little bit too much pressure to open the left clip and damaged the air seal of the display. -> Display is oled and with oxygen it's ripped :/

    And yes, i glued a coin to the pick and respected the 3 mm.

    Markus Beckert -

    Same, I riped off the display seal. The sensory group is tightly attached to the display panel. Take your time and heat it well.

    Raphaël Gallais-Pou -

  13. bn6svgDdnTZqo1Li
    bn6svgDdnTZqo1Li
    ZM3kLhdMRgUEI2rG
    • Com um secador de cabelo, aqueça a borda esquerda do iPhone por 90 segundos ou até que a tela esteja um pouco quente demais para ser tocada.

  14. 2h6ZO1ahtoicpFKF
    • Há um cabo sensível passando ao longo da borda esquerda do iPhone. Não insira sua palheta aqui, pois você pode danificar o cabo.

    There are two cables, one near the top, another lower than the middle on the left side. Further steps show where the second one is, but this picture doesn't show it...

    mesanos -

    Welches Ersatzteil benötige ich, wenn die obere Verbindung gerissen ist?

    Claudia T. -

    If the inside of your phone looks different than these photos (like me) then you may have only removed the top layer of the screen assembly. The bottom layer should pry up easily enough with tweezers.

    macro -

    I accidentally tore the cables off. What can I do?

    Alma Hernandez -

    The display flexy is in the middle of the left side, please update the picture showing the flexy connected and highlight in red, so other users don't damage it as I did :(

    Juan David Zuluaga -

    Updated -- thank you! Does this look better?

    Spencer Pennington -

  15. uNtM2YKyVD2BKNwq
    uNtM2YKyVD2BKNwq
    OyXrlHMUOR2dqtME
    • Insira uma segunda palheta de abertura no canto inferior esquerdo do iPhone.

    • Gire as duas palhetas simultaneamente até que os clipes da borda esquerda sejam liberados.

    • Aumente gradualmente a força ao girar as palhetas.

    • Se estiver tendo dificuldade para separar o adesivo, reaqueça a borda esquerda.

    Don't go from just one corner (like on the right side). I've done that (forgot this step) and broke my screen.

    Donát Viosz -

  16. GKjjmXfhwhaIRErW
    GKjjmXfhwhaIRErW
    2JqHTqMrNqKn2oIC
    Bgygc1XwrnZIXYqP
    • Gire o seu iPhone de modo que a borda direita fique à sua frente.

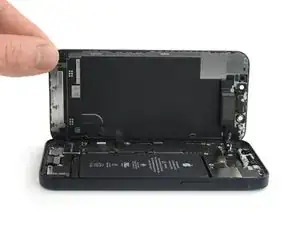
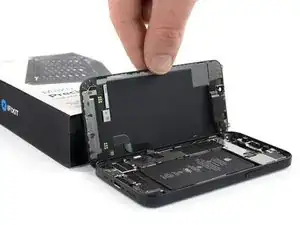
    • Abra o iPhone virando o lado direito da tela, como se estivesse abrindo a capa de um livro.

    • Não tente ainda separar totalmente a tela, pois vários cabos planos frágeis ainda a conectam à placa lógica do iPhone.

    • Encoste a tela em algo para mantê-la apoiada enquanto estiver trabalhando no telefone.

    • Durante a remontagem, coloque a tela na posição de montagem, alinhe os clipes ao longo da borda superior e pressione cuidadosamente a borda superior antes de encaixar o restante da tela. Se ela não se encaixar facilmente, verifique o estado dos clipes e certifique-se de que não estejam tortos.

Conclusão

Para montar novamente o dispositivo, siga estas instruções na ordem inversa.

Dominik Schnabelrauch

Membro desde: 23/11/16

252795 Reputação

0 comentários