Introdução
Guia pré-requisito exclusivo
-
-
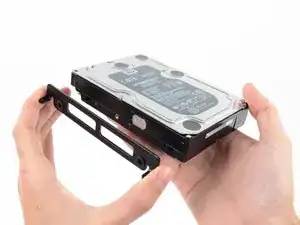
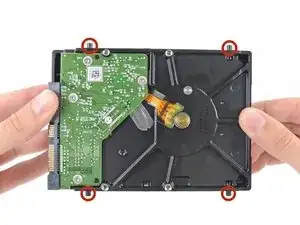
Remova os quatro pinos-parafusos T8 de 8,1 mm do disco rígido e transfira-os para o invólucro da unidade nova.
-
Conclusão
Para a remontagem de seu dispositivo, siga essas instruções na ordem inversa e use nosso guia de tiras adesivas para fixar novamente o vidro da tela.

In my case these were T9 screw posts. Late 2012 iMac. They had traces of Loctite on them.
rsnadd -
Not sure if this is the right place to add this comment, but here goes: I bought a late 2015 iMac 27 which had only a 256Gb blade SSD in it, and wanted to upgrade it with additional storage. I'll not include everything here that I did, however I will mention that I discovered that it had the brackets inside for a 3.5" HDD, but no SATA cable. With a new cable and 2.5" SSD drive in an adapter, I now found that I had no screw posts to secure the SSD adapter in the mounting brackets. I searched everywhere online, but couldn't find any to buy. I procured some (brass) logic board mounting posts with the proper thread gauge to fit the SSD adapter which I then filed to an appropriate round shape that would hold the adapter in the mounding brackets. Problem solved.
By the way: I grabbed one post in my drill to spin them while filing them round. Holding one post in the drill, I could screw a second one into it for filing, lastly placing a finished post into the drill to modify the last post. Worked like a charm!
VikingShips -