Introdução
Hi, this guide is made to Fix the Grinding noise wich occur on some of philips homerun vacuum bots
Since this is a pretty Easy repair, this guid COULD be used as a guide for similar Philips homerun Models
its a simple repair, takes about 30-40 minutes for a rookie and need the following tools
PH1 Screwdriver
PH2 Screwdriver un-insulated for access to deeper holes
Pry tool (optional)
a small knife or similar ( doenst need to be sharp)
Please Admire my Beautiful MS paint skillz :)
Ferramentas
-
-
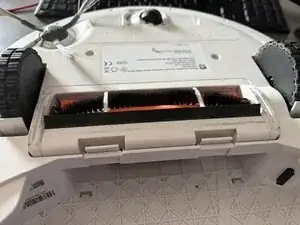
Lay the robot upside down and remove the clipped in Main-Brush cover
-
lift the brush on one side and pull it out of its housing
-
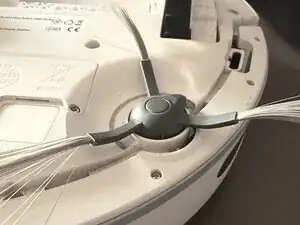
Pull out the Front Sweeping brush. its simply clicked in place.
-
Pull out the Water and dust tank. if there is still water in the tank you may need to turn the bot around to not spill water on it. the robot needs to be upside down for the next step.
-
-
-
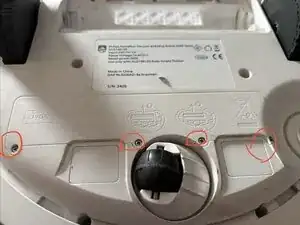
Locate the Battery housing close to the free-spinning frontwheel
-
Remove the 4x PH1 Screws securing the battery compartment
-
Use the pulltab in the middle of the battery to gently pull it out
-
Unplug the battery from the system and store it somewhere safe during the repair.
-
-
-
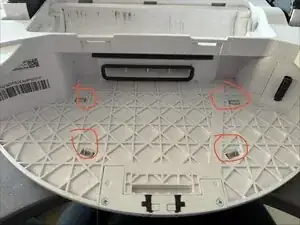
With the robot beeing upside down, locate the 4 "grabbing pins" you find them where the Dust/water tank was.
-
Use a screwdriver or any other suitable tool to push these in to gain access to the top cover. Be Care full to not break these of.
-
Turn the robot on its wheels
-
use a small Pry tool or simply your hands to lift off the top cover. there are more "grabbing pins/Claws" holding it so you need to use a little bit of force. dont just bend the top away, use the shortest possible lever point to unclip
-
The top cover is not connected to anything once removed, simply put it to the side till assembly
-
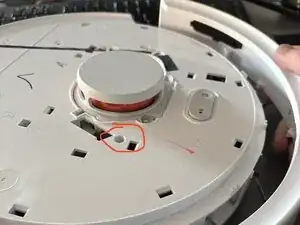
Near the Top Laser scanner (the round orange thingy) there are two PH2 Screws in a recess about 20mm deep. Dont mismatch them with the screws at the surface directly at the surface near the laser unscrew these 2 recessed screws and mark them for the reassembly.
-
-
-
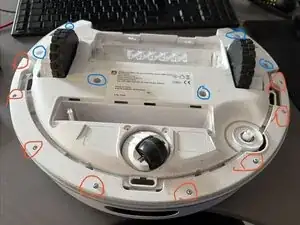
Unscrew all 8 PH1 screws on the Front bumper and unclip the C-shaped cover. you can now remove the whole bumper by pushing it downwards. this doesnt need force, it almost should fall down by its own
-
Unscrew the 6 PH2 Screws at the bottom, there are once again in a Recess about 20mm Deep make sure to remove the screw from the hole and store it somewhere safe to not loose it in further steps
-
You can now pull apart the whole housing, use the two overhangs near the dust container and gently lift the bottom up. there are a few clips holding it down so it may make a cracking sound while opening it and you need a little bit of force. if it doenst come off with a bit of force, check for screws you may forgot to unscrew
-
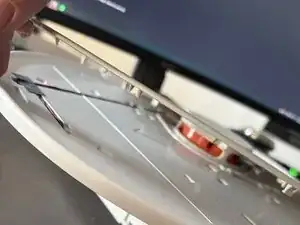
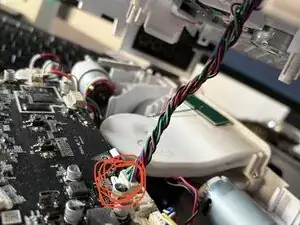
Carefully use a kitchen knive or another suitable tool to disconnect the wire harness used for the laser sensor at the top. you can use your fingers instead but dont pull on the wires directly to not harm the connector.
-
-
-
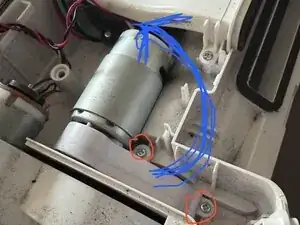
With the housing open you can now access the Motor+Gearbox driving the Main-Brush.
-
At the Gearbox there are two PH1 screws wich need to be unscrewed.
-
Rotate the Gearbox 100° Counter clockwise and lift the whole motor+gearbox out of the housing
-
Carefull pull of the Foam Seal from the Gearbox cover, but leave it sticking to the gearbox itself.
-
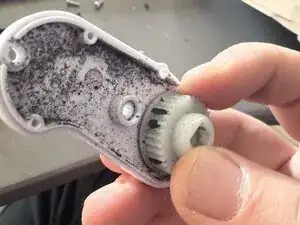
Remove the 4 PH1 screws holding the Gearbox cover.
-
-
-
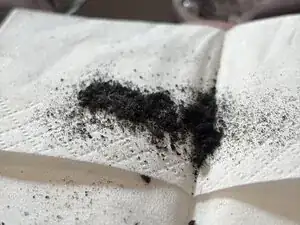
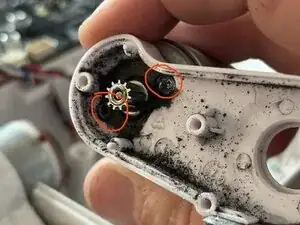
Clean the belt and the inside of the gearbox until it mostly white again. make sure to not bend the belt to much especially it its older, it may break. should be a non-issue for a newer device
-
Remove Stuck dirt from the cogs with the tip of the PH1 screwdriver or the cloth
-
-
-
Put the belt in the Gearbox again and make sure the belt is sitting on both cogs correctly. put the Main brush in the square hole on the output side of the gearbox and spin it a few times per hand to make sure its spinning freely and without grinding.
-
-
-
After rebuilding the gearbox and making sure it spinns freely, you can now re-assemble the device by doing all steps in reverse order.
-

Arbeite die Schritte in umgekehrter Reihenfolge ab, um dein Gerät wieder zusammenzubauen.