Introdução

If your Zire 71 has a damaged back cover, replacing it can help spruce up the appearance of your handheld.

  1. srE2NUeZpachZgsy
    • Flip the device so it's facing screen-side down.

    • Slide the device body upward, exposing the camera.

  2. 24KdbUTUvbkDjShs
    • Use a Torx T5 screwdriver to remove the top two screws.

    • Don't be tempted into thinking that you can take a shortcut by prying the blue body open after these screws - there are other screws underneath the metallic back section that you can't reach yet.

    Informative tutorial, and the tools were required. However, there is an error in sliding the back off the lower unit. The bracket will not detach. Its wiring is glued and soldered to the back and can’t be pulled off along with the speaker without damaging the wire. Pulling the halves apart destroyed the wiring and trashed the unit.

    Bruce Johnson -

  3. egdpGqarqwGBUuCl
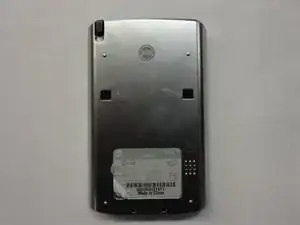
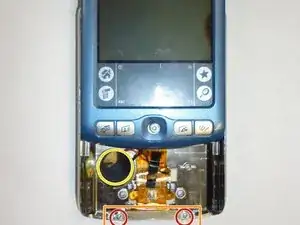
    • Remove the back sticker, or cut holes into it at the positions marked in the photo.

    • Remove the three bottom Phillips #00 screws.

  4. Oy5iy62CWBW6MfMr
    Oy5iy62CWBW6MfMr
    WGREjHIXIKWRRqct
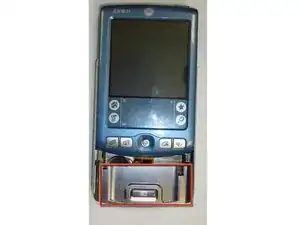
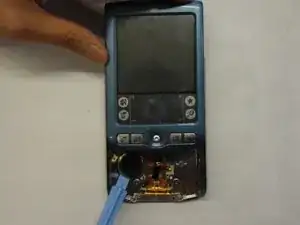
    • Flip the device over so it's facing screen-side up.

    • Slide the screen upward by a few millimeters without detaching the screen - just enough to expose the top edge of the metallic panel so that you can reach underneath.

    • Avoid pulling up too far - there's a fragile ribbon cable underneath the panel!

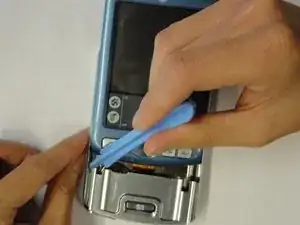
    • Use the plastic opening tool to pry off the front panel.

    • This part is tricky, especially if you want to avoid damaging the panel. Opening picks are quite handy here; try inserting them in the seam at the bottom of the device, and working them around. You may also find it helpful to squeeze the sides of the device to release the sides of the front panel.

    I found it easier to go between the front panel and the back cover with a jimmy knife instead of the relatively thick plastic opening tool. It is very tight gap. Once you get inside that gap, the panel gets off immediately.

    Lukas Gwardak -

  5. fbtPxwaLwdYhdvEw
    fbtPxwaLwdYhdvEw
    QNBBPTIpoVGcUZUi
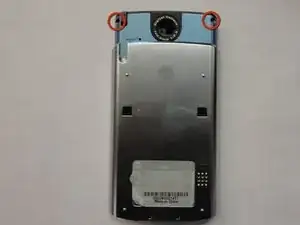
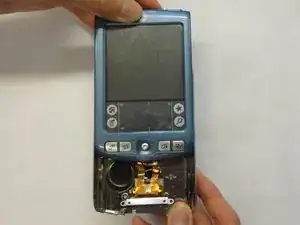
    • Remove the bottom two Phillips #00 screws.

    • Lift the bracket up from the device.

    • Remove the plastic camera button.

    • Bend the back plate very slightly to aid in popping it out from its home.

    • Use the plastic opening tool to pry off the speaker (taking care not to press on the speaker cone).

    removing this bracket also requires un-gluing the wiring harness from the back shell. This will likely destroy the speaker connection since it is soldered onto the wiring tape.

    Bruce Johnson -

    When prying off the speaker, be careful to not damage the diaphragm which is glued to the speaker grill beneath. You can remove the ribbon cable by carefully pulling up the bottom connector.

    Lukas Gwardak -

  6. gPLg1YvBVAW3SQiW
    gPLg1YvBVAW3SQiW
    ZGoJHAnkwpfFtEGD
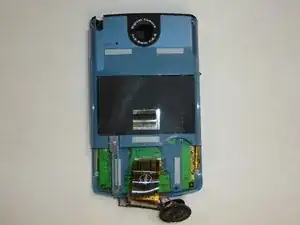
    • Gently lift the ribbon cable off of the lower panel. If necessary, work the opening tool (or picks) underneath the cable to loosen it from the small tabs on the lower panel, and any glue that may be hiding underneath.

    • Avoid separating the ribbon cable from the interior of the device, and avoid separating the supportive material from the rest of the ribbon cable itself.

    • Slide the back cover off.

Conclusão

To reassemble your device, follow these instructions in reverse order.

Jinxian Jiang

Membro desde: 29/04/11

323 Reputação

0 comentários