Introdução

  1. FxeaWKG6jY31ePXS
    FxeaWKG6jY31ePXS
    fTKLVXCfpJRIMDAQ
    • Use a JIS 00 driver to remove the four 3.4 mm‑long silver screws securing the heat sink.

  2. xU5pBrkc4GoJmZ4G
    xU5pBrkc4GoJmZ4G
    O5ol2pjO3YbIkR4e
    Ovtp3ZQd1GPIRqGk
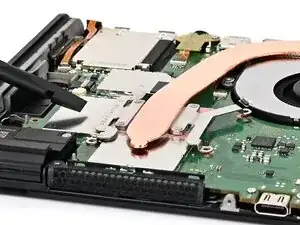
    • Insert the flat end of a spudger between the heat sink and the processor's heat spreader.

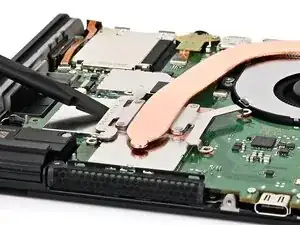
    • Twist the spudger to lift the heat sink and separate the thermal paste bonded to it.

  3. HIUTWVMHLKtOQFkH
    HIUTWVMHLKtOQFkH
    ct4WeugudXnmWIIb
    gVIUtodg6ZqggCLR
    • Lift the heat sink slowly to avoid bending its thin copper heat pipe.

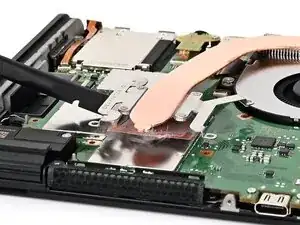
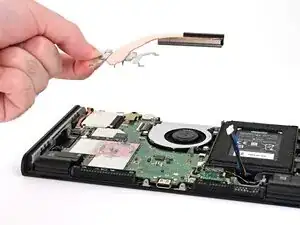
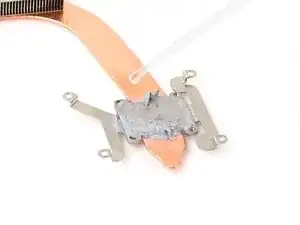
    • Slowly lift the heat sink from the front, until the aluminum fin stack at the back is detached from the adhesive beneath it.

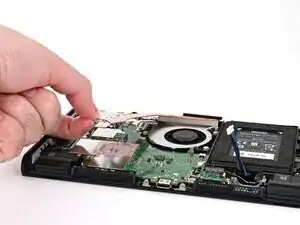
    • Remove the heat sink.

  4. isorEmoc2YST1PmT
    isorEmoc2YST1PmT
    gKRRXLEyV2yMX2AY
    EjBjOMvIIJfNBhFy
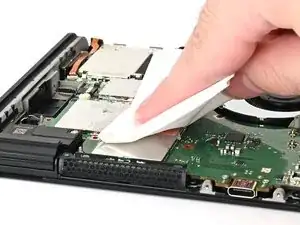
    • Use high-concentration (90% or higher) isopropyl alcohol or thermal material remover to soak the thermal paste on the processor's heat spreader for one minute.

    • Use a lint-free cloth or cotton swabs to wipe away the thermal paste.

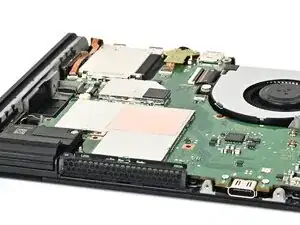
    • Repeat this process until the processor's heat spreader is clean.

  5. EHcZJMKNOpANBwE3
    EHcZJMKNOpANBwE3
    gOWNNQxSTZchwxva
    • If you're replacing your heat sink, skip this step.

    • Repeat this process to clean the thermal paste off the bottom of the heat sink.

Conclusão

To reassemble your device, follow these instructions in reverse order.

Nick Schultz

Membro desde: 24/03/24

45909 Reputação

0 comentários