Introdução

  1. y1xCkTKNBhTV1twm
    y1xCkTKNBhTV1twm
    sb1ZgxIkr6gLFGEd
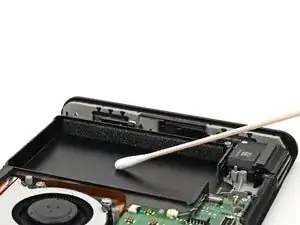
    • Apply high-concentration (90% or higher) isopropyl alcohol to a cotton swab and wipe any adhesive residue from the battery well.

    • The foam on the inside walls of the well dissolves in isopropyl alcohol. Avoid touching the foam with your cotton swab so you don't damage it.

  2. 3sgNQIRYOH4RZCEn
    3sgNQIRYOH4RZCEn
    lMDuf3XY5ANIhUe2
    • If your new battery comes with foam pre-installed, skip the next two steps.

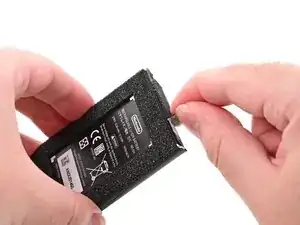
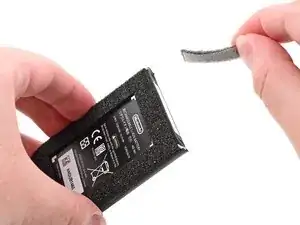
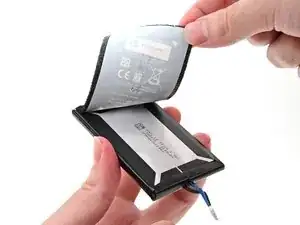
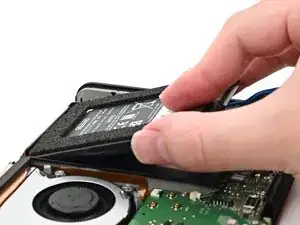
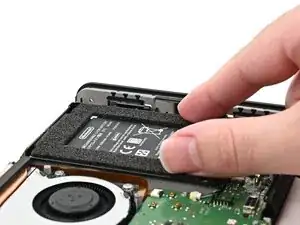
    • Use an opening pick or your fingernail to lift the foam strip off the top edge of the battery by its adhesive, not the foam itself.

  3. EkMFZRhZCdaldveS
    EkMFZRhZCdaldveS
    6BAFhJbHrDsfiWcm
    • Peel the entire sticker, including the foam, from the front of the battery.

  4. IPueYBbxhPAFavh6
    IPueYBbxhPAFavh6
    aYZEDAJIhVDXxa6h
    • Install the foam stickers in their original positions onto the new battery.

  5. w2lSwbuNguCn3uNs
    w2lSwbuNguCn3uNs
    jlpwEjY4yY6AHOYu
    nHgBegDcbot2HSog
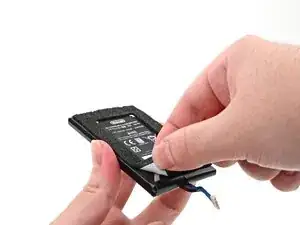
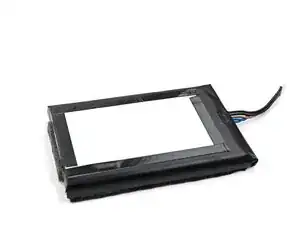
    • If your battery doesn't come with pre-installed adhesive, apply 5 mm‑wide strips of thin, double-sided tape to the flat area on the bottom of the battery. Don't install adhesive along the angled parts of the edges.

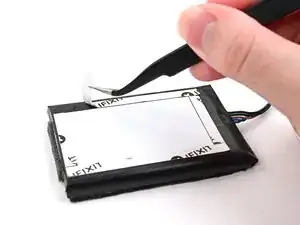
    • Remove all adhesive backings.

  6. TblhHshJGWITEXAi
    TblhHshJGWITEXAi
    FISNePAuYqZnUdLU
    esYdcrqbJJ3Z3xR1
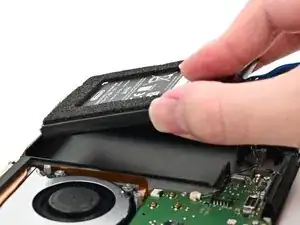
    • Align the battery with its well, ensuring the cable aligns with its cutout.

    • Carefully lower the battery into the frame.

    • Once the adhesive sticks on more than one side, don't try to lift and reposition the battery.

    • Gently press down on the battery for around 20 seconds to adhere it to the frame.

  7. 1owbTYwptksqgNKB
    1owbTYwptksqgNKB
    BqAyNgaFKL3eKC1K
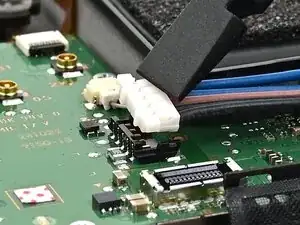
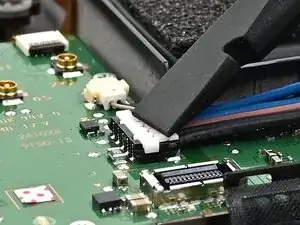
    • Use your finger or the flat end of a spudger to press the flat-topped battery connector onto its socket until it's fully seated.

Conclusão

To reassemble your device, follow these instructions in reverse order.

Nick Schultz

Membro desde: 24/03/24

45909 Reputação

0 comentários