Introdução
If your Nintendo GameCube's clock, as well as system settings, reset each time you power the console off and on, the clock battery likely needs to be replaced. The battery itself is located on the controller port PCB and is soldered to the board. The repair is relatively simple, but does require soldering/desoldering to remove the old battery and install the new one. (Note: All images are screenshots of stock photos, as I am unable to take any photos with the device I'm using, and I have no practical way to transfer images to it. Feel free to replace them if you have better ones. In fact, please do if you can!) UPDATE: I can now transfer images to this device, so I'll put in better ones as soon as I can. If anyone wants to update the images, you're still free to do so, though!
-
-
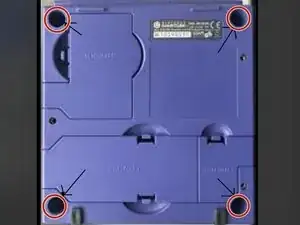
Remove the four 4.5mm gamebit screws securing the top case to the bottom of the console. The screws are located on each corner of the bottom of the console. This should allow the top case to lift away. Note that before removing the top case, you should first turn the console upright to avoid damage to sensitive components (i.e., the laser lens).
-
-
-
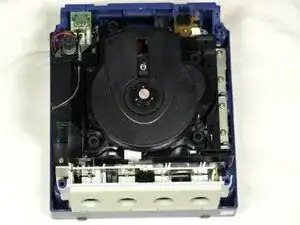
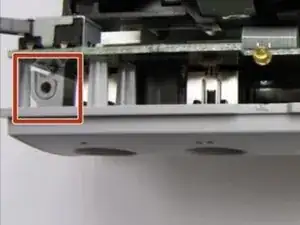
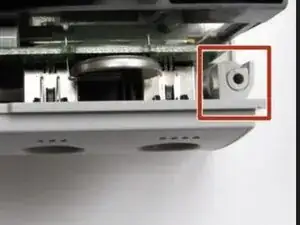
Release two plastic clips securing the gray port cover to the rest of the console. The cover and the controller port PCB should then come out together.
-
-
-
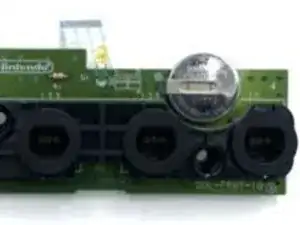
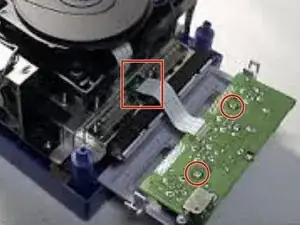
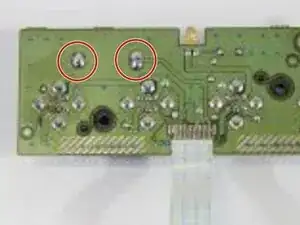
Remove the two Phillips screws securing the PCB to the gray port cover. Then remove the ribbon wire connecting the PCB to the motherboard. The battery should now be accessible.
-
-
-
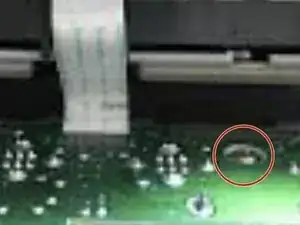
Desolder the old battery using either a desoldering braid or a desoldering pump. You can also heat one joint at a time while pushing on the tab of the battery with pliers, tweezers, or something similar, but be careful. Solder in the new battery, taking care to match the terminals correctly.
-

To reassemble your device, follow these instructions in reverse order (Just don't remove the battery again!).