Introdução

The Ninja Foodi SP101 is known for its sleek metal outer shell. Unfortunately this shell can get blazing hot when cooking and result in burns. An easy fix is to add/replace the insulation found inside of the oven.

  1. UxblIxJeMQe3ypv1
    UxblIxJeMQe3ypv1
    Zf3TFjTmJtK3lLDy
    • Use a TR10 screwdriver to remove the four 11mm screws holding the black lever bar in place.

  2. IwYS5sBJgP3SMLR1
    • Remove the black lever bar.

  3. ofy1pbhhVRNHqS6i
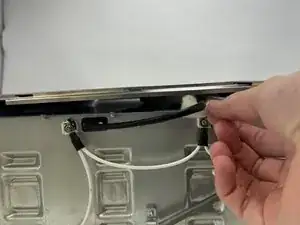
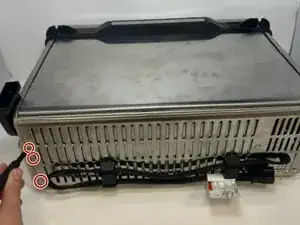
    • Use a Phillips #1 screwdriver to remove the three 8mm screws on each side of the back panel.

    I recommend using a PH2 bit here.

    Tzarial -

    Yeah I agree, ph2 bit, I came to the comments to say the same as Tzarial!

    llaadd -

    If skipping step 6 (see my comments in step 6) then you only have to remove the two screws on the outer edge of the control side (right side if looking from the front)

    Jerry H -

  4. 6wNQesiRa2kTQ3J4
    6wNQesiRa2kTQ3J4
    r3CJCX1yDa13W6dD
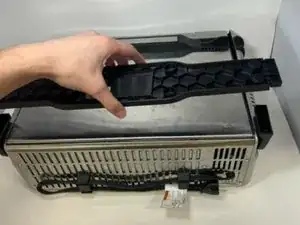
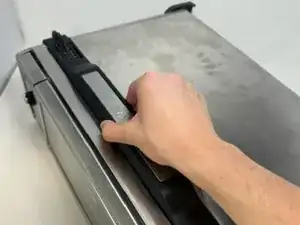
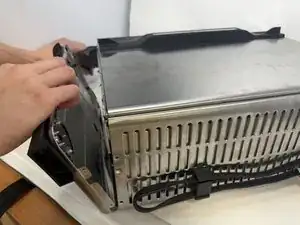
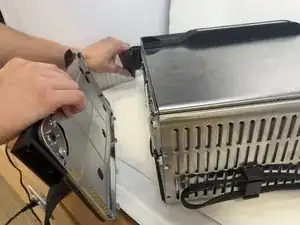
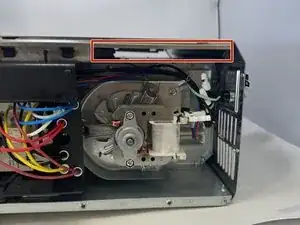
    • Flip the device upside down and open the bottom panel.

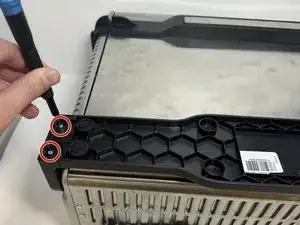
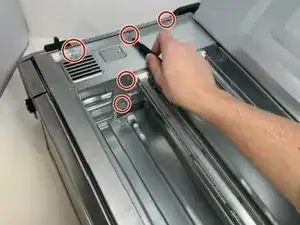
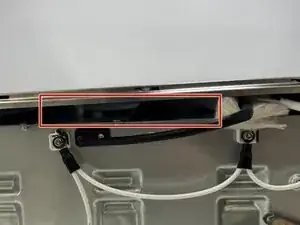
    • Remove the 3 x philips #1 screws along the top edge of the interior using a screwdriver. The Bottom 2 do not have to be removed.

    I recommend using a PH2 bit here.

    Tzarial -

    Yeah I agree, ph2 bit, I came to the comments to say the same as Tzarial!

    llaadd -

  5. frPxJEWA6pBYuSXG
    frPxJEWA6pBYuSXG
    1gEXfH3lct1wOcWL
    iUR2DB4ecmbJXiVj
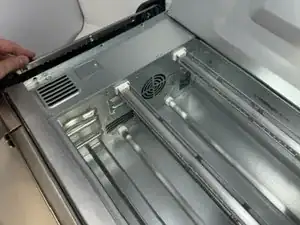
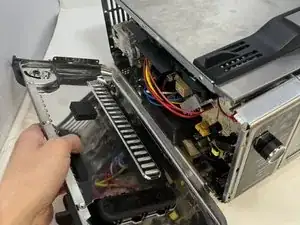
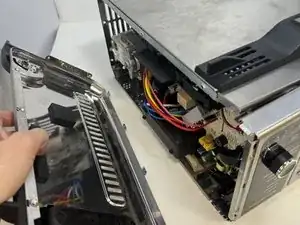
    • Remove the control side panel. To remove it, push forward towards then front control panel to release the tabs out of the main body. Fold away the side panel when the tabs have visually released from their slots in the main body.

    May have give it a good hit to knock it forward and pull and wiggle there are a bunch of little metal tabs on the she’ll keeping it in place

    Fanatic4Jesus -

  6. PwWbluNUFQLQLdOK
    PwWbluNUFQLQLdOK
    spOUbMnrwmmQPoph
    • Lift the handle and pull the side panel out.

    • Remove the handle side panel.

    There's a Torx screw inside the oven you need to remove as well...

    Richard Klingler -

    Ya there are a lot more screws on the inside that you have to unscrew. About 3 Philips closest to the openable bottom flap. Then 2 Phillips and 1 torq screw towards the front near the opening handle

    brandon wick -

    Is no operation as in dead display and controls mean a new control panel or something else please? Is it beyond economic repair?

    Sam -

    Skip step 6. If just replacing the cooling fan, the handle side panel does not have to be removed. I completed step 5 (removed the control side panel) then went straight to step 7. Loosened the electronics assembly plastic frame, to get to the retaining tab that holds the fan in. Then slide the fan out.

    Jerry H -

  7. mDLpwvJ2ddHmNhBW
    mDLpwvJ2ddHmNhBW
    FXChJsfQTMAY1MHr
    lv2O5nHWLRfRc4qt
    • Remove the thin piece of insulation from either side.

    • The insulation is made of fiber-glass material. Use gloves when handling.

Conclusão

To reassemble your device, follow these instructions in reverse order.

Griffin Peterson

Membro desde: 30/01/24

652 Reputação

0 comentários