Introdução

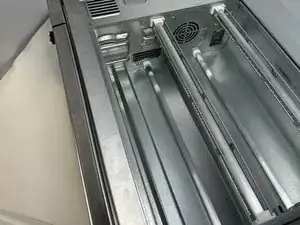
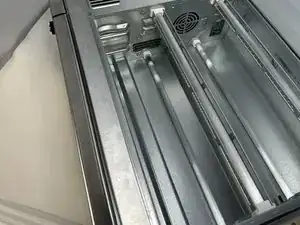
The interior heating coils in your Ninja Foodi SP101 are mainly used for the toast and broil features of the oven. The coils reach extreme temperatures, so ensure that they are completely cool and device is disconnected from power before continuing.

  1. UxblIxJeMQe3ypv1
    UxblIxJeMQe3ypv1
    Zf3TFjTmJtK3lLDy
    • Use a TR10 screwdriver to remove the four 11mm screws holding the black lever bar in place.

  2. IwYS5sBJgP3SMLR1
    • Remove the black lever bar.

  3. ofy1pbhhVRNHqS6i
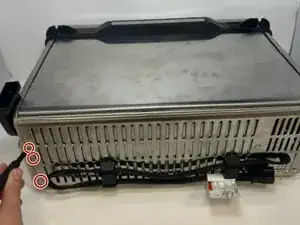
    • Use a Phillips #1 screwdriver to remove the three 8mm screws on each side of the back panel.

    I recommend using a PH2 bit here.

    Tzarial -

    Yeah I agree, ph2 bit, I came to the comments to say the same as Tzarial!

    llaadd -

    If skipping step 6 (see my comments in step 6) then you only have to remove the two screws on the outer edge of the control side (right side if looking from the front)

    Jerry H -

  4. 6wNQesiRa2kTQ3J4
    6wNQesiRa2kTQ3J4
    r3CJCX1yDa13W6dD
    • Flip the device upside down and open the bottom panel.

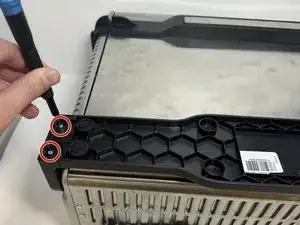
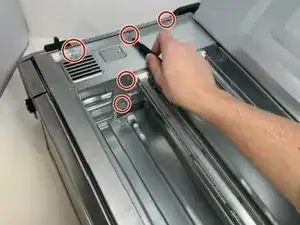
    • Remove the 3 x philips #1 screws along the top edge of the interior using a screwdriver. The Bottom 2 do not have to be removed.

    I recommend using a PH2 bit here.

    Tzarial -

    Yeah I agree, ph2 bit, I came to the comments to say the same as Tzarial!

    llaadd -

  5. frPxJEWA6pBYuSXG
    frPxJEWA6pBYuSXG
    1gEXfH3lct1wOcWL
    iUR2DB4ecmbJXiVj
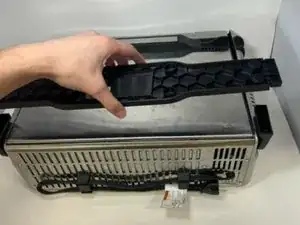
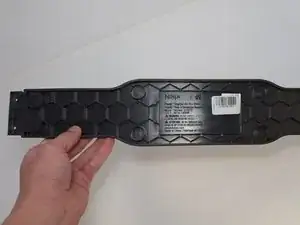
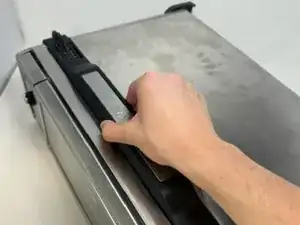
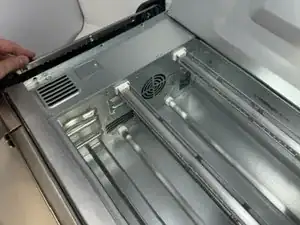
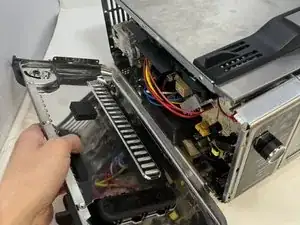
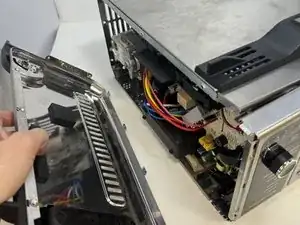
    • Remove the control side panel. To remove it, push forward towards then front control panel to release the tabs out of the main body. Fold away the side panel when the tabs have visually released from their slots in the main body.

    May have give it a good hit to knock it forward and pull and wiggle there are a bunch of little metal tabs on the she’ll keeping it in place

    Fanatic4Jesus -

  6. PwWbluNUFQLQLdOK
    PwWbluNUFQLQLdOK
    spOUbMnrwmmQPoph
    • Lift the handle and pull the side panel out.

    • Remove the handle side panel.

    There's a Torx screw inside the oven you need to remove as well...

    Richard Klingler -

    Ya there are a lot more screws on the inside that you have to unscrew. About 3 Philips closest to the openable bottom flap. Then 2 Phillips and 1 torq screw towards the front near the opening handle

    brandon wick -

    Is no operation as in dead display and controls mean a new control panel or something else please? Is it beyond economic repair?

    Sam -

    Skip step 6. If just replacing the cooling fan, the handle side panel does not have to be removed. I completed step 5 (removed the control side panel) then went straight to step 7. Loosened the electronics assembly plastic frame, to get to the retaining tab that holds the fan in. Then slide the fan out.

    Jerry H -

  7. ixFVOyRIrIbr2kUV
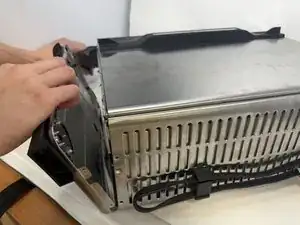
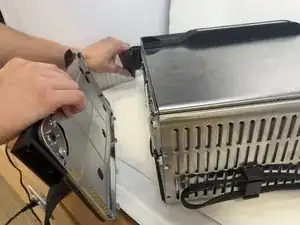
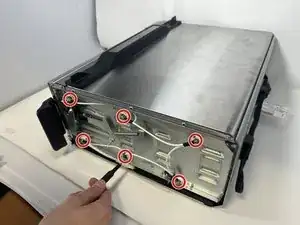
    • Using a Phillips #1 screwdriver, remove the six 8mm screws on inside of the handle-side panel.

  8. MYKvNWJWuFKiKXeT
    MYKvNWJWuFKiKXeT
    QaFxlAmFGEHqKaYN
    QhWEIeLmrAcsbSha
    • Flip the device to the control panel side.

    • Remove the single 10 mm screw with a Phillips #1 screwdriver.

    • Remove the control panel by sliding it up and out.

  9. dFN1PbFCAUVUFRpF
    dFN1PbFCAUVUFRpF
    DT6Fo4jXNY6etDbu
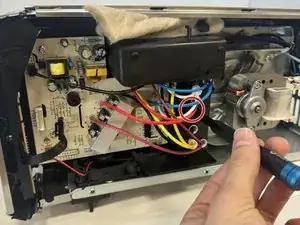
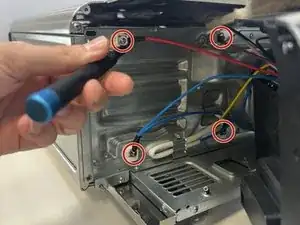
    • Remove the four 8 mm screws behind the control panel using a Phillips #1 screwdriver.

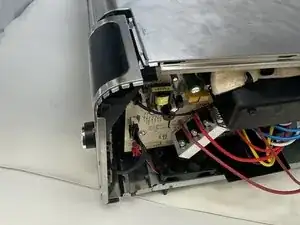
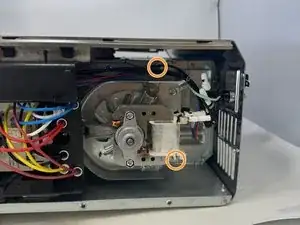
    • Remove two more screws located behind the motor.

    • You do not need to remove the motor.

  10. Qj1XZpiAyruyTmnw
    • Lift the coils up and outward for removal.

    Can you tell me the heating element part number or how can I order mine the cristal

    Broke and can not used it like this pls

    Help

    Issa Harsanyi -

    I would also like to know where to find a replacement heating element??

    Joseph Park -

    The heating element cannot be removed from my unit without considerably more disassembly including drilling out pop rivets. The inner metal shell that retains the heating elements is too rigid to move the elements sideways enough to clear the inner metal of the oven. Only after getting to the point that the instructions state "lift the coils up and outward to remove" did it become clear that there was not a picture of the coils being removed, because they cannot be removed. To answer the previous questions regarding sourcing the coils, I found a functioning unit in poor cosmetic condition and was in the process of removing the coils I needed when I discovered the difficulty in the last step. I do not think the original author likely never actually removed the coils.

    Alan Mahaffey -

    I do not think the original author actually removed the coils. The stated time of 5 minutes must also be a typo because that would require each of the 10 steps be completed in 30 seconds.

    Alan Mahaffey -

Conclusão

To reassemble your device, follow these instructions in reverse order.

Griffin Peterson

Membro desde: 30/01/24

652 Reputação

8 comentários

Where do you get the replacement element?

Rhonda Rankin -

Did you find out if you can get the element anywhere?

Tarik Browne -

Has anyone found a viable replacement element being sold?

lilfrankiejohnson -

Same question. The ones on mine say 230V 335W.

Itamar Storm -

Anybody get a reply?

Joerider -

These instructions are incomplete.. I got all the way to the last step but I can’t seem to lift the heating elements “up” and “outward”..

brandon wick -

i just took mine apart and will sell it in parts on ebay soon. have 5 elements due to one breaking while cooking. having issues on the last step as well at the moment

Jose Castro -

I've found these step-by-step illustrated instructions to be very useful in disassembling the unit to access the heating elements in step ten. Question: how does one remove them which you advise to "lift up and upward for removal"?

One solution, in my opinion, would be to remove one of the side panels by drilling out the pop rivets.

Can you advise how to test these elements and what resistance should one expect?

Charles Porter -