Introdução
Ferramentas
-
-
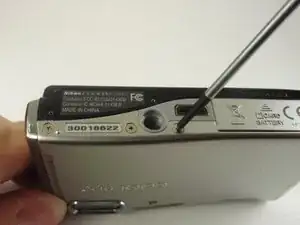
First, use a Phillips #00 screwdriver to remove all five screws that are located at the bottom of the camera.
-
-
-
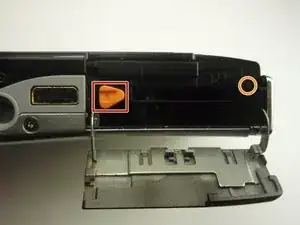
Next, slide the battery door open in the direction of the arrow to reveal a hidden screw on the opposite side of the orange lever.
-
Remove this screw using the Phillips #00 screwdriver.
-
-
-
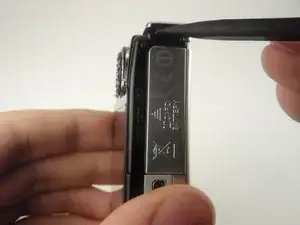
Rotate the camera to find the side panel with the lanyard attachment.
-
Detach the side panel by the lifting bottom corner slightly with the spudger.
-
-
-
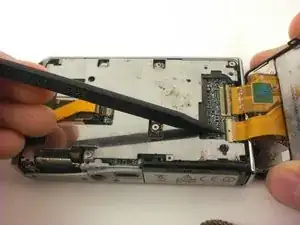
With the back cover lifted, lift the black flap that connects the ribbon to the motherboard with the spudger.
-
Carefully remove the back cover.
-
-
-
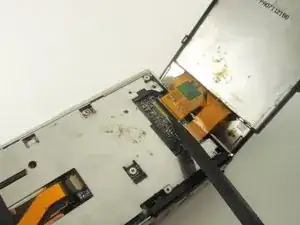
On back of LCD screen, locate the three screws underneath the ribbon.
-
Remove each screw using your screwdriver.
-
-
-
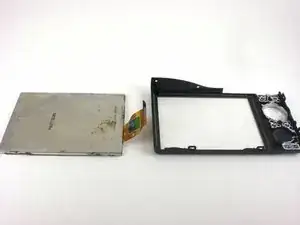
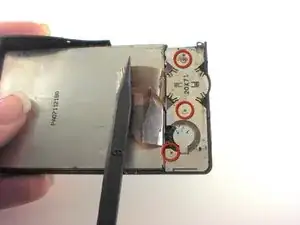
Take out the rectangular component on the side where the screws were.
-
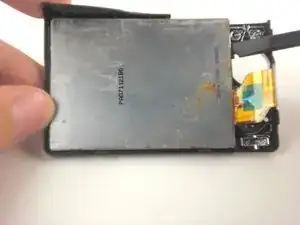
Carefully, pry apart the screen from the back casing using the spudger.
-


To reassemble your device, follow these instructions in reverse order. Take your e-waste to an R2 or e-Stewards certified recycler.