Introdução

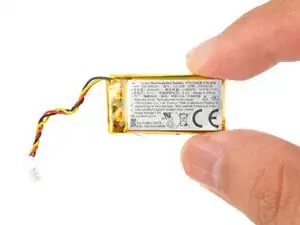
Logitech Zone 305 battery steps prereq

  1. 4FMGSoJd3JCpM56e
    4FMGSoJd3JCpM56e
    kfflWfYsJjxUnuTF
    IZVLeimhpLQL3hdd
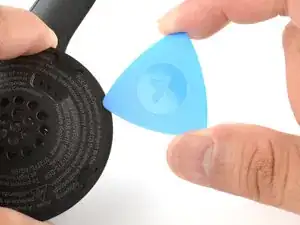
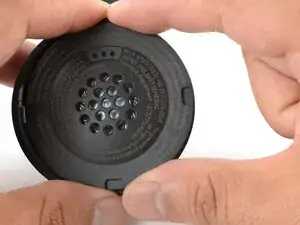
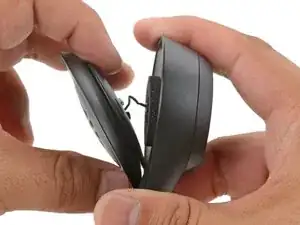
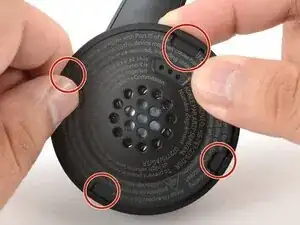
    • Insert the point of an opening pick into the seam between the speaker plate and ear cup.

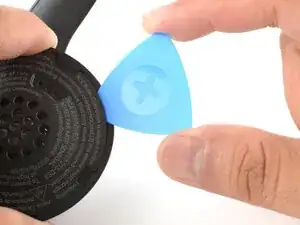
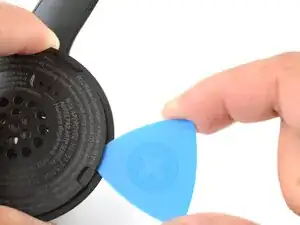
    • Slide the pick along the seam to release the four speaker plate clips.

  2. 1tZ13CgmYawuGyPH
    1tZ13CgmYawuGyPH
    aGgTHBghsLOtW1QL
    ikVDONjdQKoTWmIl
    • Don't try to fully remove the speaker plate, as a wire connects it to the ear cup.

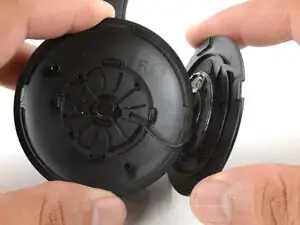
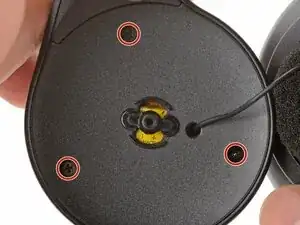
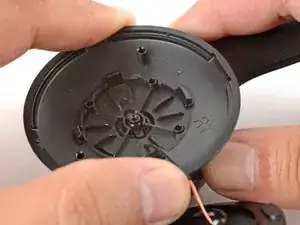
    • Use your fingers to move the speaker plate towards the right side of the ear cup so you can access the screw.

  3. BeROmuJBDIgZTAB5
    • Use a Phillips screwdriver to remove the 7.1 mm‑long pancake screw securing the speaker housing.

  4. IWR62j1bCSl1NLEE
    • This step reattaches the speaker plate temporarily to keep it from wobbling during repairs.

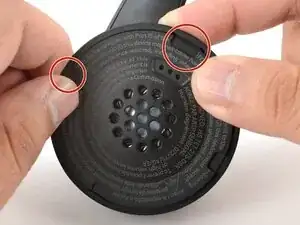
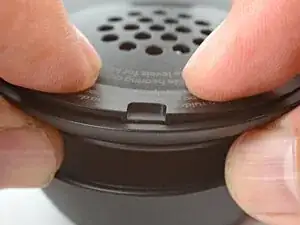
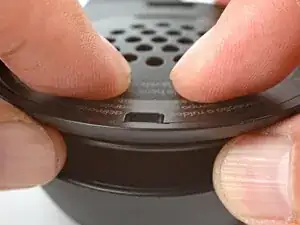
    • Align the speaker plate to the speaker housing and squeeze firmly to engage two of the four clips.

  5. UixPwZJuHQJ4JWeR
    UixPwZJuHQJ4JWeR
    TYYEOqecTMjngfRJ
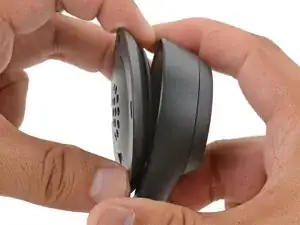
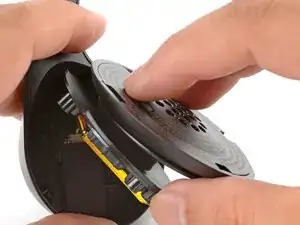
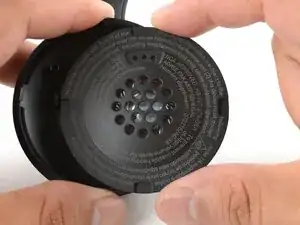
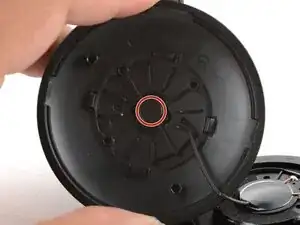
    • Use your fingers to grab the speaker housing from the back.

    • Pull firmly to pop the housing off from its ball joint.

    • Be careful not to pull too far—a speaker wire still connects the housing and the ear cup.

  6. EAlj5x3qYsImqZon
    • Use a Phillips screwdriver to remove the three 5.3 mm‑long screws securing the midplate.

  7. MxeiW3fQaAUcVM6Y
    MxeiW3fQaAUcVM6Y
    E6ZvgHiZVdDgKaQl
    6cK36oY1qrQXjKgE
    • Be careful not to strain the speaker and battery cables during this step.

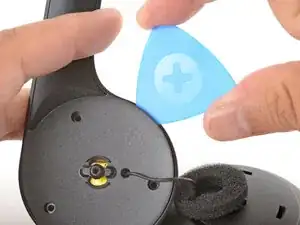
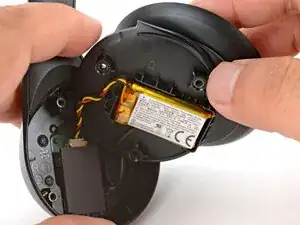
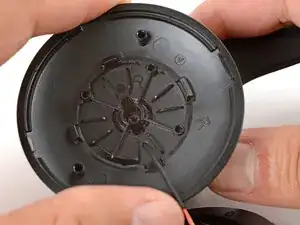
    • Insert an opening pick in the seam between the midplate and the ear cup.

    • Twist the pick to loosen the midplate.

    • Use your fingers to swing the midplate away from the ear cup.

  8. ukonDllSjhmUsKYN
    ukonDllSjhmUsKYN
    TVXfpZRsiXiYmJmK
    FN5tXZlWoEqVy2Yi
    • The battery's lightly adhered to the midplate.

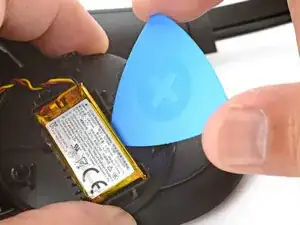
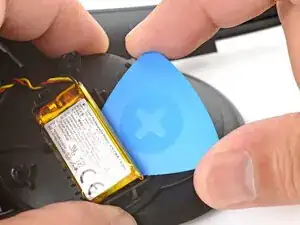
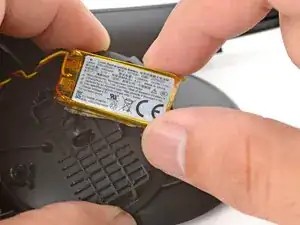
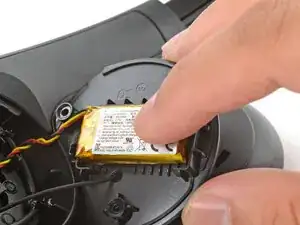
    • Slide the tip of an opening pick under the battery and pry gently to separate it from the midplate.

  9. PaxGHPYBJTYcYJCa
    PaxGHPYBJTYcYJCa
    cuw21Z3b4k32ROnZ
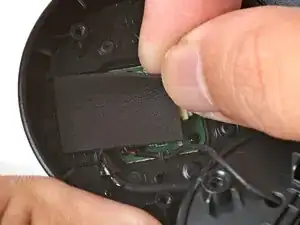
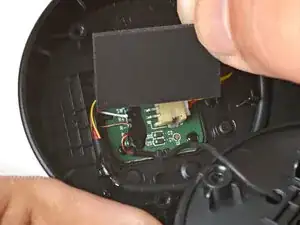
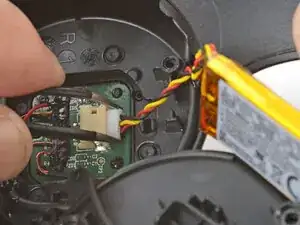
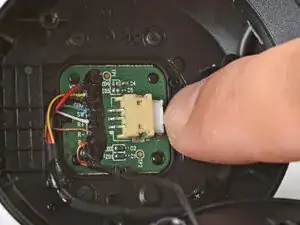
    • Use your fingers to peel and remove the foam pad covering the circuit board.

    • Store this pad in a clean location for reassembly.

  10. pr3vSK5FUBySBBTi
    pr3vSK5FUBySBBTi
    XmXIglfwbTKDsx5H
    FnIQABHX4IGiS5mT
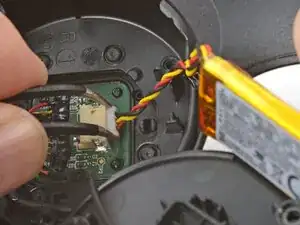
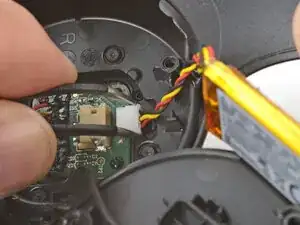
    • Use angled tweezers to grip the edges of the battery connector.

    • Gently rock the connector side-to-side and slide the battery connector out of its socket.

    • This connector can be difficult to disconnect. Squeeze the tweezers close to the tips to help grip the connector.

  11. rSpdnPC2ZxFFyDXj
    • Remove the battery.

  12. Yyoxntwb1tEbHwJj
    Yyoxntwb1tEbHwJj
    YhgxEgIaxtZyZEqe
    • The remaining instructions show how to reassemble the headset.

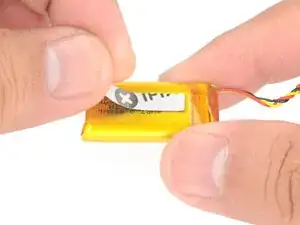
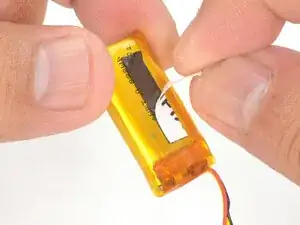
    • Cut and attach a small strip of double-sided tape onto the battery.

    • Remove the liner to expose the adhesive.

  13. X5E6DKUOIXD15GDp
    X5E6DKUOIXD15GDp
    POXHU36sks6HkiIe
    • Use your fingers to slide the battery connector fully into its circuit board socket.

  14. NoXHpGQBXcJDP1ZO
    • Place the foam pad over the circuit board and use your finger to press it in place.

  15. SY6yPrgqEDEoFOhJ
    • Align the battery in the midplate recess such that the battery cable reaches its circuit board connector.

    • Use your fingers to press the battery onto the midplate.

  16. RXJAwFMwLOlZx2KX
    RXJAwFMwLOlZx2KX
    dgRMfVwZA4i6AYlI
    • Swing the midplate back in place over the ear cup.

  17. pK5pmqbQEOeAURvO
    • Use a Phillips screwdriver to install the three 5.3 mm‑long screws to secure the midplate.

  18. ATnaY4L6VALluFxl
    • At this point, you'll need to separate the speaker plate you partially reattached earlier to reinstall the pancake screw.

    • Use your fingers to unclip the speaker plate from the housing.

  19. F5MsQ5GWEOQQD4aI
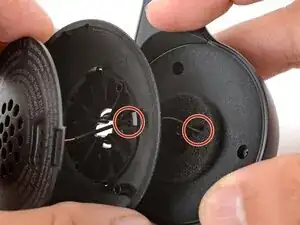
    • Align the speaker housing to the midplate such that the speaker wire threads through both parts without twisting.

  20. WEbxA6Wh3OICtPXO
    WEbxA6Wh3OICtPXO
    5qNI6LOiCyEJGX2c
    • Align the ball joint to the speaker housing's center cutout.

    • Use your fingers to firmly press the speaker housing onto the ball joint to pop it back in place.

  21. xPkNdpu3wfCDlSqy
    • Use a Phillips screwdriver to install the 7.1 mm‑long pancake screw to secure the speaker housing.

  22. 6YAyvDVLulT1QDGN
    6YAyvDVLulT1QDGN
    vqdLsRftQvCgxDEU
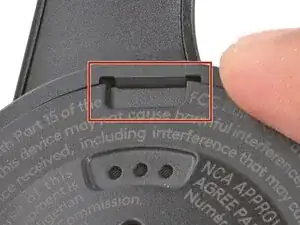
    • Use your fingers to move the speaker plate back over the speaker housing.

    • The top clip is wider than the rest of the clips. Use this to help align the speaker plate to the housing.

  23. FCGD3TypIoFImSTG
    FCGD3TypIoFImSTG
    oqcf5BOA6AcCQmNq
    m6WAhENQhpyKwRL4
    • Use your fingers to squeeze and engage the four clips to secure the speaker plate to the housing.

Conclusão

To reassemble your device, follow these instructions in reverse order.

Arthur Shi

Membro desde: 03/01/18

326111 Reputação

0 comentários