Introdução

Logitech G435 battery removal and installation steps. This prereq requires the ear pads removal/installation prereqs to be complete.

  1. RS15sNpvhcunfOPc
    RS15sNpvhcunfOPc
    WrrXYUQ3rWdGv1St
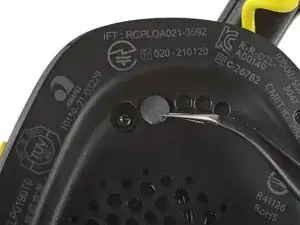
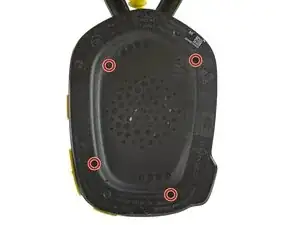
    • Use angled tweezers to peel up and remove the sticker covering the top-left speaker plate screw.

  2. 6paKIIo2sdgLkPZG
    • Use a T5 Torx driver to remove the four 6.1 mm‑long screws securing the speaker plate.

  3. VseebsLEgNRvtShy
    VseebsLEgNRvtShy
    1gNHUAZQNrtv4Cug
    YshZVxbJXbfpXScL
    • Don't try to fully remove the speaker plate—it's still attached by some wires.

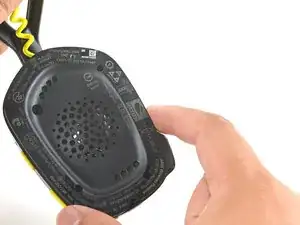
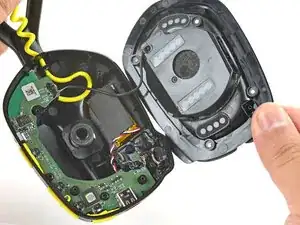
    • Use your fingers to swing the speaker plate out of the housing.

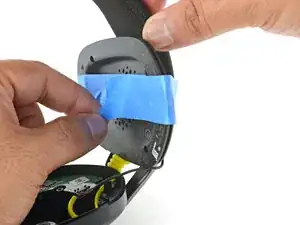
    • Use some tape to secure the speaker plate to the headband. This keeps the speaker plate out of the way while preventing the speaker wire from being strained.

  4. DrseKK6QLrNLjoNo
    • Use a Phillips screwdriver to remove the two 4.6 mm‑long screws securing the circuit board.

  5. QvjrWn1AveMGLAQN
    QvjrWn1AveMGLAQN
    mNBcGnDhDbXcWuUQ
    YITNA3LdLK4rC5vN
    • The circuit board is still connected by many wires. Be gentle as you move the board to prevent damaging any wires.

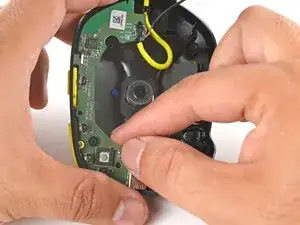
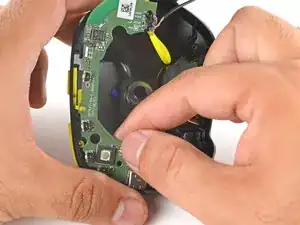
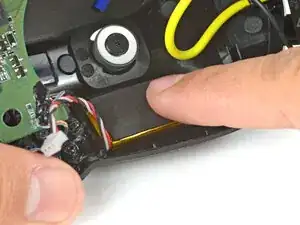
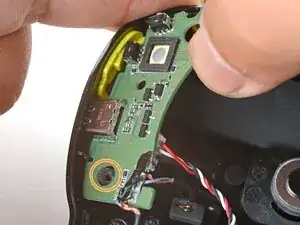
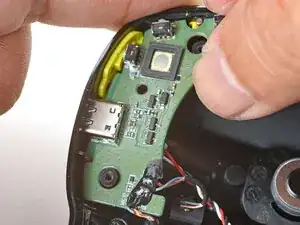
    • Use your fingers to lift the circuit board slightly out of its recess.

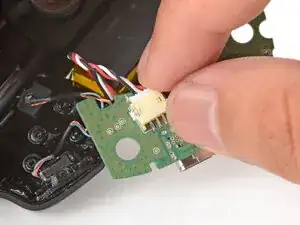
    • Flip the circuit board over so you can access the underside.

  6. quxPElyGWSUadvyb
    quxPElyGWSUadvyb
    ndOQ6252O11hrO1v
    ZiYsW5nINweCChcN
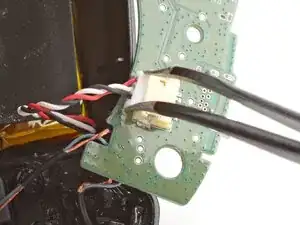
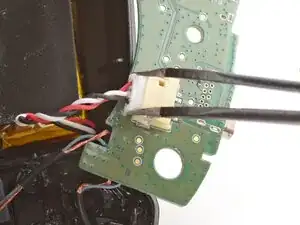
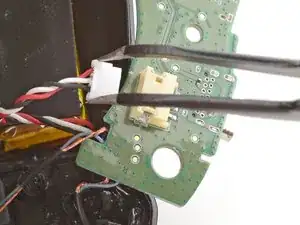
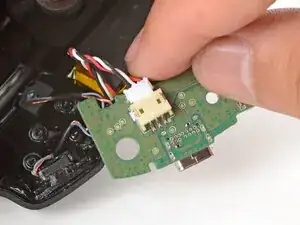
    • Use tweezers to firmly grip the edges of the battery connector.

    • Gently rock the connector side-to-side and slide it out of its socket.

  7. NDxVjgLpGKKtAyoB
    NDxVjgLpGKKtAyoB
    rAcFjbjS6CDFEI2f
    uQpbjBE2grfF1fRl
    • The battery is lightly adhered to the ear cup.

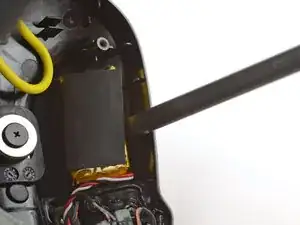
    • Insert the flat end of a spudger underneath the battery.

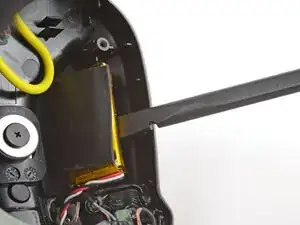
    • Pry gently to release the battery from the ear cup.
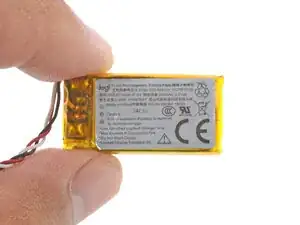
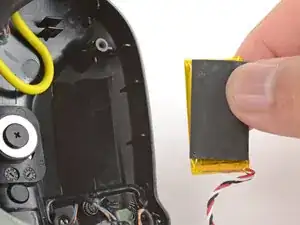
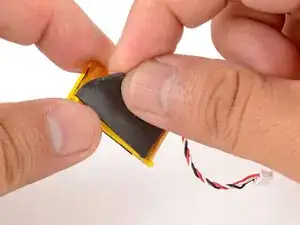
    • Remove the battery.

  8. 3TLuRaLFgPimgHt3
    3TLuRaLFgPimgHt3
    nOmjDiorX3rCAeaH
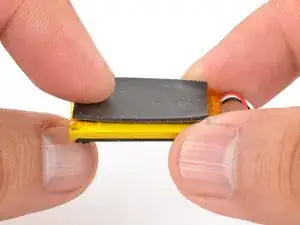
    • Use your fingers to peel the foam pad from the battery.

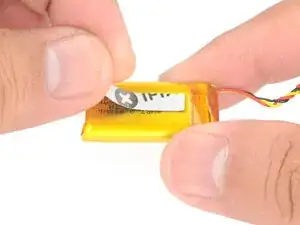
    • Transfer the pad onto the same side of the replacement battery.

  9. jlrak1sxy3AVYFkT
    jlrak1sxy3AVYFkT
    yxkFy35j6xDJ5AHM
    RuBlwmDV4gEdIPCx
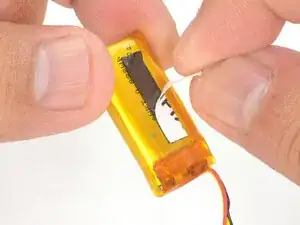
    • Cut and attach a small strip of double-sided tape onto the battery.

    • Use your finger to press the battery onto the ear cup such that the wires face towards the circuit board socket.

  10. FuSvFACUODf2nMTx
    FuSvFACUODf2nMTx
    lrUYpGstA1ltLNff
    • Use your fingers to slide the battery connector fully into its circuit board socket.

  11. MpLNMHrNcuijjAEN
    MpLNMHrNcuijjAEN
    CkLCfFo3HyQMRpPP
    • Use your fingers to gently flip the circuit board back over its recess.

  12. d6HTjdVTCwoKI4WK
    d6HTjdVTCwoKI4WK
    tnS3KAoSUPYmubHM
    DwQwdDn6H65pP6IA
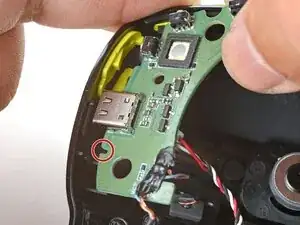
    • Align the circuit board notch on the right side of the USB-C port to the ridge on the ear cup.

    • Insert the circuit board at a downward angle and guide the USB-C port into its cutout.

    • Press the bottom edge of the board against the ear cup and tilt the board down.

    • This is a tight fit, as the board has to clear the screw post next to the port to be properly seated.

  13. dvTNQwBx1yxlZRWg
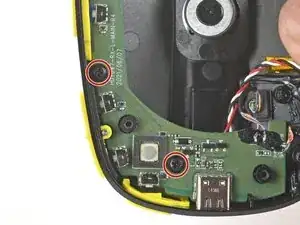
    • Use a Phillips screwdriver to install the two 4.6 mm‑long screws to secure the circuit board.

  14. vQ4w44QcNCKD4rQQ
    vQ4w44QcNCKD4rQQ
    jVadXOF1R1fxmEd1
    • Use your fingers to swing the speaker plate back into place.

  15. EGZTJt2C1UuJM1Uo
    • Use a T5 Torx driver to install the four 6.1 mm‑long screws to secure the speaker plate.

Conclusão

To reassemble your device, follow these instructions in reverse order.

Arthur Shi

Membro desde: 03/01/18

326111 Reputação

0 comentários