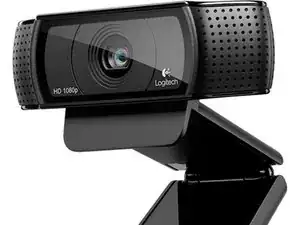
Introdução
Ferramentas
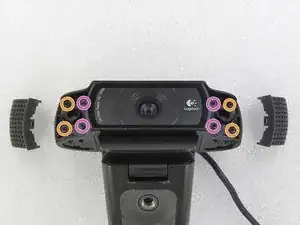
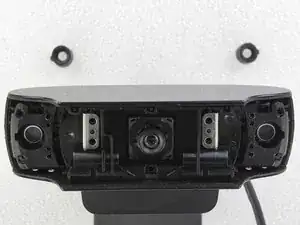
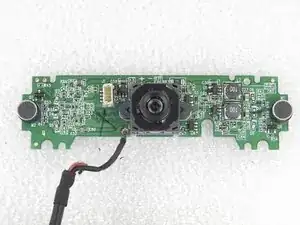
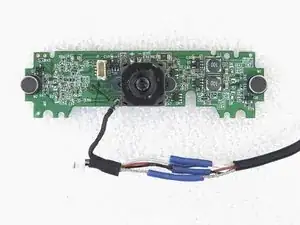
Peças
-
-
Remova os quatro parafusos Philips.
-
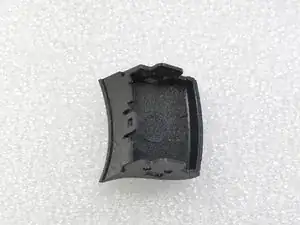
Pressione nos buracos, para destravar as tampas laterais.
-
-
-
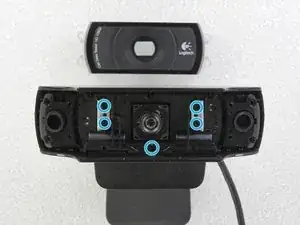
Remova a tampa cristalina da lente.
-
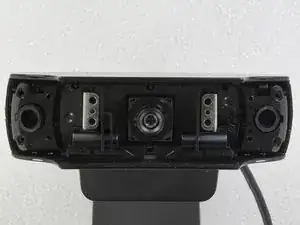
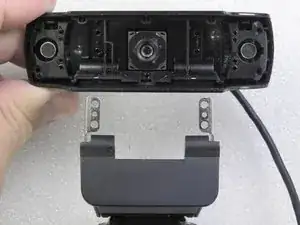
Remova os cinco parafusos Philips do suporte de metal.
-
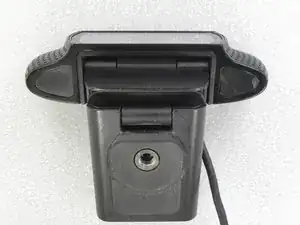
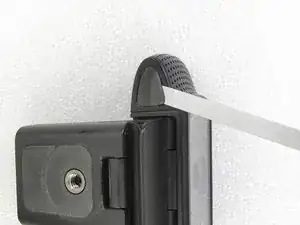
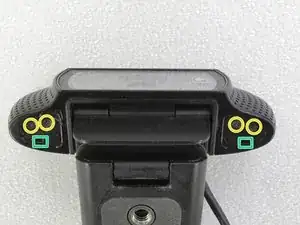
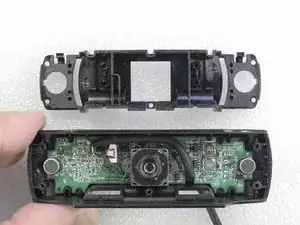
Remova as borrachas dos dois microfones (uma de cada lado).
-
-
-
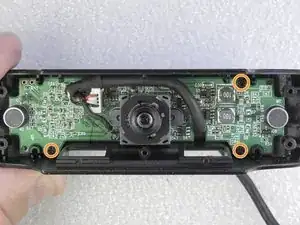
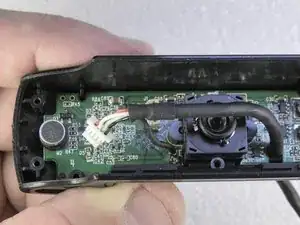
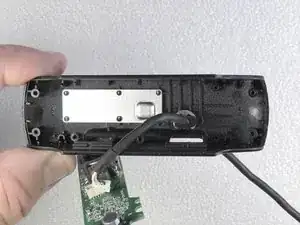
Cuidadosamente remova a base do suporte de plástico. Solte os três parafusos que prendem o circuito eletrônico.
-
-
-
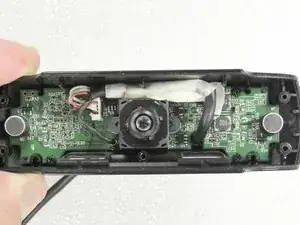
O problema da webcam era o cabo partido, na parte traseira da câmera. Cortei a parte com defeito e refiz as ligações com solda e isolei com tubos (espaguetes) termorretráteis.
-
-
-
O cabo recuperado foi montado na câmera. Revesti-o com uma fita crepe. Câmera testada: OK !
-
Remonte a câmera seguindo o procedimento na ordem inversa.
-

Para remontagem de seu dispositivo, siga estas instruções na ordem inversa.

31 comentários
Excellent! Helped me figure out how to get the base off to mount it to an ikea worklamp as a hacky boom.
Can you post a guide or technique of the process?
Or share some photos? (On meta.ifixit.com)
Cory,
I did not understand your question.
This repair guide contains several photos.
thanks for an excellent guide . I am now more positive that it is something I can perform now. Many thanks
im having trouble releasing the 4 screws on step 3!!! the screw driver keeps slipping and i’ve tried a few and another webcam…
Dojo, Use the correct screw driver. So easy to unscrew.
If you have damaged the screw head, you can use pliers. You will need to replace the damaged screws.
They’re quite tight screws on the ones I’ve worked on . Super, super soft metal too, very easy to strip out.
All of the screws used in this camera for the two side covers and the main cover glass (steps 1 through 3) can be loosened with a Phillips #0 screw driver. I don’t know about the other internal screws as I haven’t gone that far in the process. Mine were not super tight so they came out quite easily.
Don -
If you remove the rubber stickers and don’t see any screws underneath, it’s because there are actually two layers of stickers. The top sticker is the rubber that you can see, and underneath it is a plastic sticker. Sometimes they come away together, sometimes you will need to pry away the plastic sticker after first removing the rubber.
drspod -
Existem dois adesivos em ambos os lados.
Jose Gustavo Abreu Murta -
You can heat the stickers with a lighter , so they come off very easy .
kar bouter -
There are no screws there. It's just a flat surface underneath.
Chris -