
Introdução
If your computer struggles to hold a charge, powers off unexpectedly, or only works when plugged in, the internal battery may need replacement. Batteries naturally degrade over time due to regular use, heat, and charge cycles. Replacing the battery can significantly improve the device’s reliability and portability.
- Caution: Always power off the computer and disconnect it from any power source before beginning this repair. Failing to do so can result in electric shock or short-circuit damage.
- Note: This guide involves opening the device and disconnecting internal components. Work on a clean, static-free surface and use a proper toolkit to avoid damaging delicate parts.
- Reminder: As you remove screws or disconnect cables, take note of their original positions. This will make reassembly smoother and help avoid errors later.
By following this step-by-step guide, you’ll be able to replace the battery safely and bring your computer back to reliable mobile performance.
-
-
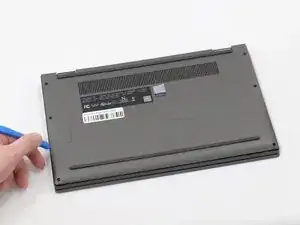
Insert a plastic spudger or opening pick into the seam between the bottom panel and the chassis.
-
Gently slide the tool along the edges to release the internal clips and lift the panel off.
-
-
-
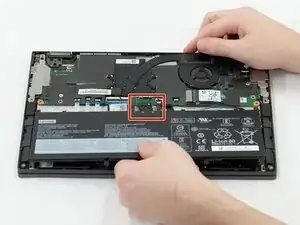
Use the flat end of a spudger to lift and unclip the outer edges of the connector. You may need to use your fingers to pull the connector completely out of its socket.
-
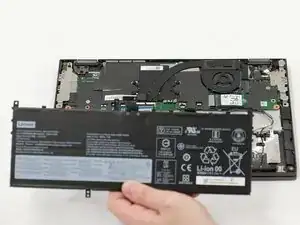
Lift the battery out of the laptop.
-

To reassemble your device, follow these instructions in reverse order. For optimal performance, calibrate your newly installed battery after completing this guide.
Take your e-waste to an R2 or e-Stewards certified recycler.