Introdução

This guide will show you how to properly replace your faulty motherboard in your Lenovo V15 laptop.

The motherboard, which is the central component that makes your laptop work and connect all together, is incredibly important to have in optimal working condition. Some signs that may show the need to replace your motherboard in your device are frequent crashing and freezing, the device won’t turn on, a burning smell, and the Blue Screen of Death appearing often are some of the many ways your device signals a replacement.

Before you begin the process of this replacement, you need to power off the device and be sure it is not plugged into anything once you start.

  1. poD1Eoiceg4PPMtG
    poD1Eoiceg4PPMtG
    GlUsNTYODosmId3n
    • Power off your laptop and disconnect the charger and peripheries before beginning.

    • Flip the laptop over so that the lower case is facing up.

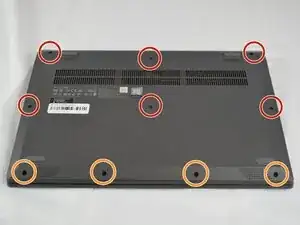
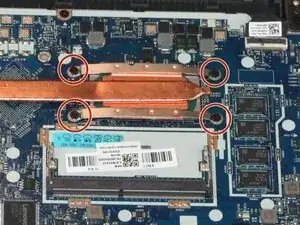
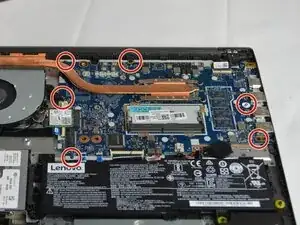
    • Remove the following Phillips #1 screws:

    • Six 7 mm-long

    • Four 4 mm-long

  2. qOIqUFnSkyqeOe6I
    qOIqUFnSkyqeOe6I
    WDvCPs5VS5RcBLeA
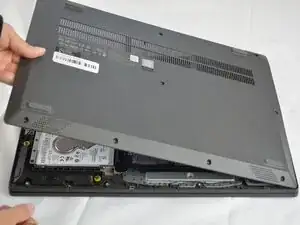
    • Insert an opening pick into the seam between the lower case and chassis.

    • Slide the opening pick around the entire perimeter until all of the retaining clips are fully released.

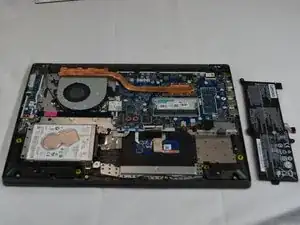
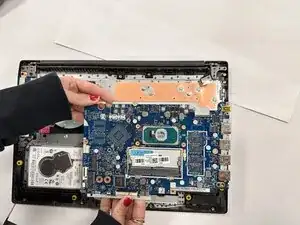
    • Lift and remove the lower case.

  3. tYPgfpFnQIKleANf
    • Use your fingernails to "walk" the battery connector out of its socket.

  4. 16uTfMOKpcqOsfXV
    16uTfMOKpcqOsfXV
    RNXLQPybZZJMm6IG
    MiOFE3wBDym1IAiA
    • Remove the three 6 mm-long Phillips screws securing the battery.

  5. wtqyIbOqlKHHNAGs
    wtqyIbOqlKHHNAGs
    eNWS2eGvQTRoSH11
    • Lift the battery up and out of the chassis.

  6. HjOuVsNAQaE3GtLi
    HjOuVsNAQaE3GtLi
    piVefQW5djqZM1T5
    2uFmKOc2OnNPNUHK
    • Remove the four 2.5 mm-long Phillips screws securing the heat sink.

    • Remove the heat sink.

    • Reapply thermal paste before installing a new heat sink.

  7. tLCLN5au1Mi21wJL
    tLCLN5au1Mi21wJL
    gcv3Pc64VNXCd2Gg
    • Remove all six 2.5 mm-long screws securing the motherboard.

    • One of the screws is under a white sticker.

  8. fBsCRJAYqdgOpuZn
    • Use your fingernails to "walk" the fan connector out of its motherboard socket.

    • Be gentle and careful when removing.

  9. BFiuITBfBEsrPPYL
    BFiuITBfBEsrPPYL
    1ZUcXfoNXvt6POJS
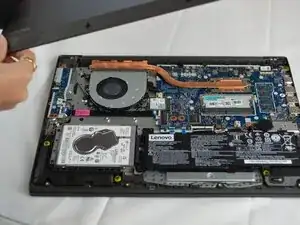
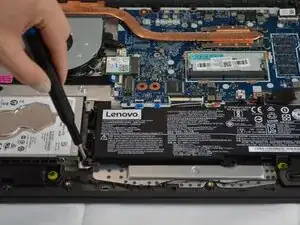
    • Flip up the locking flap securing the keyboard ribbon cable.

    • Disconnect the keyboard ribbon cable.

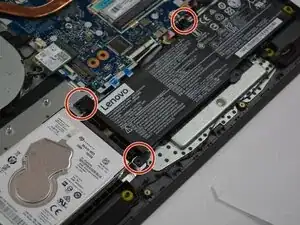
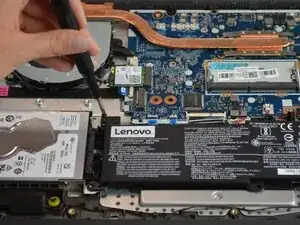
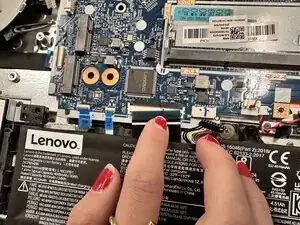
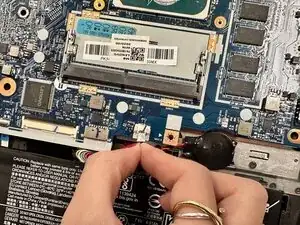
    • Disconnect the CMOS battery.

  10. mBPdgDT3C6geu6dI
    mBPdgDT3C6geu6dI
    ZBkHDiGHFkGGGSyH
    • Flip up the locking flaps on the three ribbon cables and disconnect them.

  11. QhOn5UhHfAsZIVut
    QhOn5UhHfAsZIVut
    pcDOkYkhINSQ2Hto
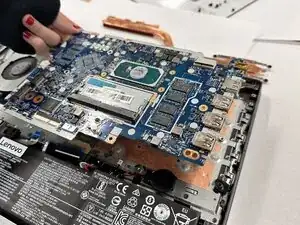
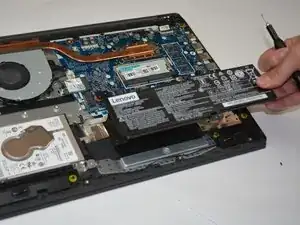
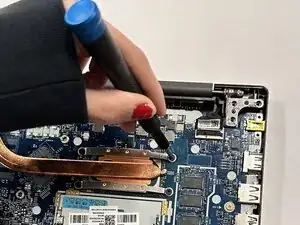
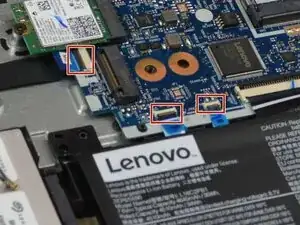
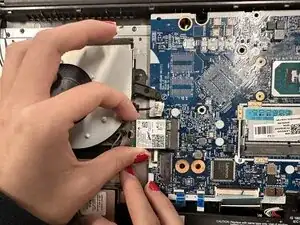
    • Use the tip of a spudger to pry up and disconnect the Wi-Fi card antenna cables.

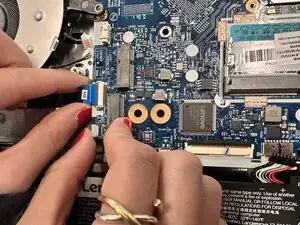
    • Pull the Wi-Fi card directly out of its socket.

  12. NHb4s2J36gMYWZMw
    NHb4s2J36gMYWZMw
    QkPvQRuBgCBjYfSP
    • Ensure all motherboard connections are disconnected.

    • Remove the motherboard.

Conclusão

To reassemble your device, follow the above steps in reverse order.
Take your e-waste to an R2 or e-Stewards certified recycler.
Repair didn’t go as planned? Try some basic troubleshooting or ask our Answers community for help.

Sara Gonzales

Membro desde: 30/09/25

538 Reputação

0 comentários