Introdução
Having a sticky keyboard, or even missing keys and come to the conclusion of replacement? This guide will show you step by step on how to replace your Lenovo X1 ThinkPad Yoga (3rd Gen) keyboard. As with working on any device, before starting anything ensure that the laptop is fully powered off to prevent any safety hazards. To replace a keyboard, it does take a lot of tearing down of different components, so be sure before beginning to look at the prerequisite guides. This guide will begin with both the speaker and battery already apart, showing the steps to remove the keyboard from the laptop.
-
-
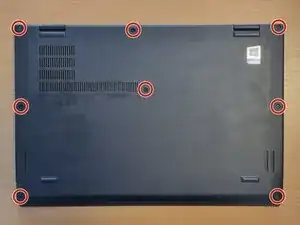
Use a Phillips screwdriver to loosen the eight captive screws securing the lower case.
-
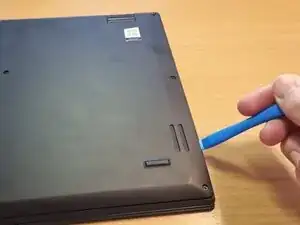
Insert an opening tool into the seam between the lower case and chassis.
-
Pry around the perimeter until the lower case fully releases.
-
Remove the lower case.
-
-
-
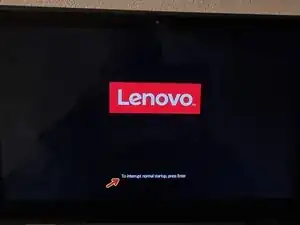
Reboot your laptop.
-
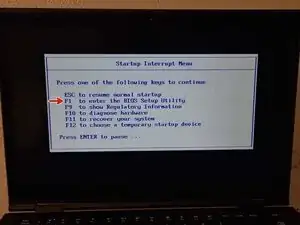
On the Lenovo boot-screen, first press the Enter key and then press F1 in the Startup Interrupt Menu that appears afterwards to enter the BIOS.
-
-
-
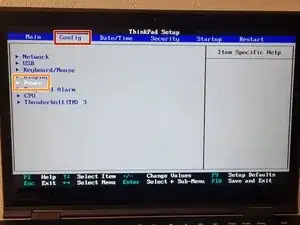
Use the left/right arrow keys to navigate to the Config section.
-
Use the up/down arrow keys to navigate to the Power option and press Enter .
-
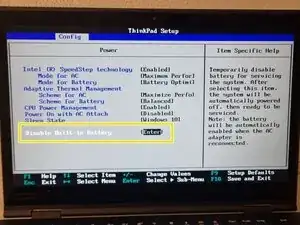
Use the up/down arrow keys to navigate to Disable Built-in Battery and press Enter.
-
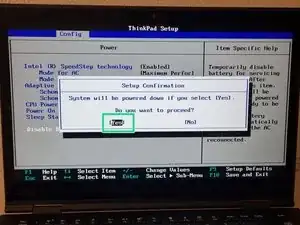
Confirm disabling with Enter.
-
-
-
Loosen the eight Phillips #0 screws on the underside of the case.
-
Carefully pry the case cover off the laptop.
-
-
-
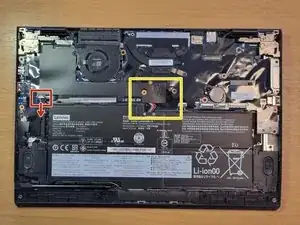
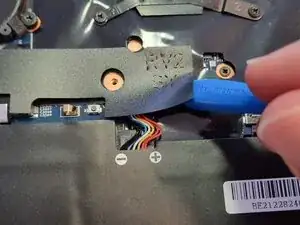
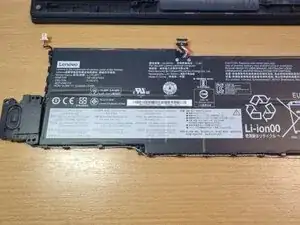
Pull the white plug of the speaker cable (towards the battery) out of the socket.
-
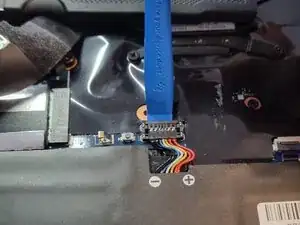
Carefully peel the black protective film covering the battery connector away from the film underneath.
-
Disconnect the black battery connector from the port; the easiest way to do this is with an opening tool
-
-
-
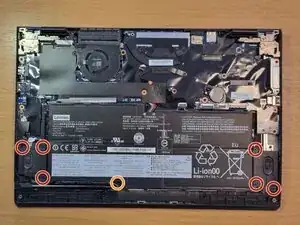
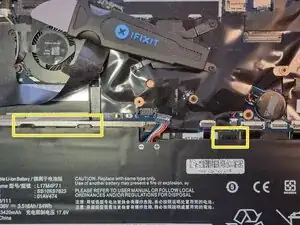
Remove the six Phillips #0 screws located on the two speakers to the left and right of the battery.
-
Remove the seventh Phillips #0 screw located at the bottom of the battery.
-
Now lift the battery at the bottom edge and remove it (along with the speakers), and remove the speakers.
-
-
-
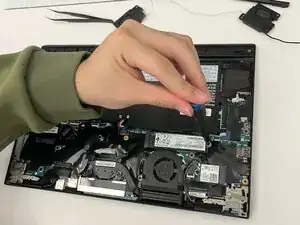
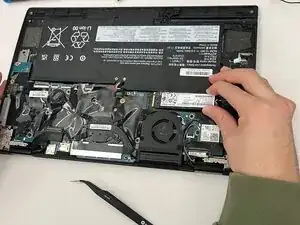
Use a phillips #00 screwdriver to remove the one screw holding the SSD card in place.
-
Gently pull the SSD card directly out of its socket.
-
-
-
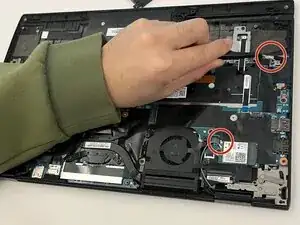
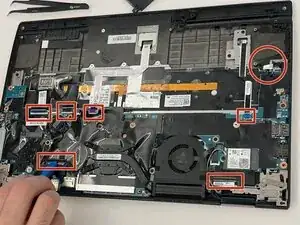
Using tweezers, gently unplug the 3 wires, 1 towards the top and the 2 next to the fan.
-
Gently lift the six locking flaps securing the ribbon cables, then disconnect the cables.
-
-
-
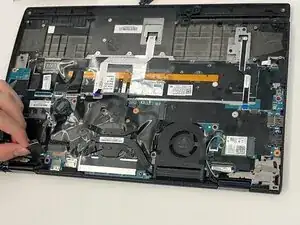
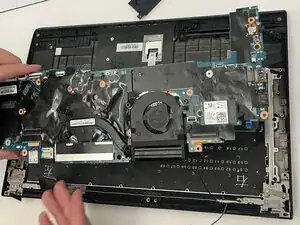
Remove the twelve 6 mm-long screws pictured with a Phillips #0 screwdriver.
-
Gently lift up and set aside motherboard.
-
-
-
Using a Phillips #0 screwdriver, remove the three 2.8 mm-long screws on the outer bracket, repeat for both sides. Lift and set aside.
-
Using the same screwdriver, remove the two screws on the bottom that hold the black brackets. Lift brackets from both on both sides and set aside.
-
-
-
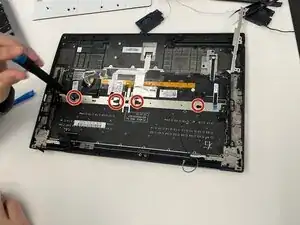
Use a Phillips #0 screwdriver to remove the four 3.2 mm-long screws holding in the two metal brackets.
-
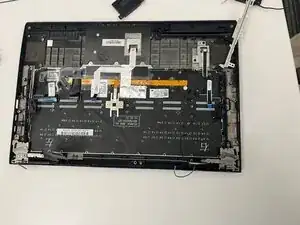
Remove the brackets and set them aside.
-
-
-
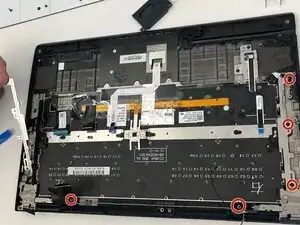
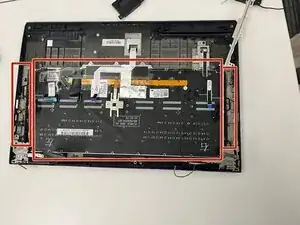
Remove all 2 mm screws securing the keyboard with a Phillips #00 Screwdriver.
-
Gently lift keyboard up and out of the laptop.
-


To reassemble your device, follow the above steps in reverse order.
Take your e-waste to an R2 or e-Stewards certified recycler.
Repair didn’t go as planned? Try some basic troubleshooting or ask our Answers community for help.
