Introdução

Use this guide if you are experiencing issues with the Lenovo ThinkPad T14s Gen 1 CPU Cooling Fan. If the laptop is overheating, crashing during use, fans not spinning or unusual noise such as grinding, the CPU Fan may be faulty.

Before continuing with this guide, refer to the troubleshooting pages.

This repair requires opening the device, so proceed with caution; some components may be sensitive to electrostatic discharge (ESD) or accidental damage. Consider using an anti-static mat or wrist strap to minimize ESD when repairing electronic devices.

Consider replacing the thermal paste to avoid further overheating issues or repair.

Allow the the laptop to de-energize if it has recently been charged.

Ensure it is powered off before starting repair.

  1. go1sT3QshlLcPnLj
    go1sT3QshlLcPnLj
    toaMLWDF3jHZhvqR
    • Use a Phillips #0 screwdriver to loosen the five captive screws securing the back panel.

    • The screws are secured to the back plate with small plastic washers and cannot be fully removed.

  2. Yi2xxjojJ1phyFUf
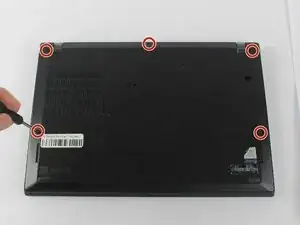
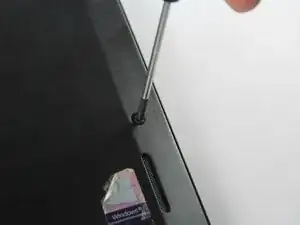
    • Insert the end of an iFixit opening in the space between the bottom and top case and move it around the perimeter to release the clips that hold the bottom case to the device.

    • You may hear the clips crack or pop as you release them and remove the bottom panel.

    • Before removing the bottom case, make sure all clips are fully released. Pulling the case away while clips are still engaged can break the clips or crack the case. Take your time and work around the edges to ensure the panel separates evenly.

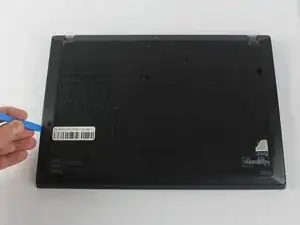
    • Remove the back panel.

  3. mDDIM3AiPxCs1RBQ
    mDDIM3AiPxCs1RBQ
    53d3xkT2tWCdLUDE
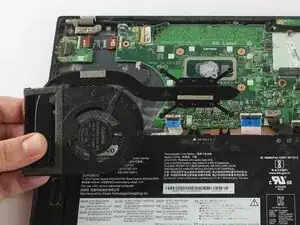
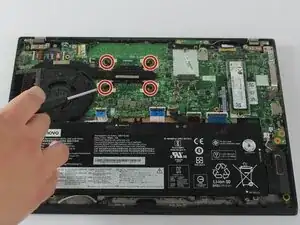
    • Use a Phillips #0 screwdriver to loosen the four 3.0 mm captive screws holding the heat sink in place.

    • These screws are secured to the fan by plastic washers and cannot be fully removed.

  4. Wle6T6YQonCryJlQ
    Wle6T6YQonCryJlQ
    gmNBAK2nCGWyo5KU
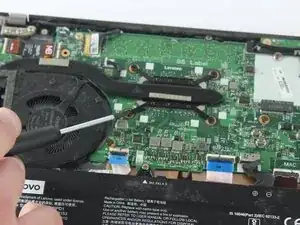
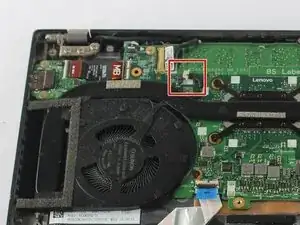
    • Use the point of a spudger to push on alternating sides of the connector to "walk" it out of its socket.

    • It may take a lot of alternating before the connector comes out. Be patient, and don't pull on the cables.

    • To reconnect the cable, align the connector and use a spudger or clean fingernail to push it fully into the socket.

    • Avoid pulling or pushing on the cables. Doing so could damage the connector.

  5. NaifWGhOxRuYfcnj
    • Gently lift fan up and away from the laptop to complete removal.

Conclusão

To reassemble your device, follow these instructions in reverse order. Take your e-waste to an R2 or e-Stewards certified recycler.

Noah C

Membro desde: 17/10/25

147 Reputação

0 comentários