Introdução

In this guide, we will replace the Lenovo ThinkPad T14 Gen 3's motherboard. The motherboard is responsible for connecting various other components of the laptop, such as the Wi-Fi card, RAM, and SSD card, letting them all communicate with each other. It also contains the central processing unit.

Before beginning, power off and unplug the device.

  1. iIkcRfyQjOtElYcB
    • Use a Phillips #1 screwdriver to loosen the seven captive screws securing the back panel.

    • The screws are captive and will not come out of the panel.

  2. bBdBKpxqc5m2gmMM
    bBdBKpxqc5m2gmMM
    qp4fvjplehmtPSJo
    IEJ1MBMquFUVJGOD
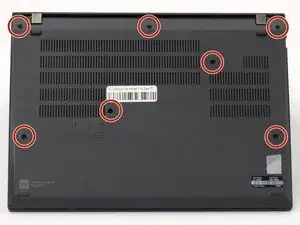
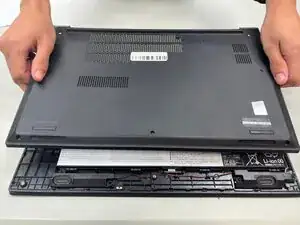
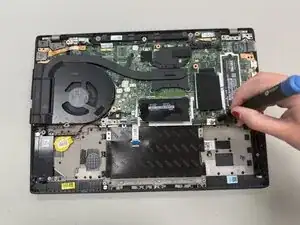
    • Insert an opening pick into the seam between the back panel and chassis.

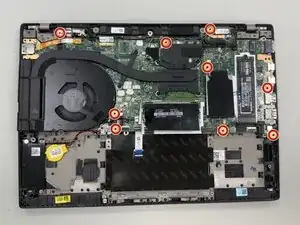
    • Slide the opening pick around the perimeter of the device to release the clips that hold the back panel to the device.

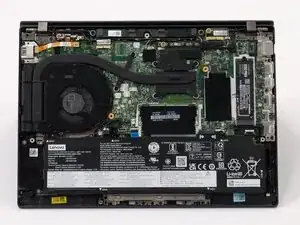
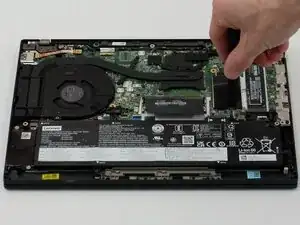
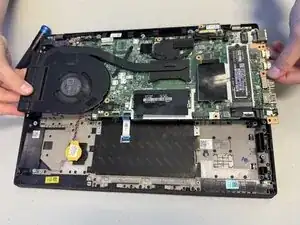
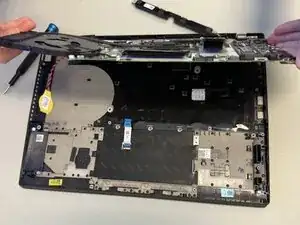
    • Remove the back panel.

  3. gSqgVLUQJMYD5Km4
    gSqgVLUQJMYD5Km4
    1e6FMkIoIkBTPiw3
    • Use a JIS #1 screwdriver to remove six M2 x 5 mm screws that hold the battery in place.

    • There is a risk to your laptop if the battery is not discharged properly.

  4. ykCOUKWDVdWHE1vZ
    ykCOUKWDVdWHE1vZ
    FNOWcdXwbyVsOYnW
    bmpVU3WIYdOOpMCH
    • Slide the battery from the battery connector and remove it.

  5. TJm16UQ6yvwsIWu5
    TJm16UQ6yvwsIWu5
    FLJc2kHDw4UNUOuq
    • Remove the nine 2.5 mm-long Phillips screws securing the motherboard.

  6. MDxlI6xdLLnPNDGi
    MDxlI6xdLLnPNDGi
    ERVwayHjOh3BENMA
    • Lift the motherboard to remove it.

    • The motherboard is connected to the rest of the laptop through a series of wires, so it will not come out entirely.

Conclusão

To reassemble your device, follow the above steps in reverse order.
Take your e-waste to an R2 or e-Stewards certified recycler.
Repair didn’t go as planned? Try some basic troubleshooting or ask our Answers community for help.

Asher Daniel

Membro desde: 08/09/25

112 Reputação

0 comentários