Introdução
This guide will show you how to remove the Bottom Panel on your, Lenovo ThinkPad T14 Gen 1. Using this guide will allow you access to the inside of your Lenovo ThinkPad for further repairs.
Before working on this guide be sure to turn off your computer completely and make sure you are working in a clear space. Working in a cluttered area could cause issues or be potentially dangerous. Since you are going to be inside of the computer where cables, circuits, and other equipment lie, if you were to spill anything or have something in the way it could end badly for not just the computer but most importantly you.
Be careful when using any sharp tools like a screwdriver around the battery. Puncturing the battery itself could be a fire hazard.
-
-
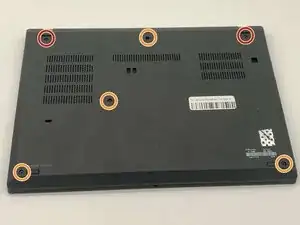
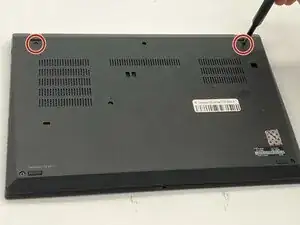
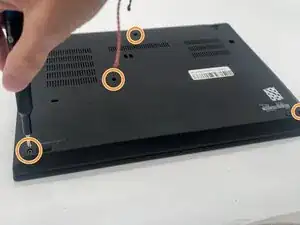
Use a Phillips #1 screwdriver to loosen the following captive screws:
-
The top two 6.8 mm corner screws
-
Four 5.8 mm-long screws
-
-
-
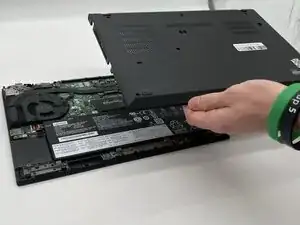
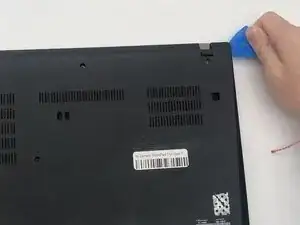
Use a plastic opening tool to pry the bottom panel.
-
Insert the end of the opening tool into the seam between the bottom and top cover.
-
Slide the opening tool around the edge of the bottom panel to release the clips holding them together.
-
Gently remove the bottom panel.
-

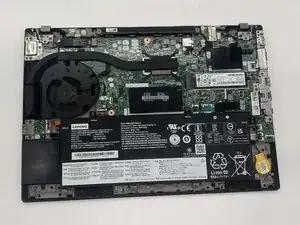
To reassemble your device, follow these instructions in reverse order. Take your e-waste to an R2 or e-Stewards certified recycler.

You might not need to remove the screws. My laptops back cover had all screws held in place with washers. You just need to untighten them.
Sverrir -
...also worth mentioning: Three of the screws are philips size 0, the ones near the hinges and the one closest to the center.
Sverrir -