Introdução
Use this guide to replace or upgrade the memory (RAM) in a Lenovo ThinkPad L470 .
Upgrading RAM can fix sluggish performance, reduce swapping data to disk, and help with multitasking.
This procedure shows how to remove the bottom cover and swap the memory module(s).
What this part does
RAM (Random Access Memory) is the laptop’s high-speed working space for the operating system and applications.
It’s much faster than storage drives and plays a key role in overall performance.
Common symptoms of faulty/insufficient RAM
- Random app or system crashes, freezes, or reboots
- Failure to boot accompanied by repeated beep codes
- Blue-screen memory errors or poor performance under heavy load
Before you begin
- Shut down the laptop and unplug the AC adapter.
- If upgrading, install DDR4 SO-DIMM modules that meet Lenovo ThinkPad L470 specifications.
- If troubleshooting, try reseating the existing modules and running a memory test before replacement.
After the repair
- Enter BIOS/Setup at startup (press F1) or open Task Manager → Performance → Memory in Windows to confirm the system recognizes the new memory capacity.
Ferramentas
-
-
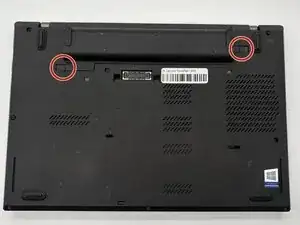
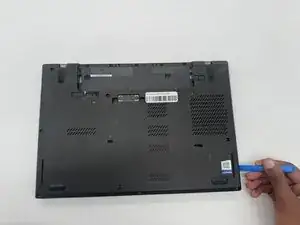
Turn off the laptop and unplug the AC adapter.
-
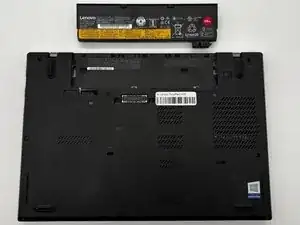
Slide the battery latch to unlock and lift out the external battery.
-
Hold the power button for 10 seconds to discharge any leftover power.
-
-
-
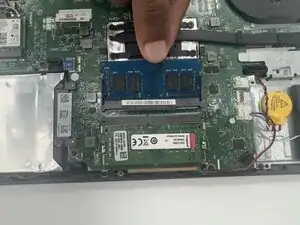
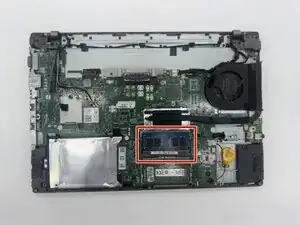
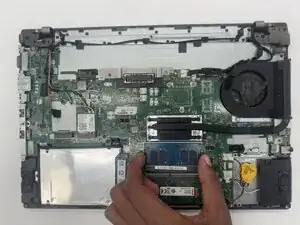
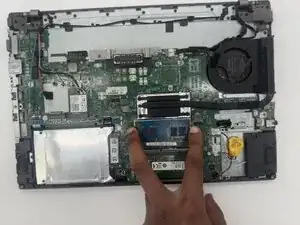
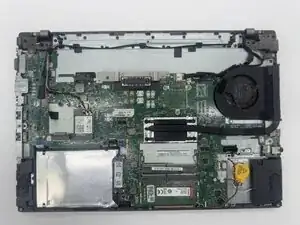
Gently pull the RAM straight out of its slot. If there are two modules, repeat the process for the second slot.
-

To reassemble your device, follow these instructions in reverse order.