Introdução

Use this guide to replace or upgrade a broken or insufficient RAM module in the Lenovo ThinkPad E15 Gen 2. (Model Numbers 20T8, 20T9, 20TD, 20TE)

  1. L2RJGMLwnHthYFoD
    L2RJGMLwnHthYFoD
    AFCnSZNEdfwfEoFx
    Uyu55PMWFRBxZmNV
    • Use a Phillips #1 screwdriver to loosen the eight captive screws securing the lower case.

    • The screws are captive and should not have the ability to be taken out.

  2. ScZODUnvNZaoeAA5
    ScZODUnvNZaoeAA5
    WU5mVDoYrs13LPXB
    dHNsRObZulxM4TBu
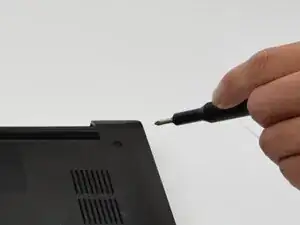
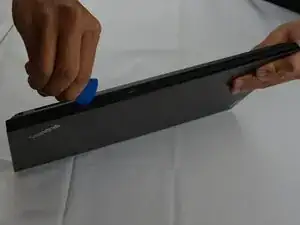
    • Insert an opening pick into the seam between the lower case and chassis.

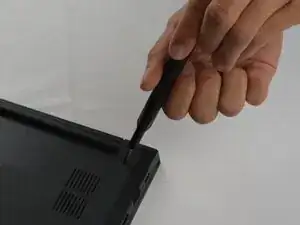
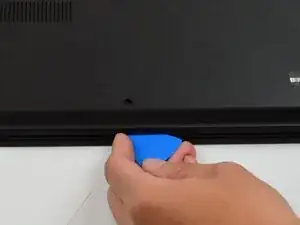
    • Slide the pick around the entire perimeter until the lower case fully releases.

  3. tfnL32nBHONiTlt4
    • Remove the lower case.

    • When reassembling, place the lower case on top of all the clips and push down around the edges until all the clips are engaged.

  4. SwJTj4DJ4jeZlDIp
    SwJTj4DJ4jeZlDIp
    1tLJurSfkj1JJBc6
    • Pull the battery connector directly out of its socket.

  5. mlrEouhLLC22SgvL
    mlrEouhLLC22SgvL
    lVXoScTRP6Hrpgvs
    KKmfcLTU6hLt6FqX
    • Unscrew the 2.4 mm-long Phillips #1 screw securing the RAM shield.

    • Remove the shield.

  6. vxf3NQfY5ZBllgy6
    vxf3NQfY5ZBllgy6
    svZsiwwTE1VJaZdw
    hMxKWMSrJxedETrf
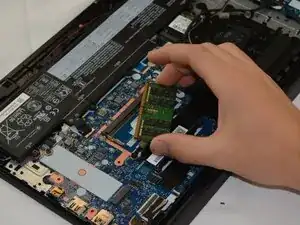
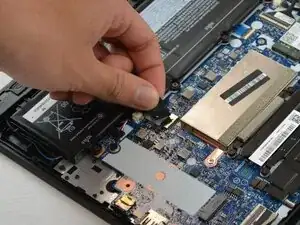
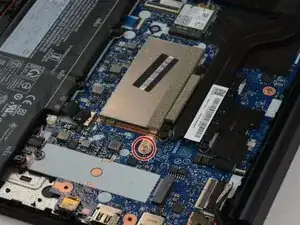
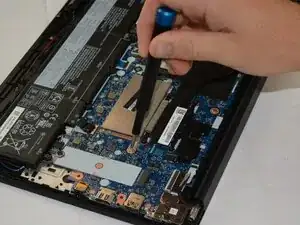
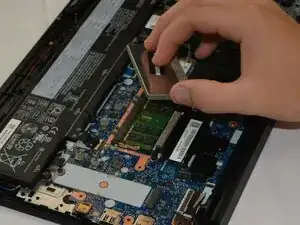
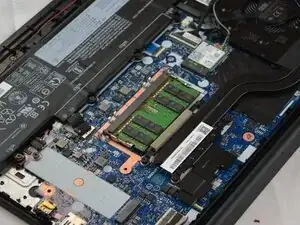
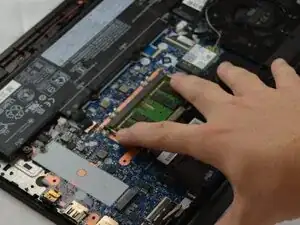
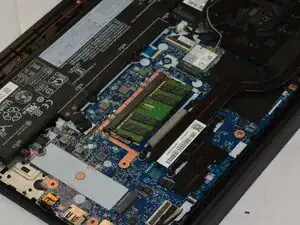
    • Two clips secure the RAM module in place, one on each side. Using your fingers, spread the clips away from the RAM module.

  7. fEH1X2BKRN31mU6b
    fEH1X2BKRN31mU6b
    AKZPXBAQDeQmDCbj
    • Pull the RAM module directly out of its socket.

Conclusão

To reassemble your device, follow the above steps in reverse order.
Take your e-waste to an R2 or e-Stewards certified recycler.
Repair didn’t go as planned? Try some basic troubleshooting or ask our Answers community for help.

Loic

Membro desde: 30/09/25

277 Reputação

0 comentários