Introdução

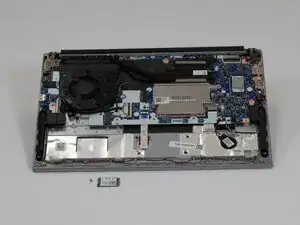
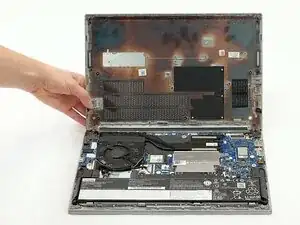
The Lenovo ThinkPad E14 Gen 4 is a 14" laptop designed mainly for small-to-medium businesses. It is part of the ThinkPad E Series, which prioritizes affordability and accessibility. This guide serves to inform how to remove and replace the wireless LAN card of the ThinkPad E14 Gen 4.

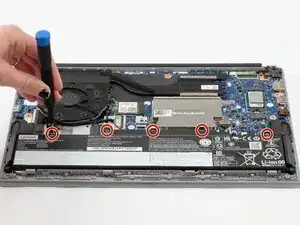
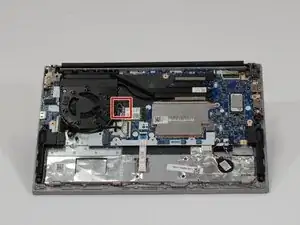
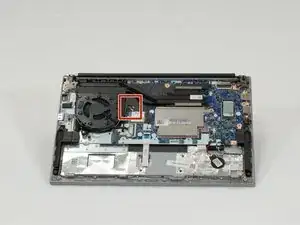
A wireless LAN card is an adapter card that allows the device it is installed into to connect to a LAN, or Local Area Network, of which Wi-Fi is the most widely known type. If your device is lagging/slow, having trouble showing available networks, or dropping known connections, these may be symptoms that the wireless LAN card is failing and needs replaced. The device may also produce an inordinate amount of heat, but that particular symptom may have a number of causes. Wireless Lan cards are not meant for frequent or rough treatment, so handle the component with care.

Warning: Before you begin opening your device, ensure that it is unplugged and that the battery is completely shut down.

  1. pUmlh6oBPmJNgHjp
    pUmlh6oBPmJNgHjp
    eDQG4ZZlUOimFfgf
    TSypuPsYPLoHUJt3
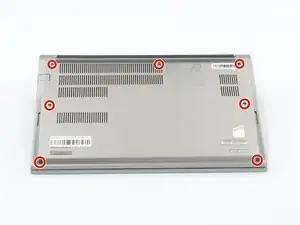
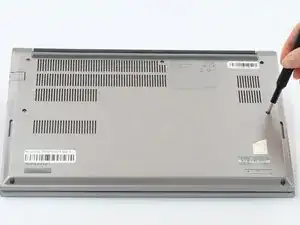
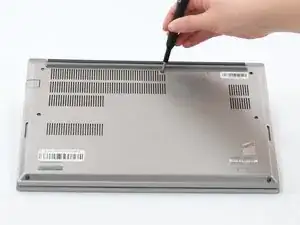
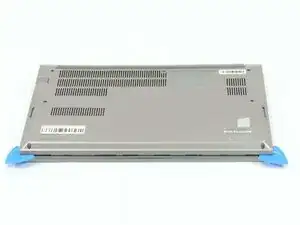
    • Loosen all seven captive screws on the back panel of the device with a Phillips #1 screwdriver.

  2. ljjste5X2fADVmDc
    ljjste5X2fADVmDc
    hMJeLUAjnKjYHPtR
    LY4ZacTDOk6NVEc1
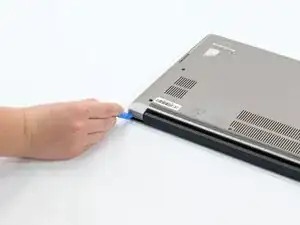
    • Insert an opening pick into the seam near the hinges.

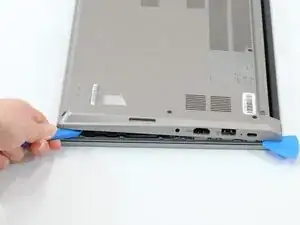
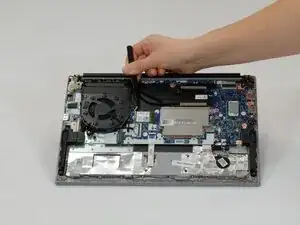
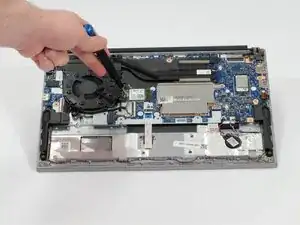
    • Working from the hinges to the front, gently pry apart the back of the device from the main body.

    • You should hear little pops and see a small gap forming at the seam before attempting to remove.

    • Plastic pry tools are the best to use with electronics such as phones, tablets, and laptops because they are designed to break before the device does.

  3. ILJrjUhARIuINRaD
    • Carefully lift the loosened panel away from the laptop.

    • Before attempting to lift the panel off, make sure it has been pried away from all edges and corners of the device. Trying to remove the back panel when any part is still firmly attached to the laptop can cause damage to the device.

  4. SJ3HK1HoaVGxKZPs
    SJ3HK1HoaVGxKZPs
    duaEnAybDqyEPRnB
    • Remove all five 5mm screws from the battery using a Phillips #1 screwdriver.

  5. M1Qmw6GFD6ZMN22A
    M1Qmw6GFD6ZMN22A
    21E64tEuVmQBhgPO
    • Using the fabric tag, disconnect the battery cables from their port inside the device.

  6. QIVJQmWCaAuPj2YD
    • Lift the battery out of the device.

  7. 6QfWMOmCITv231Qb
    6QfWMOmCITv231Qb
    QArCTK25yAjRRHPR
    kxwGOOgCnVLcRcNR
    • Uncouple both the main (silver) and auxiliary (black) coaxial cables.

  8. yewnEOSdMOMDtu4U
    yewnEOSdMOMDtu4U
    TesNx2weuFXDWVHg
    • Remove one 3mm screw with a Phillips #1 screwdriver.

  9. P4SeIgTwQiD6wYTM
    • Gently grab the LAN card and pull it from the slot.

Conclusão

To reassemble your device, follow these instructions in reverse order.

Tyler Wolf

Membro desde: 09/10/25

97 Reputação

0 comentários