Introdução
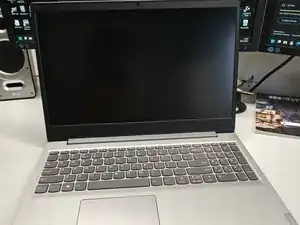
This PC Laptop is quite old, although it is still in a good shape. Unfortunately the “A” key has stopped working. I checked if this was a software issue, I also tried the recommended troubleshooting from the official Lenovo site. It seemed that the keyboard was broken.
The back of the keyboard is fixed with molten plastic ☹. I wanted to change only the keyboard, but that would've meant melting of and then trying to remelt that plastic back again. I thought this is much harder to do than changing the whole plastic frame, so I went with the latter.
I tried to search for a frame with only the keyboard with it, thinking that I would replace the rest from the old frame, but unfortunately, I couldn’t find any in my area, only frames with keyboard, mouse pad and speaker. This type of frame had a higher price, but it saved me a great amount of time.
Ferramentas
-
-
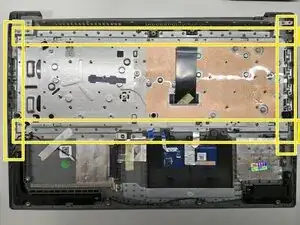
Unfortunately the keyboard can't be replaced so easily, it is fixed to the case of the laptop. It is welded into place with plastic as you can see in the images.
-
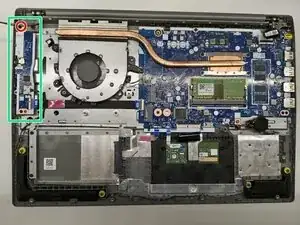
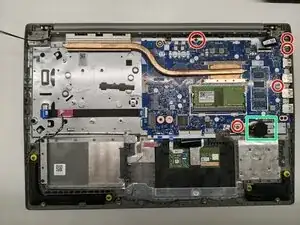
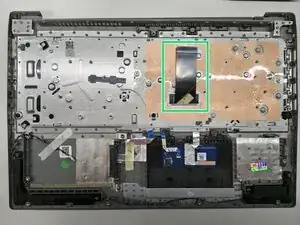
In the following steps the screws are marked with red, the elements with green.
-
-
-
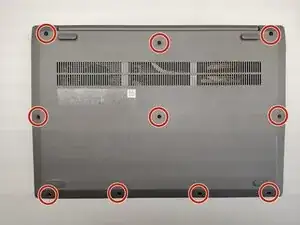
The back of the laptop is fixed with 10 screws, remove them. After that with the help of an opening Pick, it can be removed easily, this way you can access the interior.
-
-
-
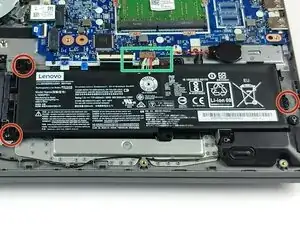
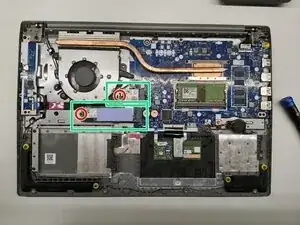
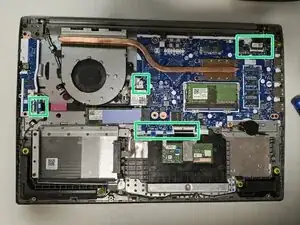
Remove the motherboard. It is fixed with 5 screws, one of them is covered with a Lenovo sticker. And detach the motherboard battery from the case.
-
-
-
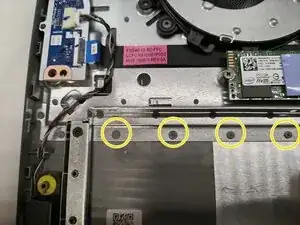
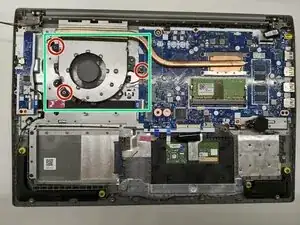
-4 screws hold the monitor into place.
-
After the screws are removed, lift the metal hinges up from the back frame (it is quite hard to move). Then you should open the back plate toward the hinges and remove from the display part. Be careful with the connectors of the display and the wireless antenna.
-
-
-
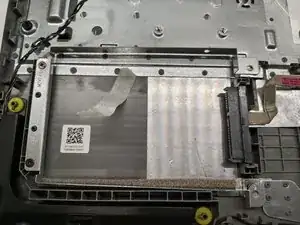
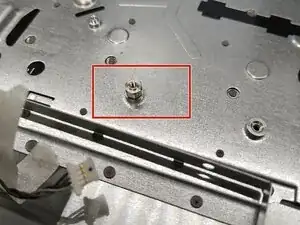
My new back frame came without a 2,5" SSD/HHD frame and also the extension screw for SSD which is mounted on the motherboard was missing.
-
-
-
Place the new back frame perpendicular to the display module. After connecting the two pieces, you can place the back frame on the display (the laptop will be closed). You can close the hinges (watch out for the display and antenna wires) to the back frame and screw it down.
-
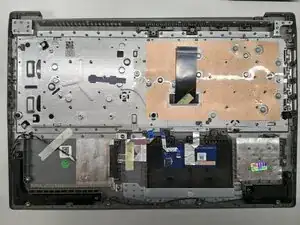
Connect the keyboard ribbon connector before you mount it the motherboard. I learnt this the hard way.
-
fix the motherboard
-
And add the rest of the removed components, following the steps in reverse.
-