Introdução

The charging port is one of the most frequently used and worn-out components of your device. If your Lenovo IdeaPad Flex 3 CB 11M735 stops charging due to a damaged port, this guide will walk you through the replacement process, ensuring your device stays powered and functional.

Before starting, ensure your device is powered off and unplugged to prevent electrical hazards. This guide will also help you identify key motherboard connections to avoid accidental damage.

  1. ZLqHEeY1XMonnurt
    ZLqHEeY1XMonnurt
    rTxQBeFbjANnuBan
    • Shut down your Chromebook completely. Unplug the charger and anything else connected. Flip the device over and place on a flat surface.

    • Use a T6 Torx screwdriver to unscrew the nine M2 x 6.5mm screws.

  2. AxBNxDEiaMUqWASQ
    AxBNxDEiaMUqWASQ
    tsSBXA5GkgCVqQLY
    KwhihwROyZBQnlyv
    • Using a plastic spudger, carefully lift the palmrest from the bottom cover.

    • Be careful while removing the keyboard, and unplug the connections.

  3. xOUoKdHORIvwZxFm
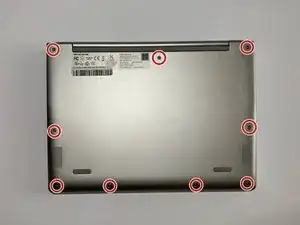
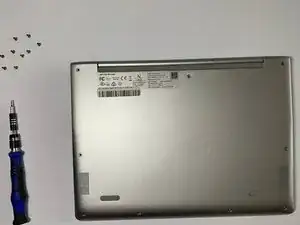
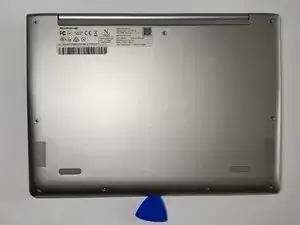
    • Remove the seven 4.5 mm screws using a Phillips #00 screwdriver.

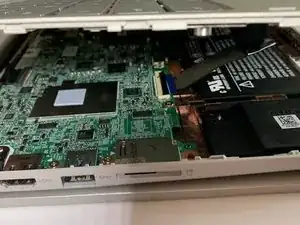
    • Disconnect the display cable from the motherboard.

    • Remove the display from the laptop.

  4. f1ZOpDNoYlfpvAsD
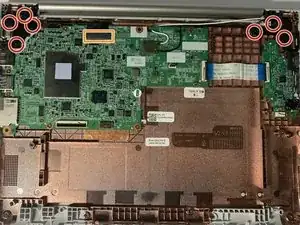
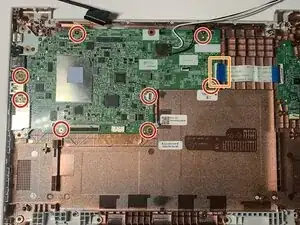
    • Remove the eight 4 mm screws from the motherboard using a Phillips #00 screwdriver.

    • Each screw securing the motherboard is marked with a small triangle, which helps identify the correct screws for reassembly, as some holes require multiple layers to be screwed together.

    • Disconnect the ribbon cable from the motherboard.

  5. uLHIGqbQ1Xp2siGU
    uLHIGqbQ1Xp2siGU
    4ZOoeyoiIUYmZYIQ
    bnFEJaZRytGeQ3xE
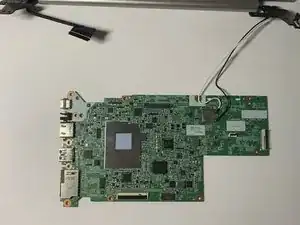
    • Remove the motherboard from the laptop.

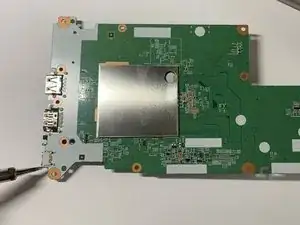
    • Plug in your soldering iron and set it to approximately 350°F.

    • Be cautious to avoid burns, and always use a proper stand. Keep the soldering iron away from flammable surfaces.

    • Flip the motherboard over and carefully desolder the small holes using the tip of your heated soldering iron. This will melt the solder, allowing you to remove the USB-C port.

    • Position the new USB 3.1 Type-C 16-pin female connector in place, then reheat the solder to secure it to the motherboard.

Conclusão

To reassemble your device, follow these instructions in reverse order.

Arian Esfandiari

Membro desde: 09/02/23

421 Reputação

0 comentários