Introdução
This guide explains how to remove and replace the motherboard in the Lenovo IdeaPad 3 (14IML05). A motherboard replacement may be needed if the laptop will not power on, has charging problems, or shows failure of multiple components.
Make sure the laptop is completely powered off before starting.
Ferramentas
-
-
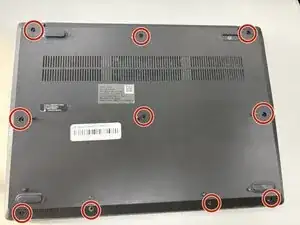
Use a Phillips screwdriver to loosen the ten captive screws securing the bottom cover.
-
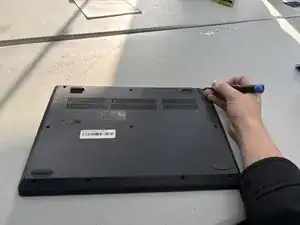
Insert a plastic opening tool into the seam between the bottom and top cover and slide it around the perimeter to release the clips holding them together.
-
Carefully remove the back panel.
-
-
-
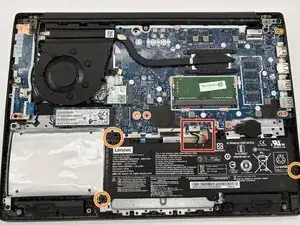
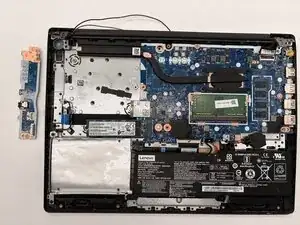
Locate the battery connector at the bottom of the motherboard.
-
Use the point of a spudger to push on alternating sides of the battery connector to "walk" it out of its socket on the motherboard.
-
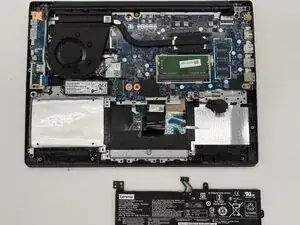
Remove the three 6 mm Phillips screws securing the battery.
-
Remove the battery from the laptop.
-
-
-
Remove the 3.0 mm Phillips head screw securing the I/O board.
-
Use a Phillips screwdriver to remove the screws from the hinges.
-
Lift and move the display to shift the hinges out of the way of the I/O board.
-
Use a spudger or a clean fingernail to flip up the locking flap on the ZIF connector—this is the unlocked position.
-
Use tweezers or your fingers to gently pull the cable out of its socket.
-
Remove the I/O board from the laptop.
-
-
-
Use a Phillips screwdriver to remove the single screw from the Wi-Fi card.
-
Slide a thin, ESD-safe pry tool or angled tweezers under the metal neck of the coaxial cable connector (as close to the head as possible) and lift straight up from the board.
-
Remove the Wi-Fi card.
-
Remove the 4.0 mm Phillips screw securing the SSD.
-
Pull the SSD from the M.2 slot.
-
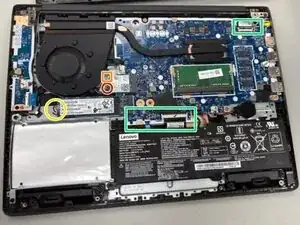
Disconnect the remaining connectors from the motherboard.
-
-
-
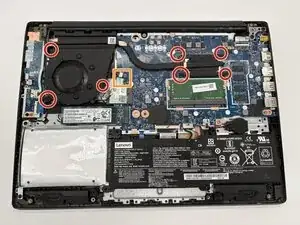
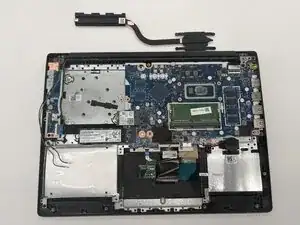
Use a Phillips screwdriver to loosen the screws securing the fan and heat sink.
-
Use the point of a spudger to push on alternating sides of the fan connector to "walk" it out of its socket.
-
If that doesn't work, use a pair of tweezers to firmly grip the sides of the connector and pull straight away from the socket. Hold the tweezers closer to the connector to get a better grip.
-
Remove the fan and heat sink.
-
-
-
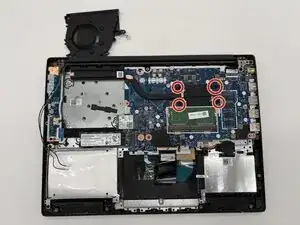
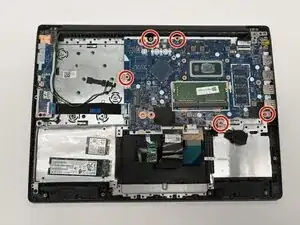
Remove the five Phillips screws holding the motherboard in place.
-
Lift the motherboard straight up from the edges to remove.
-

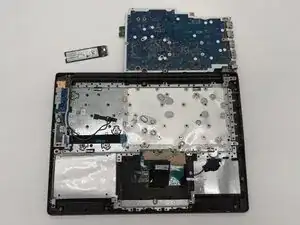
To reassemble your device, follow these instructions in reverse order. Take your e-waste to an R2 or e-Stewards certified recycler.