
Introdução
Use this guide to replace a broken or malfunctioning touchpad in the Lenovo Flex 11 Chromebook za27 Model. The Chromebook touchpad primary function serves as an input and pointing device that replaces an external mouse allowing a user to have control of the screen, and perform various actings using multi-finger movements.
Signs a Chromebook touchpad needs replacement are:
- Completely unresponsiveness
- Persistent erratic behavior (i.e., cursor jumps around the screen, overly sensitive, or lagging issues)
- Non-functional gestures or clicks
- Intermittent Freezing/ malfunctioning
- Physical damage (i.e., “dead zones”, cracks, lifting, or button mechanisms are stuck)
- Loose trackpad cable
Make sure to power off the Chromebook and disconnect from any external power sources before beginning before beginning this guide to prevent electrical harm.
After following this replacement guide, ensure to properly dispose of the unused touchpad. Unused touchpads may NOT be disposed as unsorted municipal waste. Lenovo offers a variety of recycling programs and services to assist equipment owners in recycling their IT products.
For more information about which programs are around your area, please visit:
No special tools are needed to complete this repair procedure; however, users must have a mechanical Aptitude as this guide is moderately difficult.
Ferramentas
-
-
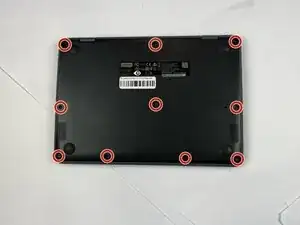
Close the lid and turn the laptop over so the underside is facing up.
-
Use a Phillips #00 screwdriver to remove the ten 7 mm-long screws on the lower case.
-
-
-
Flip the Chromebook over again.
-
Open the lid 180 degrees, folding the Chromebook in half like a tablet.
-
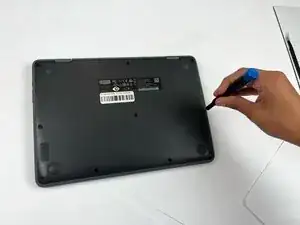
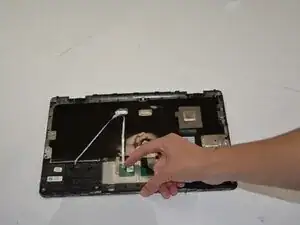
Insert an opening pick between the palmrest and keyboard assembly and the chassis.
-
Slide the pick around the perimeter until the assembly releases.
-
-
-
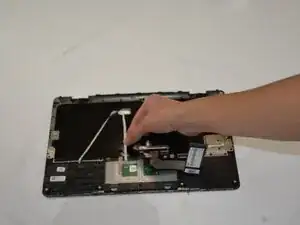
Slowly lift the palmrest and keyboard assembly, with care not to strain the connected ribbon cables.
-
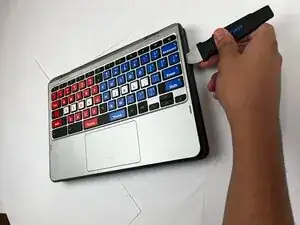
Flip up the locking flap securing the keyboard ribbon cable.
-
Disconnect the keyboard ribbon cable.
-
-
-
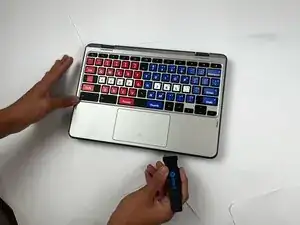
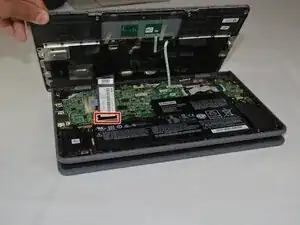
Flip up the locking flap securing the touchpad ribbon cable.
-
Disconnect the touchpad ribbon cable.
-
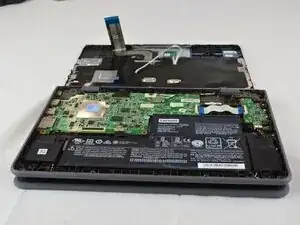
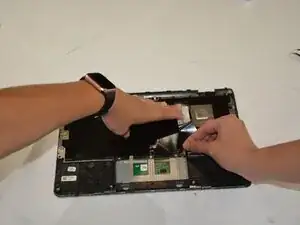
Remove the palmrest and keyboard assembly.
-
-
-
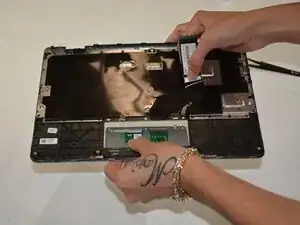
Flip up the locking flap securing the touchpad ribbon cable.
-
Disconnect the touchpad ribbon cable.
-
-
-
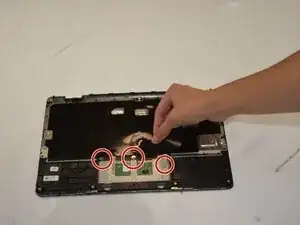
Hold the keyboard ribbon cable out of the way.
-
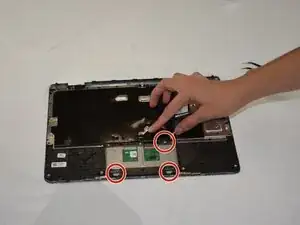
Remove the three Phillips screws securing the touchpad.
-
-
-
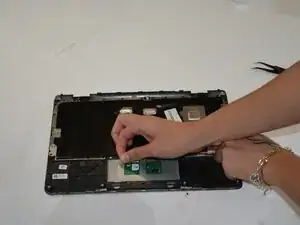
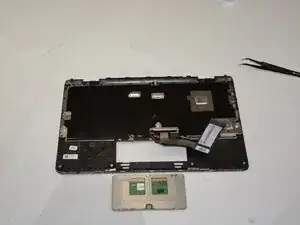
Identify the hooks holding the touchpad to the keyboard.
-
Unhook the touchpad by applying downward pressure while sliding the module towards the two bottom hooks.
-
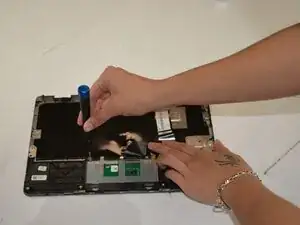
Remove the touchpad.
-

To reassemble your device, follow the above steps in reverse order.
Take your e-waste to an R2 or e-Stewards certified recycler.
Repair didn’t go as planned? Try some basic troubleshooting or ask our Answers community for help.