Introdução

This guide will help you replace the USB Ports in the Lenovo 500e Chromebook 81ES. If you are experiencing issues with the USB Ports, including damaged ports, bad connections, follow this guide. For this guide, you will need a spudger,  Phillips #0 screwdriver, and tweezers. Make sure the Chromebook is powered off and unplugged from the charger.

  1. Fn2nXWaxEsoRWOeR
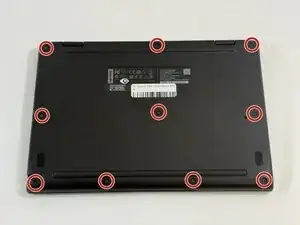
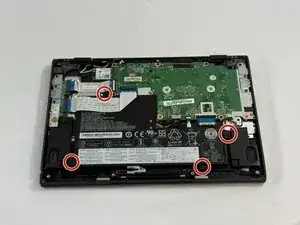
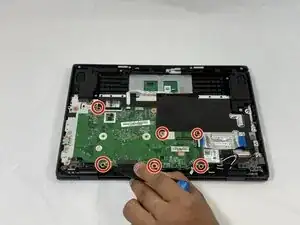
    • Use a Phillips #0 screwdriver to remove the ten 4 mm-long screws that secure the lower case.

  2. BMA4kyyEbpFQFNlF
    BMA4kyyEbpFQFNlF
    E4bUYlvUYlOrGkBi
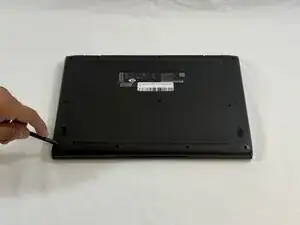
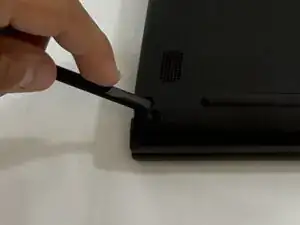
    • Insert the flat end of a spudger into the seam between the lower case and chassis.

    • Pry around the entire perimeter until the lower case fully releases.

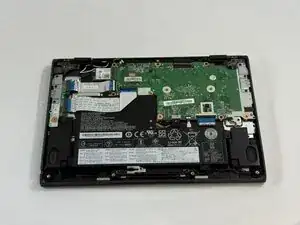
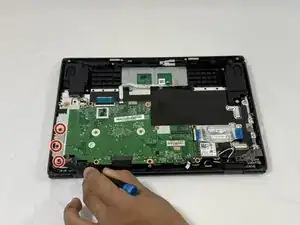
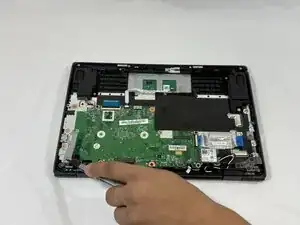
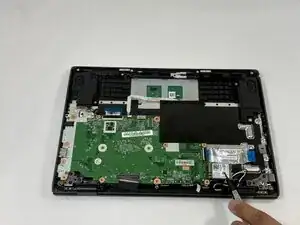
    • Remove the lower case.

  3. KoMk2M6uivhs2PZ5
    KoMk2M6uivhs2PZ5
    C3yX415aYtR1RbV2
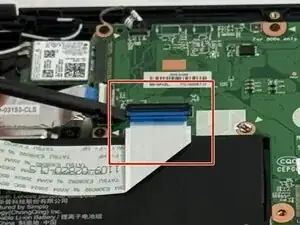
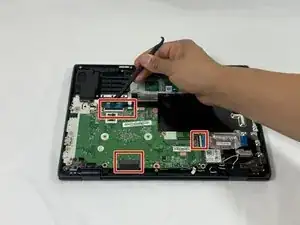
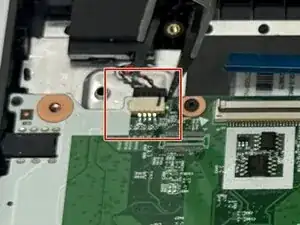
    • Use a spudger to flip up the locking flap securing the lower I/O board ribbon cable to the motherboard.

    • The cable should be able to freely move back and forth. If not the plastic gate might not be fully unlocked.

  4. VWSqEs51ub5YFIDT
    VWSqEs51ub5YFIDT
    aMCHy1AU41Mbu42T
    • Use tweezers to disconnect the battery connector.

  5. VhMT4xsGuSeFpUaZ
    VhMT4xsGuSeFpUaZ
    OfYmFQ1oHWkQ2VPh
    • Use a Phillips #0 screwdriver to remove the four 4 mm-long screws that secure the battery.

  6. SFDudpiubE6JIZkA
    SFDudpiubE6JIZkA
    nFIpqTe1ptALIAWM
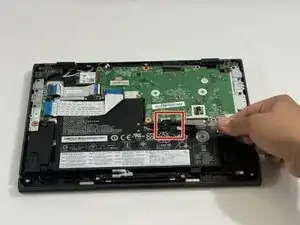
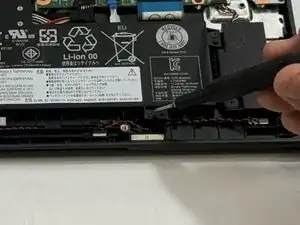
    • Slide a spudger under the battery.

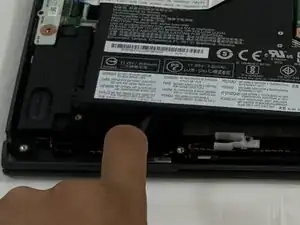
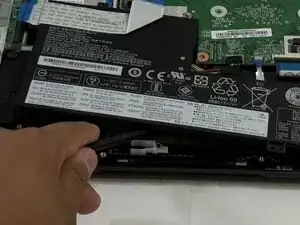
    • Slightly lift the battery with the spudger, then grip and remove the battery.

    • If the battery appears bulging or has any visible bubbles, proceed with extreme caution during removal.

  7. 4BJi4uAiSsQZTsD2
    4BJi4uAiSsQZTsD2
    VVTckWUTSvgY6IFf
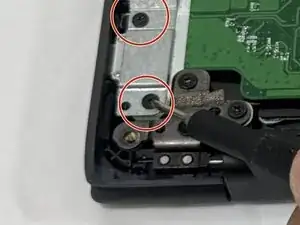
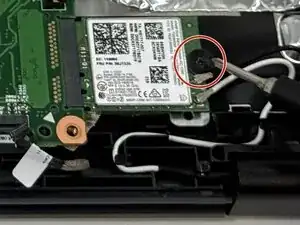
    • Use a Phillips #0 screwdriver to remove the four 2 mm-long screws that secure the metal bracket over the ports.

  8. aEGGEIYtffcrOmvt
    • Remove the metal bracket.

  9. vCmPgEVjQYgOiDQ4
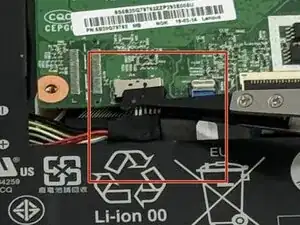
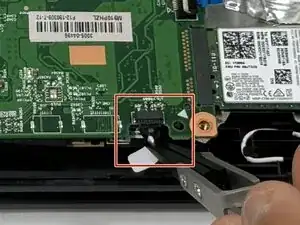
    • Using a spudger to carefully lift up the gates connecting the ribbon cables to the motherboard.

    • Disconnect the ribbon cables.

  10. jn6tpYR5fwmMM2TI
    • Use tweezers to disconnect the speaker cable.

  11. NX1FncA2K6mZCkUx
    • Use a Phillips #0 screwdriver remove the six screws securing the motherboard.

  12. 2NmLQGiATGQTppQw
    • Use tweezers to disconnect the connector.

  13. maLEIqcKdXWDvMII
    • Use a Phillips #0 screwdriver to remove the single screw securing the Wi-Fi Card.

  14. DyAdDTSGDbNj6JW1
    • Remove the Wi-Fi card.

  15. GpGr5nDHAlQPyvMX
    • Remove the motherboard.

Conclusão

To reassemble your device, follow the above steps in reverse order.
Take your e-waste to an R2 or e-Stewards certified recycler.
Repair didn’t go as planned? Try some basic troubleshooting or ask our Answers community for help.

Nick

Membro desde: 25/09/25

385 Reputação

0 comentários