Introdução
Here's how to replace the keyboard assembly.
Ferramentas
Peças
-
-
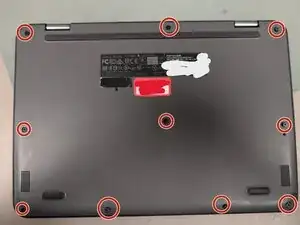
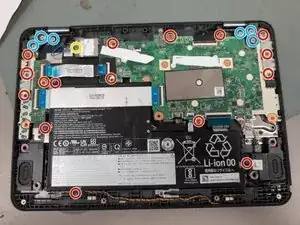
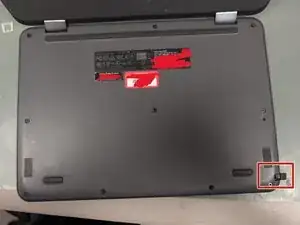
Unscrew the 9 screws on the bottom case
-
They are captive screws. Don't take them fully out of the case. They will stay attached.
-
-
-
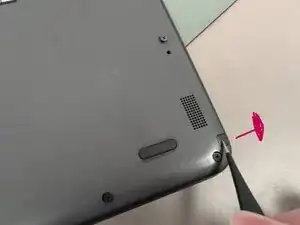
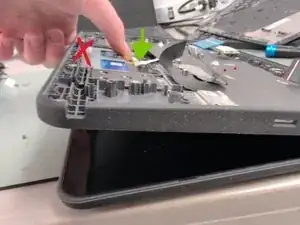
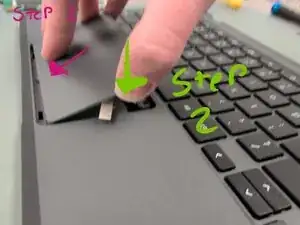
1: Push the stylus holder out
-
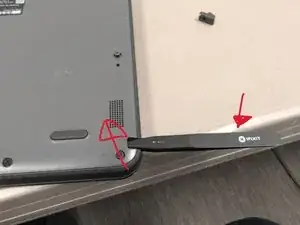
2: Put a pry tool inside and pull the bottom case up.
-
3: Pull the bottom case up manually.
-
-
-
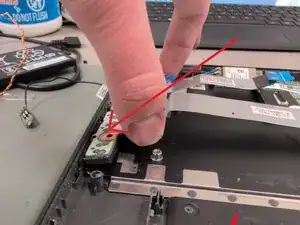
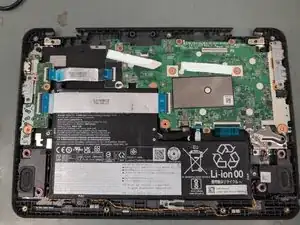
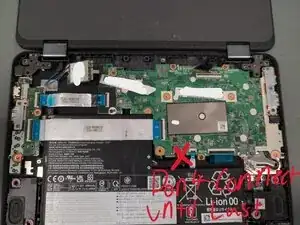
1: Disconnect the battery first, and in the future, connect it the absolute last. This model is prone to damage if you don't do this.
-
-
-
1: Organize your screws
-
WiFi
-
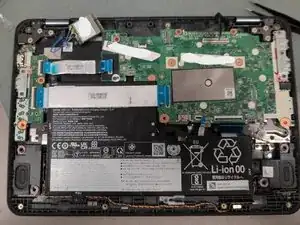
Battery, Motherboard, and I/O board
-
Bottom hinges
-
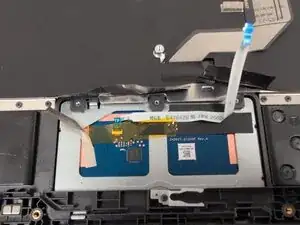
Touchpad
-
2: Unscrew everything you can see
-
-
-
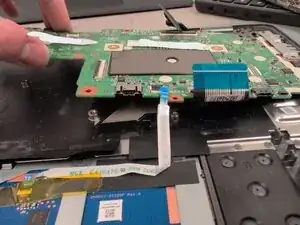
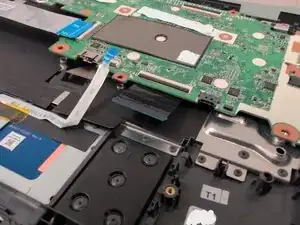
1: The motherboard and i/o board pull out at an angle, and slot in to certain places on the keyboard case.
-
2: Everything else comes out normally.
-
-
-
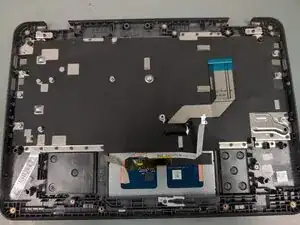
You might have luck by folding the screen while it's still connected, but just make sure that any way you do it that you don't put any pressure on the keyboard case. The top case should come off easily.
-
-
-
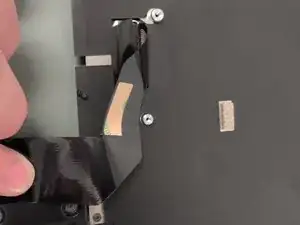
1: Unscrew the 3 touchpad screws. They might be hidden under the plastic.
-
2: Push on the upper side of the touchpad. You may break a clip in the keyboard case, this is normal.
-
-
-
1 WiFi screw
-
16 Battery, Motherboard and IO board screws
-
6 hinge screws
-
3 touch pad screws
-
When you make sure you have all your screws, grab your new keyboard.
-
-
-
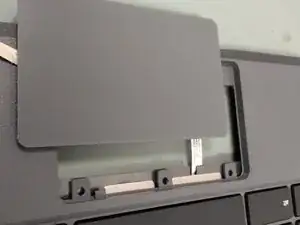
1: Slide the cable from the touchpad to under the keyboard.
-
2: Put the touchpad into place by putting the bottom clips through first
-
3: Push down on the top to connect the clip.
-
4: Screw in the touchpad in the same place (on the new keyboard) as where you unscrewed it before. Make sure to keep it from falling out.
-
-
-
Peel off the adhesive on the keyboard connector on your new keyboard.
-
Stick it down flat and where it naturally goes.
-
Pull the connector back like this so it can plug into the motherboard. Do not crease the cable.
-
-
-
1: Put the motherboard in at an angle. Make sure you get it all the way in, then you can connect the keyboard and touchpad.
-
2: The I/O board also goes in at an angle.
-
3: Screw them in.
-
-
-
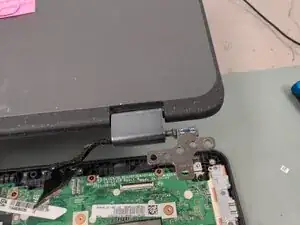
1: Fold the hinges flat
-
2: Put the screen upside down
-
3: Hover the top case's hinges above where they go on the keyboard case.
-
4: Place it down, and screw the hinges in.
-
-
-
1: Route cables correctly from the top case, including the wifi and display cables.
-
2: Screw down everything (look at Step 4 if you need to know where the screws go)
-
3: Connect EVERYTHING BUT THE BATTERY
-
4: Connect the battery absolute last
-
-
-
1: Screw the bottom case back up (view Step 1 for location)
-
2: Push the stylus plug back into place (if applicable)
-
-
-
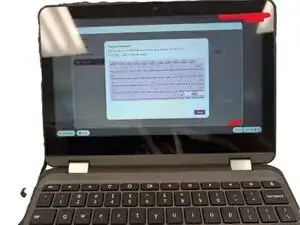
1: Plug in your chromebook
-
2: Test the keyboard by going to the diagnostics menu CTRL + SEARCH + ESC
-
3: Click keyboard, then click test.
-


Thanks for viewing my guide