Introdução

  1. IKu11TonQKJcygDa
    IKu11TonQKJcygDa
    WvFgHMl22fPfmEVA
    • Use a Phillips #0 screwdriver to remove the nine 8.6 mm screws from the back cover.

  2. jZpuKcgQ2xyIELsB
    jZpuKcgQ2xyIELsB
    2NDjqiUXLLYu4NwZ
    • Carefully remove the back cover from the Chromebook.

    • You may hear clicking sounds as the cover becomes detached from the frame.

  3. ivmGNWOPoByUWlH1
    ivmGNWOPoByUWlH1
    ZRkDtjrBPGNnW1jN
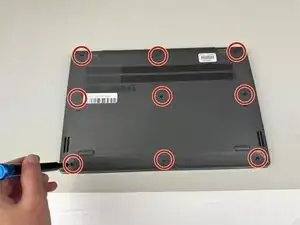
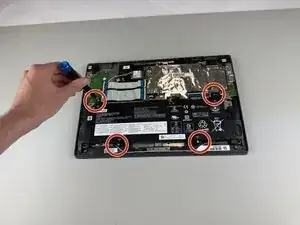
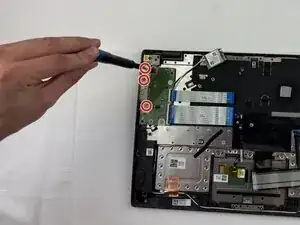
    • Use a Phillips #0 screwdriver to remove the four 5.5 mm screws holding the battery in place.

    • Do not apply too much downward pressure when unscrewing the screws, as the interior contains many vital and fragile components.

  4. I5eFgGN1iKReiJL1
    I5eFgGN1iKReiJL1
    rY6S2wstor1oDEwd
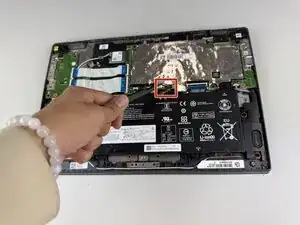
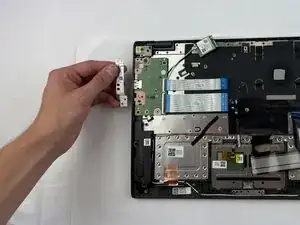
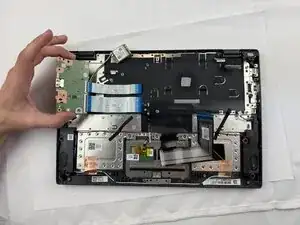
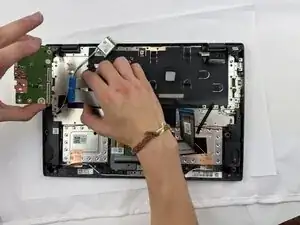
    • Gently disconnect the power interface using a pair of tweezers.

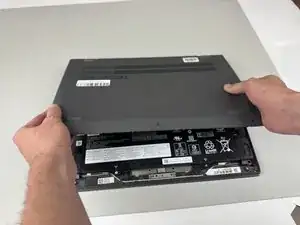
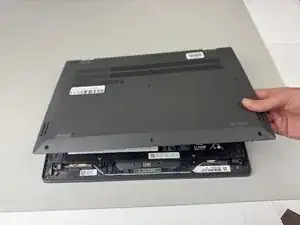
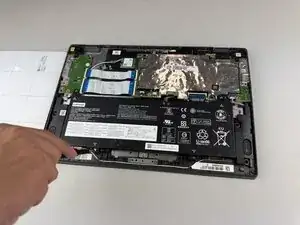
    • Lift the battery out of the Chromebook.

  5. sgKSRyTfBeYAVCKC
    sgKSRyTfBeYAVCKC
    CbsgROyAHZMOlQIC
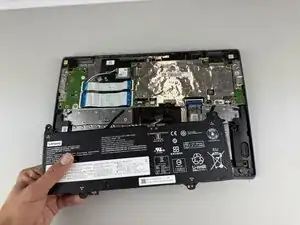
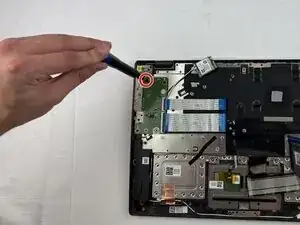
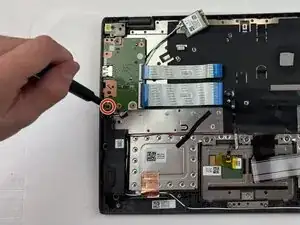
    • Use a Phillips #0 screwdriver to remove the three screws from the daughterboard bracket.

    • Remove the bracket.

  6. SauhhWt2HPmSN4WJ
    SauhhWt2HPmSN4WJ
    RTXXtYSLTeXKN1bf
    • Use a Phillips #0 screwdriver to remove the two screws from the daughterboard.

  7. 5kZsP1YrL3YAdDfv
    5kZsP1YrL3YAdDfv
    HZKSrSoDCMCLK4Nx
    • Detach the two ribbon cables from the daughterboard and remove it from the laptop.

Conclusão

To reassemble your device, follow these instructions in reverse order.

Kristen Gismondi

Membro desde: 12/11/14

103918 Reputação

0 comentários