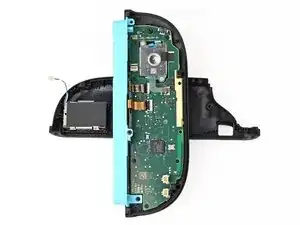
Introdução

  1. Q6kJIhnBRN2D6niQ
    Q6kJIhnBRN2D6niQ
    ClJfbRvYvtpmPKNV
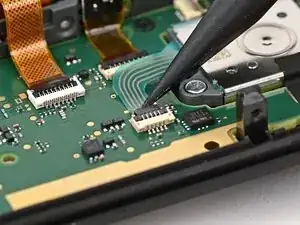
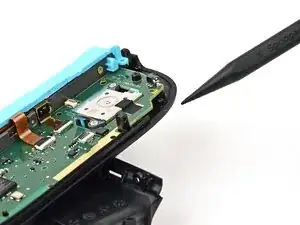
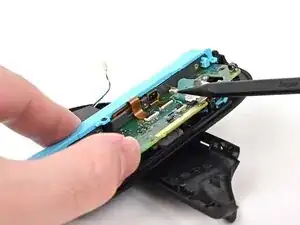
    • Use the point of a spudger to flip up the locking flap on the joystick cable ZIF connector, located in the center of the board.

  2. ZQyOigSPQX23SUjI
    ZQyOigSPQX23SUjI
    26OmwifOhmmgsoUO
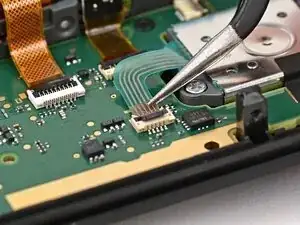
    • Use tweezers or your fingers to grab the brown part of the cable and gently pull the cable out of its socket.

  3. rAWFHmD4nuxaCJBt
    rAWFHmD4nuxaCJBt
    cpE3hBAYcFIIJMer
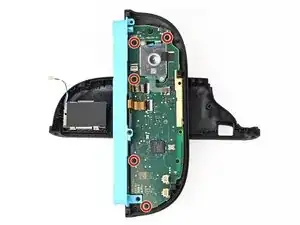
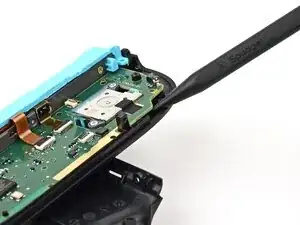
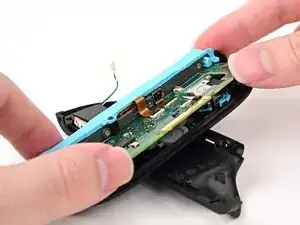
    • Use a JIS 00 driver to remove the five 3.1 mm‑long black screws securing the board to the controller.

  4. 2ujFqbv3ikRc3Xx2
    2ujFqbv3ikRc3Xx2
    Na6RpVj1RrVAWnMb
    VefCBBAoO6T6DW5H
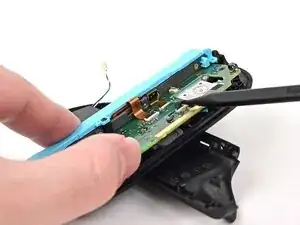
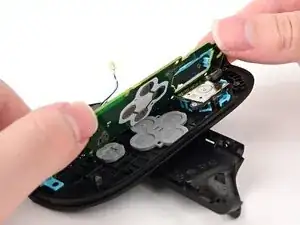
    • Insert the point of a spudger underneath the board, next to the joystick, between the board and the frame.

    • Pry up slowly on the board to lift it until you can grab it with your fingers.

    • The black tape stuck to the joystick will stay with the board. Work slowly to avoid tearing the tape.

  5. uqaYyY3uIYwQ13TH
    uqaYyY3uIYwQ13TH
    oCxvPIYJaclONuZN
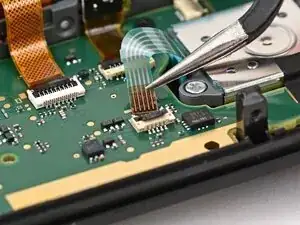
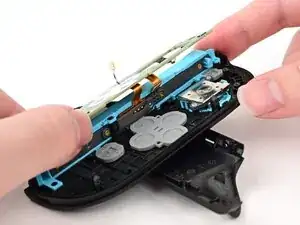
    • Use your fingers or a spudger to lift the joystick cable up so it's perpendicular to the joystick module.

  6. KLVPmJZgmdufeh3C
    KLVPmJZgmdufeh3C
    wgbklyVwH5Vrbr12
    Ie1wLqRGNoPcBZAx
    • Lift the board and flip it over the controller's inner edge.

    • Be careful not to crease or tear the two ribbon cables connecting the board to the controller.

Conclusão

To reassemble your device, follow these instructions in reverse order.

Nick Schultz

Membro desde: 24/03/24

45909 Reputação

0 comentários