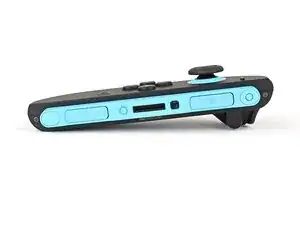
Introdução

  1. AocCZm5flCKqyQP3
    AocCZm5flCKqyQP3
    ffdO3drRHwqfNGnt
    • Use a tri‑point Y00 driver to remove the two 3.1 mm‑long black screws on the right edge of the controller.

  2. BHBkKEVmSUvJGSCO
    BHBkKEVmSUvJGSCO
    V143EftfffKNmNAL
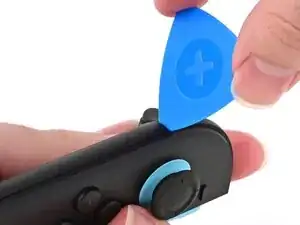
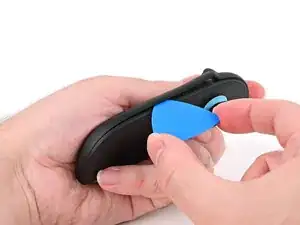
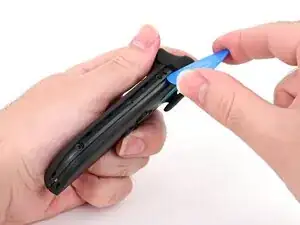
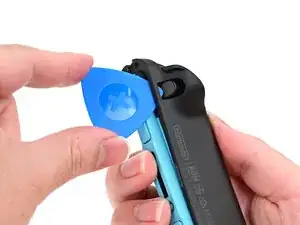
    • Insert an opening pick into the gap underneath the bumper button on the left side of the controller, with a point of the pick pointing downwards.

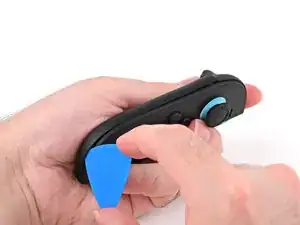
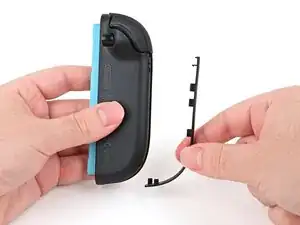
    • Pry up to slightly lift the plastic strip running across the left edge of the controller.

  3. 5lRN3a6LNJ1Ix4Wa
    5lRN3a6LNJ1Ix4Wa
    4afLB1vcGZxvprrK
    B2HlCP1BrKApQq4v
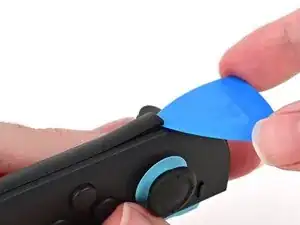
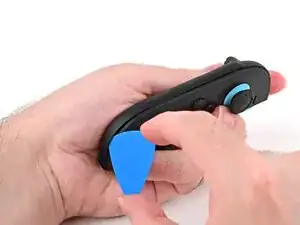
    • Slide the opening pick around to the front of the controller.

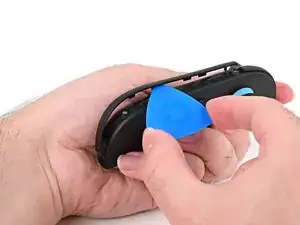
    • Slide the opening pick down the plastic strip to separate the clips and adhesive securing it to the controller's body.

  4. E5NKhTQStSgHyWW3
    E5NKhTQStSgHyWW3
    rZ5T6Z2gjavIxTjP
    4PjFWj6vRxLORgJL
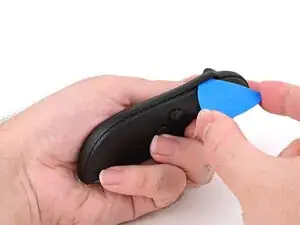
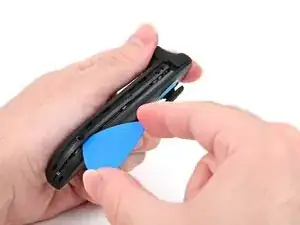
    • Pry up on the bottom edge of the plastic strip with slow, steady force.

    • Repeat this prying action along the length of the strip until it's fully detached.

  5. AbTUejsu6Iy4b3RP
    • Remove the plastic strip.

  6. weiAao5PNNrtZ6sF
    weiAao5PNNrtZ6sF
    LcpjBvBBuSfllgwa
    • Remove the two screws on the left edge of the controller:

    • One 3.1 mm‑long tri‑point Y00 black screw

    • One 3.0 mm‑long JIS 00 silver screw

    • You can use a Phillips screwdriver in a pinch, but you risk damaging or stripping the screw. Push down firmly on the screwdriver and twist slowly. Often, switching drivers may help, even if they're the same size.

    It's actually supposed to be a JIS000 bit. At least that is the size that worked for me.

    BlueForce -

  7. elQeqaBMHFqC5FR4
    elQeqaBMHFqC5FR4
    NqmkKqAHf1WWno5w
    OXjhFnF5iabZbUgw
    • Don't try to remove the back cover yet.

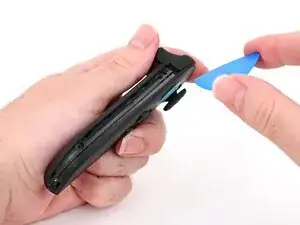
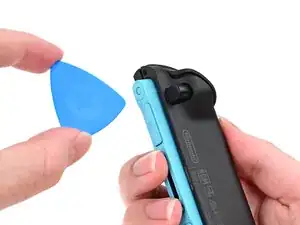
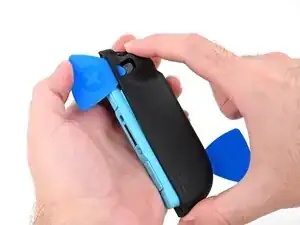
    • Insert an opening pick into the gap between the front and back halves of the controller on its left side.

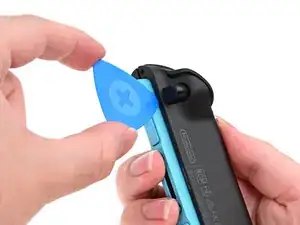
    • Slide the pick down the controller to disengage the clips.

    • Leave the opening pick at the bottom of the controller's left edge, just before its curve.

    • The opening pick will fall out once the back cover is removed. If it falls out before then, put it back to keep the two halves separated.

  8. BO6ctuiGEwv1xDNy
    BO6ctuiGEwv1xDNy
    g3ffhsMGOhHLw3kA
    CoWnTTN1NycmPgUj
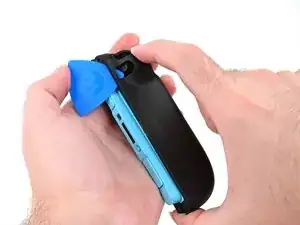
    • Hold the controller upside-down.

    • Insert a point of another opening pick next to the release button at the top of the controller.

    • Use the opening pick to press the release button through the gap.

  9. 2OF2lhQEkYVAMA2w
    2OF2lhQEkYVAMA2w
    er5pqsBsj1tH11OU
    PiZqZTeCLs3DJHSg
    • The back cover is connected to the controller by a cable at the bottom. Don't try to remove it completely yet.

    • While holding the release button with the opening pick, use your other hand to slide the back cover down to release the clips securing it to the controller's body.

    • Open the back cover.

  10. SIEHVyIqUNys2eZ3
    SIEHVyIqUNys2eZ3
    DqYVoaQwOGfENq1l
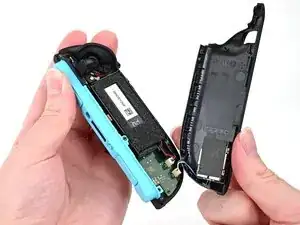
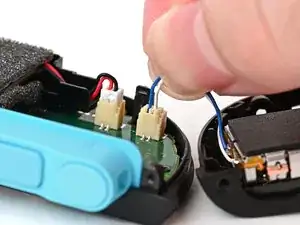
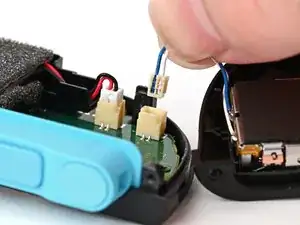
    • Firmly grasp the two wires (blue and white) above the rumble motor connector, located at the bottom of the controller's board, and pull the beige connector out of its socket.

    • Pulling the cable won't damage it, but don't dig your nails into the plastic sheathing.

    • Remove the back cover.

Conclusão

To reassemble your device, follow these instructions in reverse order.

Nick Schultz

Membro desde: 24/03/24

45909 Reputação

0 comentários