Introdução

  1. GqxIiULncF21ENgO
    GqxIiULncF21ENgO
    EB6HnFSdo3HjgEtv
    fPKWpfBhwVB6DaXx
    • Drain your eReader's battery as much as possible before starting your repair. Ideally, it should be fully discharged.

    • Optionally, to drain the battery faster, navigate to MoreSettingsEnergy saving and privacy and set Automatically go to sleep after and Automatically power off after to Never.

    • When working on or near the battery, don't use sharp metal tools to avoid puncturing and shorting the battery.

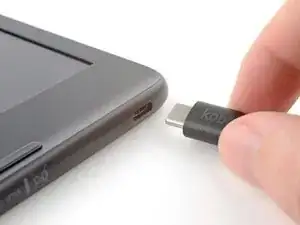
    • Unplug all cables and fully shut down your eReader.

    • Your screen should be black and say Powered off.

    Don't forget to remove the protective sheet from the replacement screen (as I did). Thanks for the manual, its working now again!

    Hans -

    Haha I second that! I nearly had a heart attack when I realized I hadn't removed the plastic film

    Arianna A -

  2. TPpxsLcsmgaPFxNF
    TPpxsLcsmgaPFxNF
    CT1XMaClc61CCTCI
    VmtBxMMmLknG1ZtT
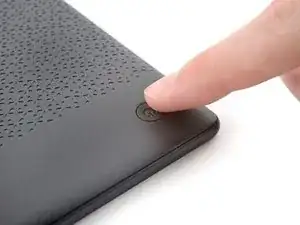
    • Flip your eReader over so the screen is facing down.

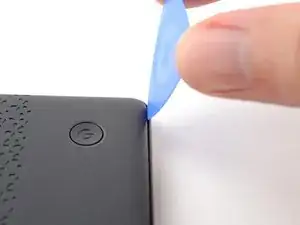
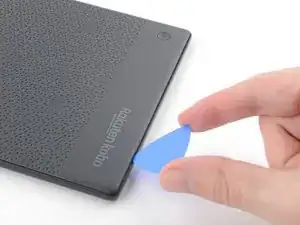
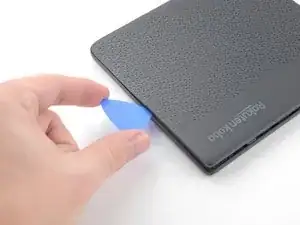
    • Angle an opening pick straight down, and insert its tip under the top right corner of the back cover, near the power button.

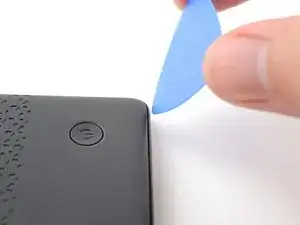
    • Push downward and pry up with the pick until you feel it slide between one of the clips and the frame.

    • You may have to test a few spots along the corner until the pick slides between one of the clips.

  3. 4Wyg6sI55X4XfZXn
    4Wyg6sI55X4XfZXn
    KW1XrUEr5GjSIh2q
    ZYracIWpbZtsDMfa
    • Slide the pick toward the bottom right corner to release the clips along the right edge.

  4. ew2UsHdvphafIIOT
    ew2UsHdvphafIIOT
    gUxJCgS4liVAJQuQ
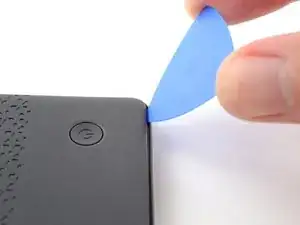
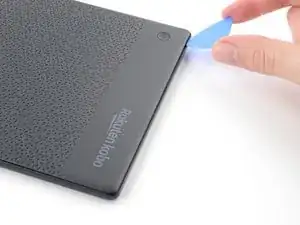
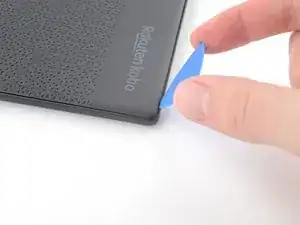
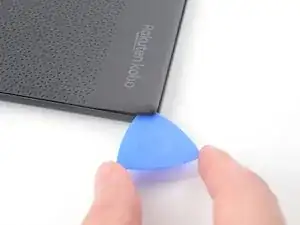
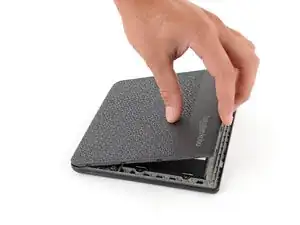
    • Angle the pick flat under the back cover and rotate it around the bottom right corner to release its clips.

    • If you're having trouble, try twisting the pick to lift the corner clips out of their slots.

  5. JLZk2HqRxSpTumot
    JLZk2HqRxSpTumot
    DHybTPoDNsLASolZ
    YHoXY4TvTwMDS2tr
    • Slide the pick toward the bottom left corner to release the clips along the bottom edge.

  6. eELw4HIs3in5FnBH
    eELw4HIs3in5FnBH
    Fld1qdbbZ4gHFGBE
    yftQSCXd2Pv3x5fS
    • At this point, you should be able to grip the back cover and release its remaining clips. If not, slide a pick under the perimeter of the back cover until you can grip an edge.

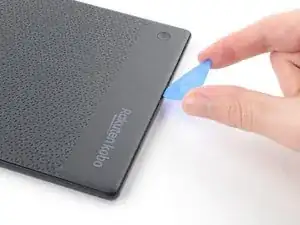
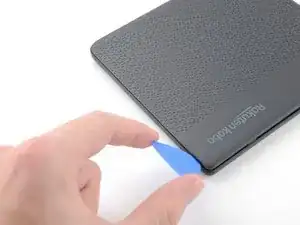
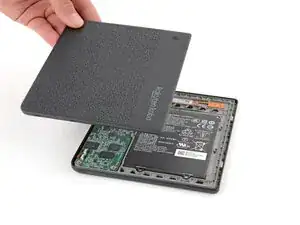
    • Grip the right edge of the back cover and lift it away from the eReader to release the remaining clips.

    • Remove the back cover.

    • During reassembly, align the back cover over the eReader and press along the perimeter until all its clips snap back into place.

  7. OeLbFETLaFUo2GXh
    OeLbFETLaFUo2GXh
    2Ydyo6TikdYnhfIV
    SEEQeLjowJyhH2R4
    • The entire surface of the eReader's internals is covered in a thin, plastic-like waterproof coating. Keep the following in mind as you continue disassembly:

    • While this won't hurt your device, removing the coating compromises the device to potential water damage.

    • The coating is brittle and can flake into many small pieces. Heating the coating helps, but working with it is still a time-consuming process.

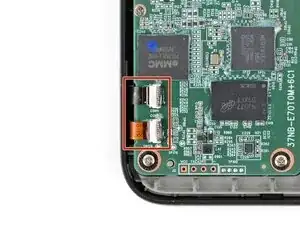
    • Depending on your repair, you might have to remove the coating from ZIF connectors and their cables.

  8. iPT2cBmrPoKZgVBd
    iPT2cBmrPoKZgVBd
    RGJO1qP3a5uC6ENO
    • Use a spudger to pry up and disconnect the battery press connector.

    • Don't pry against the motherboard, as you risk breaking small, surface-mounted components.

    • Your E-ink screen will continue to say Powered off even after disconnection—this is normal!

  9. KhtXWJfWyKeABAQy
    KhtXWJfWyKeABAQy
    Cq6G2LTf3MeTVYBy
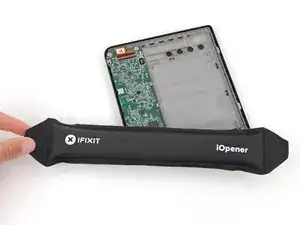
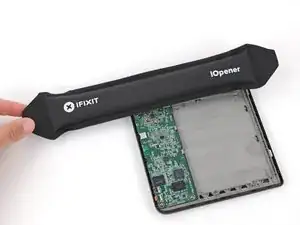
    • Heat an iOpener and lay it on the digitizer cable ZIF connectors for 90 seconds to soften the coating.

    • Alternatively, you can use a hair dryer or a heat gun for 30 seconds.

  10. LEj1STqSBuwFEBuL
    LEj1STqSBuwFEBuL
    BZIpEPUMngsLijtH
    UOKcnpDNIxfFoTSQ
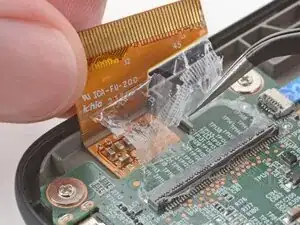
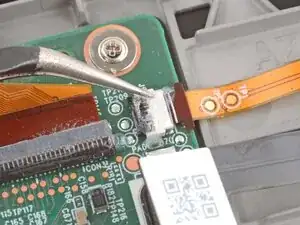
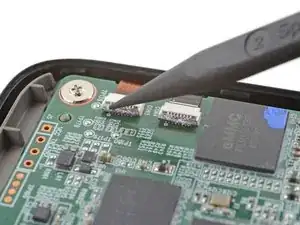
    • Use the tip of a spudger to scrape the coating along the ZIF connectors' black locking tabs—enough so you can grab clumps of it with pointed tweezers.

    • Use pointed tweezers to peel off the coating around the black locking tabs and their hinges on the ZIF connector.

    • If the coating becomes too brittle and hard to peel off, reheat the connectors and try again.

    • This is a meticulous process! Failure to remove enough of the coating could damage the locking tab during disconnection, so take your time!

  11. sAoSoFAmLxeveJpO
    sAoSoFAmLxeveJpO
    26h1mxZyjej3bOji
    KvEtCedNhRnDBnon
    • Use the point of a spudger to lift up the locking tabs on the ZIF connectors.

    • The locking tabs should be nearly vertical when unlocked. If not, remove more coating until the tabs can move freely.

  12. 5iKy6PC14MvrHddu
    • Apply a heated iOpener to the digitizer cable ZIF connectors for 90 seconds to soften the coating.

    • Alternatively, you can use a hair dryer or a heat gun for 30 seconds.

  13. UELbdkWGUYyWymyG
    UELbdkWGUYyWymyG
    G52VM3ptB2lEmZum
    XrVnDQaAJ2nRItPJ
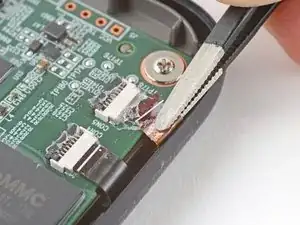
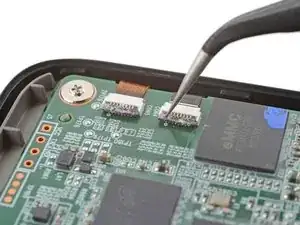
    • Slide one arm of a pair of pointed tweezers underneath the cables to separate the coating securing them to the motherboard.

    • You only need to separate enough coating so you can grip the cables with blunt nose tweezers.

  14. DAJBupISMixnTqQU
    DAJBupISMixnTqQU
    5dPFxM4KGRDeUFGE
    2SKfQtUtGuDtiCWf
    • Because of the awkward angle, this step requires some patience to avoid tearing the cables. Work slowly and apply heat regularly.

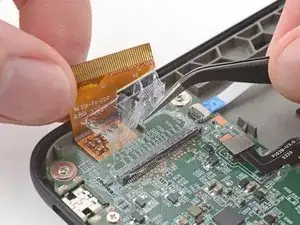
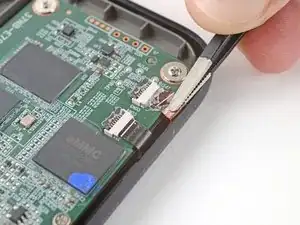
    • Use blunt nose tweezers to pull the cables away from their ZIF connectors slowly and steadily at a level angle to separate the coating.

    • Gripping the tweezers closer to the tip can help get a tighter hold on the cables.

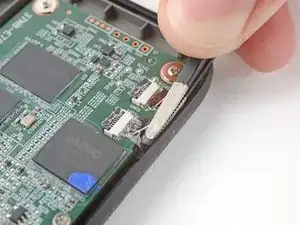
    • Keep pulling on the cables until they're completely disconnected.

    • During reassembly:

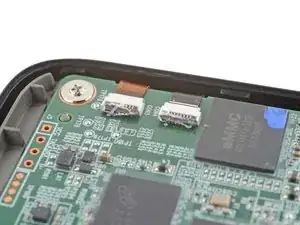
    • Inspect the ends of the cables and the ZIF connectors for any remaining coating that could prevent a good connection.

    • Peel off the coating, heating the cable and the ZIF connectors when the coating becomes too brittle.

    • It doesn't have to look pretty! You just need to remove enough coating to have the cables sit properly in their connectors.

  15. gACajbEcPfVWRZxy
    gACajbEcPfVWRZxy
    hOwq3GY6OEgIiANi
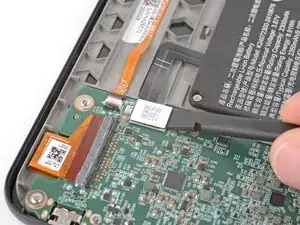
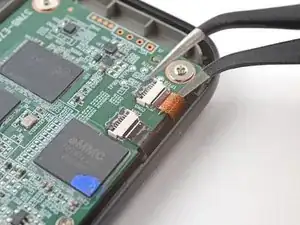
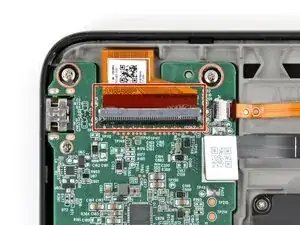
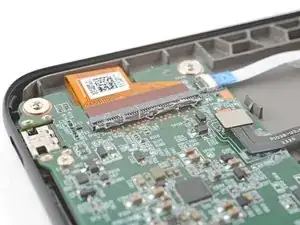
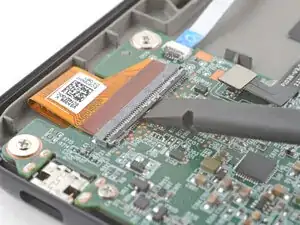
    • Apply a heated iOpener to the display cable ZIF connector for 90 seconds to soften the coating.

    • Alternatively, you can use a hair dryer or a heat gun for 30 seconds.

  16. UtVeqLH6AdAfTbVe
    UtVeqLH6AdAfTbVe
    Mmn1rkC6b5kYVQ11
    qNd6cgBrLNpgMjXu
    • The display cable ZIF connector is larger and requires a different procedure to disconnect properly.

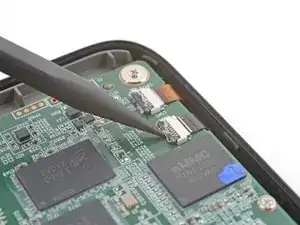
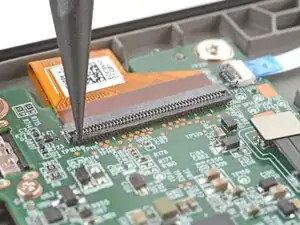
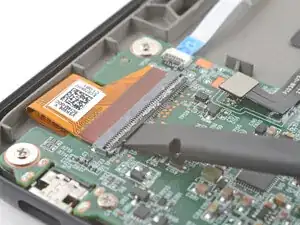
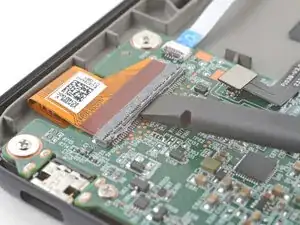
    • Use the tip of a spudger to scrape the coating along the ZIF connector's black locking tab—enough so you can grab clumps of it with pointed tweezers.

  17. 4KjrhswKDaeBeXQe
    4KjrhswKDaeBeXQe
    GjBifZ3nAinFqTHf
    GWLWM1OdKgFkxYlJ
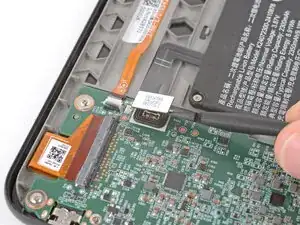
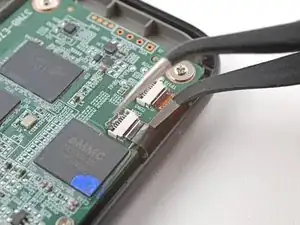
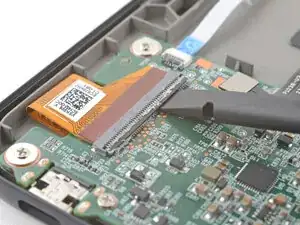
    • Use pointed tweezers to peel off the coating around the locking tab and its hinge on the ZIF connector.

    • If the coating becomes too brittle and hard to peel off, reheat the connector and try again.

    • This is a meticulous process! Failure to remove enough of the coating could damage the locking tab during disconnection, so take your time!

  18. QYovDlKDT466FnSm
    QYovDlKDT466FnSm
    IE3RJEt2m2p6nXL4
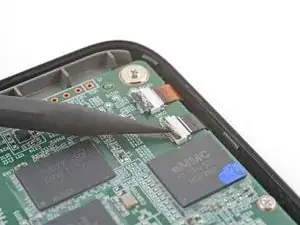
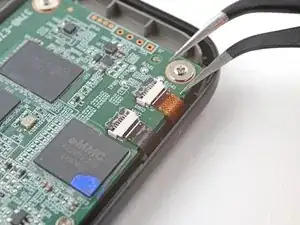
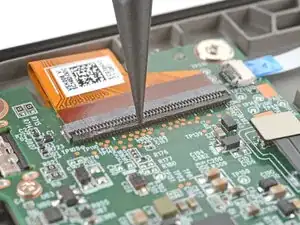
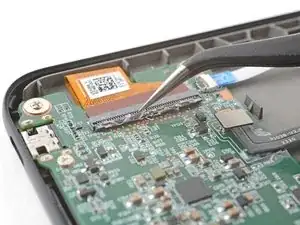
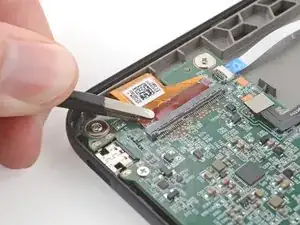
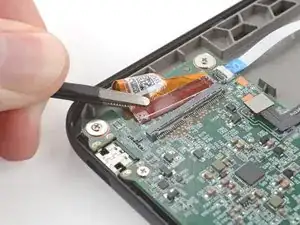
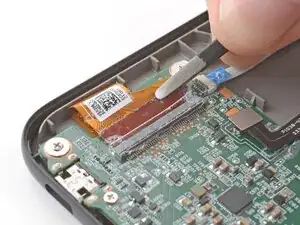
    • Use the flat end of a spudger to gently pry along the length of the locking tab to separate any remaining coating.

    • Don't pry hard at the corners of the locking tab to avoid snapping it.

  19. Ddaao21Gla6uQldQ
    Ddaao21Gla6uQldQ
    ZU3lILnbjsRquCFP
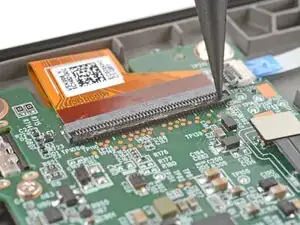
    • Insert the flat end of a spudger under the middle of the locking tab and lift to unlock it.

    • The locking tab should be nearly vertical when unlocked. If not, remove more coating until the tab can move freely.

  20. IhZLSeZkwP23JubO
    IhZLSeZkwP23JubO
    ZxOQ6arobUvXOt6T
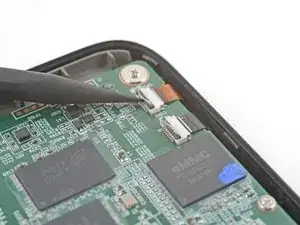
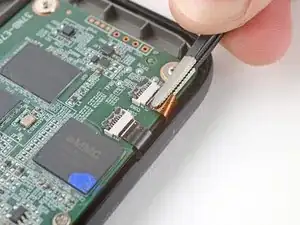
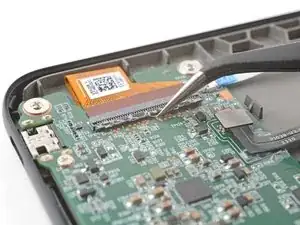
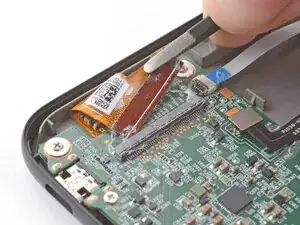
    • Use blunt nose tweezers to grip the corner of the display cable closest to the charging port.

    • Pull the cable away from the ZIF connector slowly and steadily at a level angle to separate the coating at the corner.

    • If you're having trouble, try rocking the cable side-to-side while pulling.

    • Gripping the tweezers closer to the tip can help with getting a tighter hold on the cable.

  21. THhKF1Yu1nKODlMn
    THhKF1Yu1nKODlMn
    MaG5KhnODSgrwxiR
    VAvZDGNvOXXmOVcX
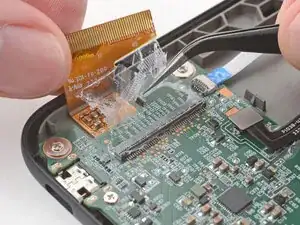
    • Repeat the previous step for the other corner until the entire cable is disconnected.

    • Lift up the cable and peel off any remaining coating holding it to the motherboard.

    • During reassembly:

    • Inspect the ends of the cable and the ZIF connectors for any remaining coating that could prevent a good connection.

    • Peel off the coating, heating the cable and the ZIF connector when the coating becomes too brittle.

    • It doesn't have to look pretty! You just need to remove enough coating to have the cable sit properly in the connector.

Spencer Day

Membro desde: 14/09/22

165254 Reputação

0 comentários