Introdução
Having charging problems? It could be time for a new battery. Use this guide to replace the battery in your Kindle Paperwhite 1st Generation.
Ferramentas
-
-
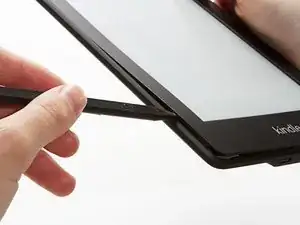
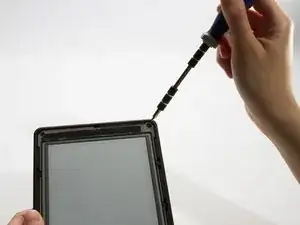
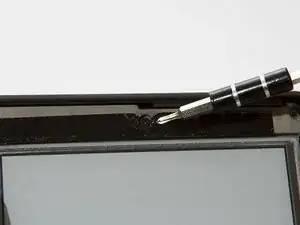
Using a spudger or plastic opening tool, gently pry the bezel from the screen. It is easier to start in the corners and work your way around the bezel.
-
-
-
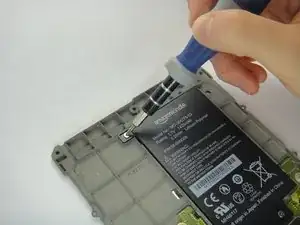
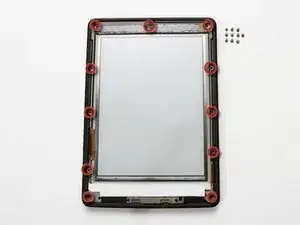
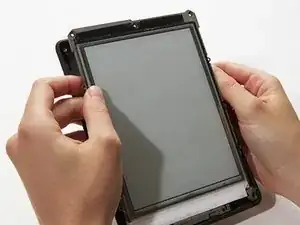
Turn over the midframe to locate the battery.
-
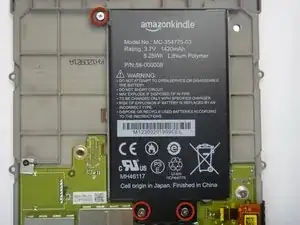
Remove the three Phillips 3.0 mm screws securing the battery to the midframe.
-


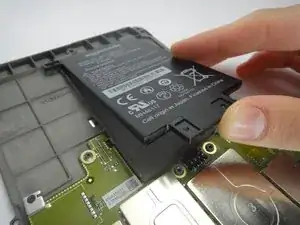
To reassemble your device, follow these instructions in reverse order.
14 comentários
You may not need a new battery. I had the issue of the paperwhite re-indexing ALL of my content and getting snagged on a corrupted book toward the end of the process. This looks for all the world like the battery is dying.
Backup your kindle devices folder to a computer.
Delete everything but the book you are reading.
Delete the hidden indexes in the system folder.
Restart the kindle.
Now it should charge to 100% - and last weeks instead of hours.
(search for kindle paperwhite indexing battery re-indexing)
If you have a corrupted book how do you tell which one it is?
The spudger was no help what so ever as it was too thick to get between the edge. I finally had to use a exacto knife. And the #2 screwdriver they recommended was laughably large! I ended up using a screwdriver I got with a kit to tighten your glasses. On the battery (which iFixit doesn't sell but recommended from another seller) the last two digits were different (03 rather than 05) and it didn't work. I don't know if that's why, or if something else is wrong. The only thing that was useful was the video - at least I knew what to do and the order to do it. Too bad none of it worked. Guess I'm getting a new Paperwhite Kindle!
pjparke -
The battery on my Kindle Paperwhite 1st Gen died earlier this month. I ordered a replacement battery online, opened my Paperwhite using the instructions on this page, replaced the battery and yeehaa, it works again. Thank you!!!!
I found it easier to start this step off with one of the Opening Picks found in the iOpener pack.
NathanF -
The glue on bezel started to peel the sticky back protective layer off the screen for me - managed to smooth it back down, although now have an unsightly crease. I would try to hold the screen down when you pull the bezel off to stop damaging the screen.
Callum Rogers -
This step is most time consuming. Take you time and try not to scratch the bezel :)
Oleksii -
Couldn't get the plastic spudger under the edge of the bezel. A right-angle X-Acto blade was a satisfactory tool here.
dbrick -
The glue was VERY difficult...I used a trick, from taking apart phones, and used a hair drier to loosen up the glue...worked like a charm.
billkaris -
The glue on our older Kindles was VERY hard to get past. I ended up using flat-broad metal spudger to release the bezel, after many attempts to use more standard plastic ones (both pointed and broad tipped).
pgrey -
I tried spudgers and plastic opening tools and picks. Couldn't get any of them into the groove. I finally used my iSesamo (bought before I knew of iFixit) and that got me in. The glue was VERY heavy and it took a lot of work separating the bezel, but finally got it off. I probably should have tried the hair dryer trick someone mentioned, but I was afraid I'd melt something. Anyway, once that time-consuming part was done, it was smooth sailing the rest of the way. Thanks for the excellent repair guide and all the previous comments!
Discon -