Introdução

If you're trying to replace the motherboard, or main board, of your Insignia NS-24ER310NA17 TV this guide will walk you through the process step by step. The motherboard is the main component that controls the video, audio, and power of a TV. If you are seeing issues like lines on the display or half the screen going black, a faulty motherboard is often the problem.

Before you begin, make sure to unplug the TV and let it sit for a few minutes to allow any remaining electricity to discharge. This will help prevent damage to the internal components of the TV. Work in a clean, static-free area (such as on an anti-static mat) and have a small Phillips-head screwdriver ready. Make sure to handle the new motherboard carefully to avoid damage. Once you get the old motherboard out, you can install the new one by following these steps in reverse.

  1. 3QDjoaKT3JU1hvku
    3QDjoaKT3JU1hvku
    AHA3TxX4V6Duc3PJ
    41G3JgpZTPjI43UU
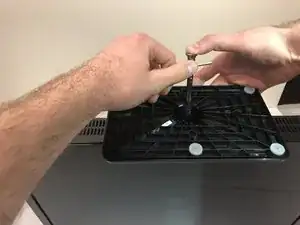
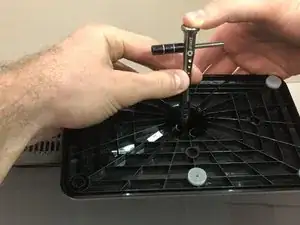
    • Rest the TV on its top edge so you have access to the base.

    • Use a Phillips #2 screwdriver to remove the four screws on the bottom of the base.

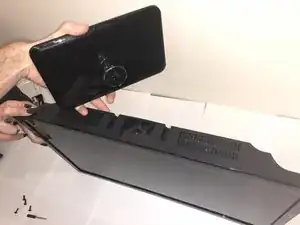
    • Remove the base from the frame.

  2. 6SPZO1FtKxaPddDV
    6SPZO1FtKxaPddDV
    foIimx5fFWLi3Htx
    G22xkKKFjFUQA6Hp
    • Lay the TV face down.

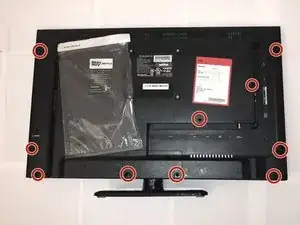
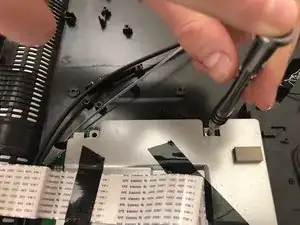
    • Use the Phillips #00 screwdriver to remove all of the screws from the the back of the TV.

  3. bUnMoJ1PmekrGbaJ
    • Stand the TV on its top edge.

    • Gently pry apart the front and back of the TV.

    • The two halves should pull apart easily since there are no longer any screws holding it together.

    • The two halves will still be connected by wires and cables that are taped to each side. Do not pull on these. We will remove them in the next step.

  4. SFFSpvLB5cZhWfEg
    SFFSpvLB5cZhWfEg
    hECYwNdZDuDkMFbT
    ATKoc1TCnQ5INiKj
    • As mentioned in the previous step, there are wires still connecting the two halves.

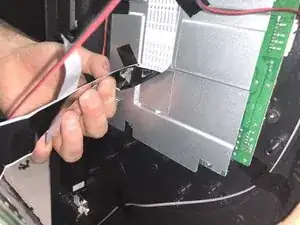
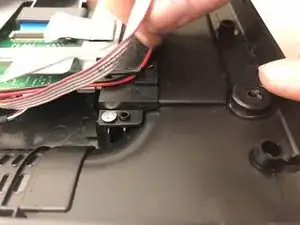
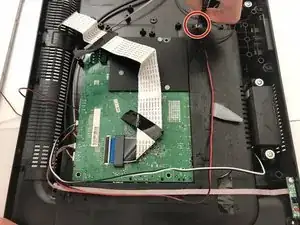
    • Remove all the pieces of tape to detach the wires from both sides.

    • You want to gently peel the tape off, without pulling on the wires.

  5. NNUMKqaVSkcPyoby
    • Spread apart your TV the rest of the way, but do not disconnect any of the wires.

    • You should have a clear view of the inside on both sides.

  6. wXN1SXUrTUVLTZp6
    • Remove all strips of tape attached to the silver steel rectangular piece.

  7. lvGuoRgEZIYEs5lt
    • Pull the red wire out from under the black plastic clip.

  8. TWJ3UIBVMLj1wQwR
    TWJ3UIBVMLj1wQwR
    xFcjk45RBWP5hpQr
    • Unscrew the four screws surrounding the steel rectangle with a Phillips 00 Screwdriver.

  9. a1UaRcHaBJMZyu5R
    • Carefully lift the rectangular piece.

  10. RQbwU2USXgFuMgUh
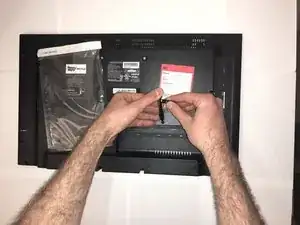
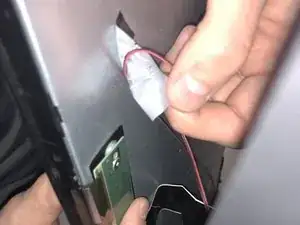
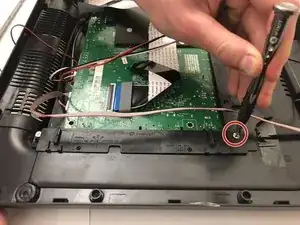
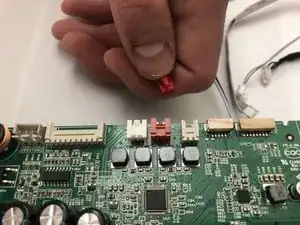
    • The rectangular piece will still be attached to the motherboard beneath it with a strip of tape. Remove this strip of tape.

  11. xcWNLuutYyptrpOf
    xcWNLuutYyptrpOf
    cmYSmR4nnYcqAoyj
    • Use a Phillips #00 screwdriver to remove the two screws on both sides of the motherboard.

  12. eJrGsJRlAVBMXUKw
    • Carefully lift the motherboard away from the television.

    • Keep in mind that the motherboard is still attached by several thin wires and should not be tugged.

  13. c1wLokabICmLftVW
    c1wLokabICmLftVW
    WqIcKLghDPCIIyTh
    M1tFCLxv4IjeFxJt
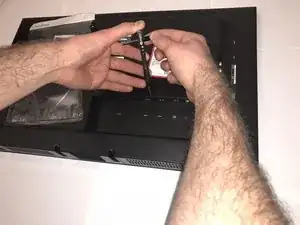
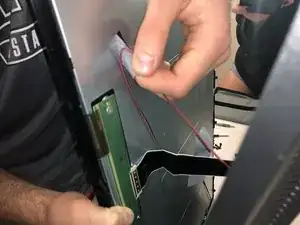
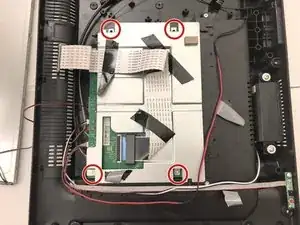
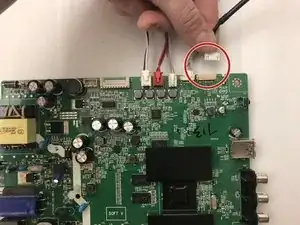
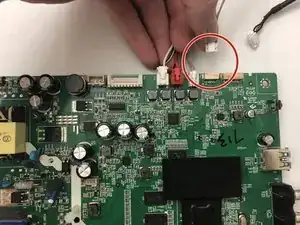
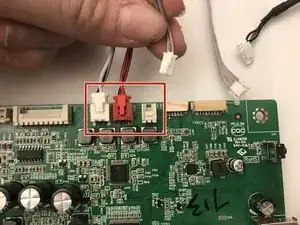
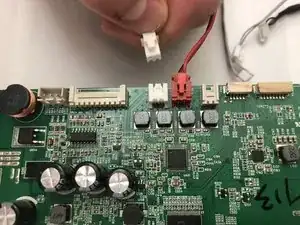
    • There are 5 wires attached to the motherboard. Remove the two thicker white wires to the right of the red wire.

  14. G6hv3Rxtva3gZMOK
    G6hv3Rxtva3gZMOK
    xnrGb2vcbnKIcOVK
    s2mSgKZcjdILmxuO
    • Remove the remaining three wires from the mainboard.

    Remember which wires go to where!

    Joshua Weiss -

  15. Y521RopVhO5wBKm6
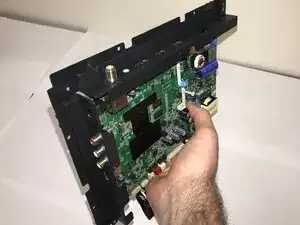
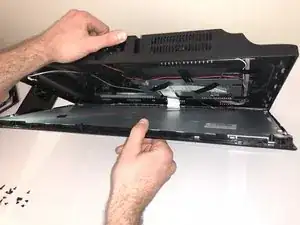
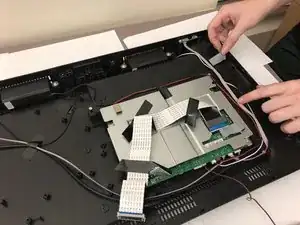
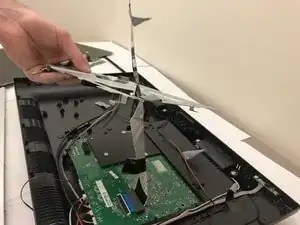
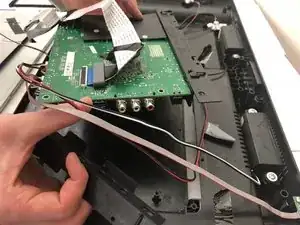
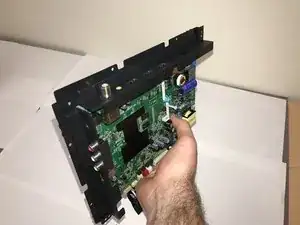
    • Carefully remove the mainboard from the television.

    • You have now successfully removed the mainboard.

Conclusão

To reassemble your device, follow these instructions in reverse order. Take your e-waste to an R2 or e-Stewards certified recycler.

Maggie Kuntz

Membro desde: 23/01/18

301 Reputação

2 comentários

Did all said including main board replace still no picture

d k -

Mi inglés no es muy bueno así que si se pueden las indicaciones en español sería excelente. Buen día y gracias

Joel Esquivel -