Introdução

If your Lenovo IdeaPad L340-15API overheats quickly, runs slowly, makes loud grinding or whirring noises, or experiences sudden shutdowns or restarts, the cooling fan may need to be replaced.

This guide walks you through replacing the fan in a Lenovo IdeaPad L340-15API, which helps regulate the device’s internal temperature and prevent overheating.

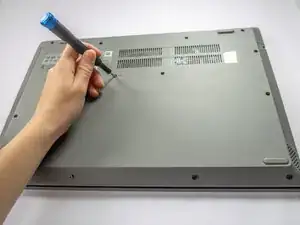
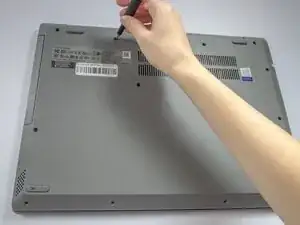
Before you begin the repair, power off the laptop and disconnect the charging adapter and any external peripherals.

  1. LtK1YEXJHsQrNsF1
    LtK1YEXJHsQrNsF1
    acPOKi63BoBUauYb
    • Before beginning the repair, make sure that the device is fully powered off.

    • Turn the laptop over so the bottom cover is facing up.

    • The small screw hole near the center of the case, marked with a tiny DVD icon and an arrow, secures the optical drive.

  2. kFgULSNlSMDRKqYX
    kFgULSNlSMDRKqYX
    2CRQje3a2M6vYkn1
    • Use a Phillips #1 screwdriver to remove the 7.5 mm screw securing the optical drive.

    • Place the screw down safely in a container/magnet strip where it will not get lost while you are working. These screws are very small and easily misplaced.

  3. VJqbKgaQ2SRWTpmv
    VJqbKgaQ2SRWTpmv
    VZBGmK1TEdBhKVQL
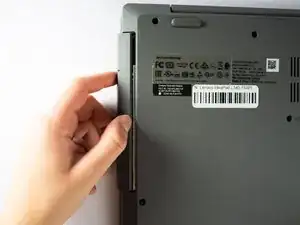
    • Place your thumb at the seam between the optical drive and the device.

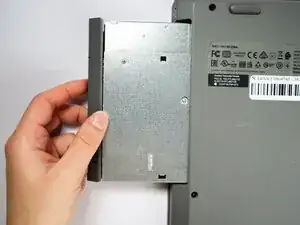
    • Gently pull the component straight out from the device, taking care not to pull at an angle.

  4. kQsKKUGfDyJ4p1vI
    kQsKKUGfDyJ4p1vI
    JxtT6F1FEEqYHwdF
    • Use a Phillips #1 screwdriver to remove the twelve 7.5 mm screws from the back cover.

  5. UFbkylKbyefVAMZq
    UFbkylKbyefVAMZq
    bxYPKbTsthQSdIWh
    JHBqLXGvsrULvg4B
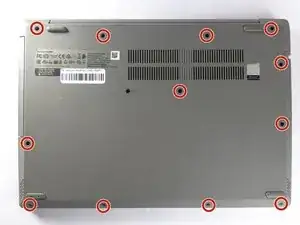
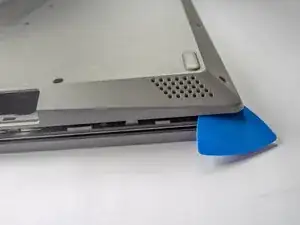
    • Insert a plastic opening pick in the back left corner and wedge the panel open.

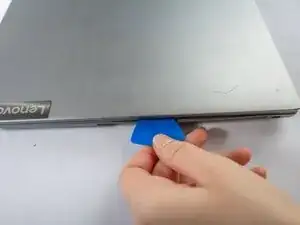
    • Slide the pick around the edge of the laptop to release the clips as you lift the panel.

    • If the opening pick isn’t working, use the iFixit opening tool to gain more leverage.

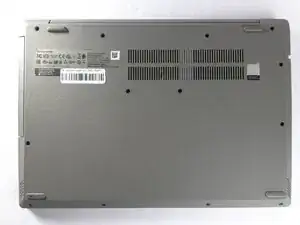
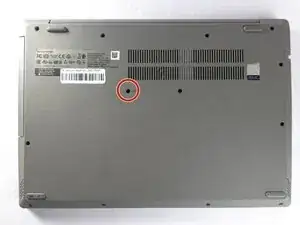
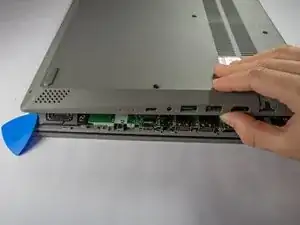
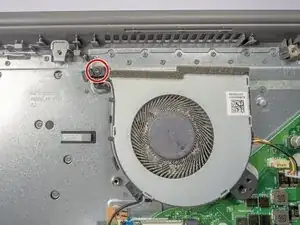
    • Remove the bottom cover.

  6. MYwmFcoYDNTdZFVm
    MYwmFcoYDNTdZFVm
    ueErVcCfFwTXN6Ta
    • Use the Phillips #1 screwdriver to remove the five 6.5 mm screws securing the battery.

    • Use a container/magnet strip to store the screws while working.

  7. SVDdX1kDXevb1GVX
    SVDdX1kDXevb1GVX
    T2nRIVYCpA1ViJPe
    GViQ3WFdZUDjPQ24
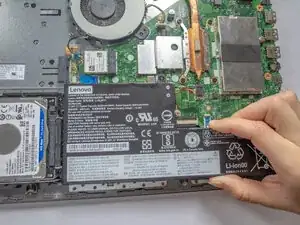
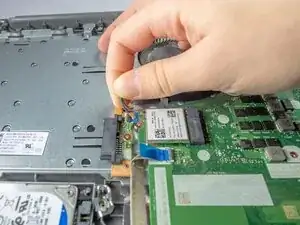
    • Use the wide end of a spudger to push the connector tab, sliding the battery connector out of its socket.

    • It may take a lot of force to disconnect the cable. Go slowly, and don't pull on the cables.

  8. puUEuDf1UPCA4iXO
    • Remove the battery from the laptop.

  9. dZLaHQuxfK6pFXLB
    dZLaHQuxfK6pFXLB
    jEQqMssmJvGBYdAI
    luXRvAipNF64ZSWp
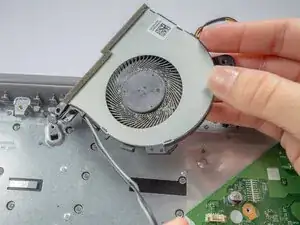
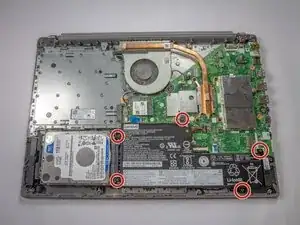
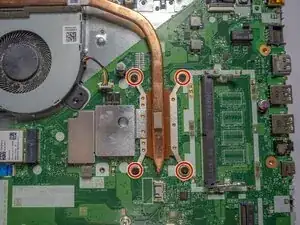
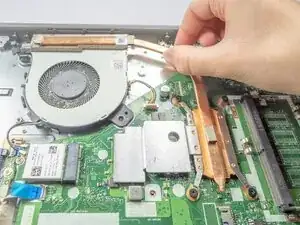
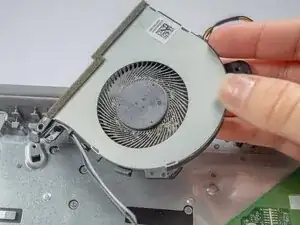
    • Before you remove the fan, you need to remove the heatsink. The heatsink is the long copper piece connected to the fan.

    • Use a Phillips #1 screwdriver to loosen the four captive screws holding the heatsink in place.

    • The screws will stay connected to the heatsink but separate from the motherboard.

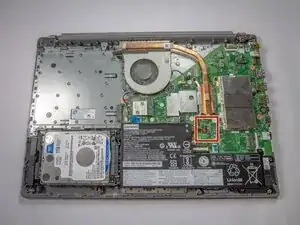
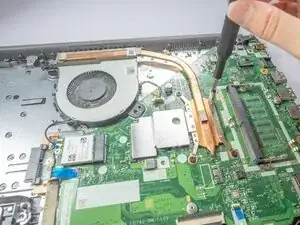
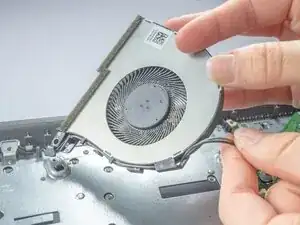
    • Gently lift the heatsink and set it aside for reassembly later.

  10. LdkZYMdfSHUGNmHL
    LdkZYMdfSHUGNmHL
    LOvA5xWAWMuFFTxW
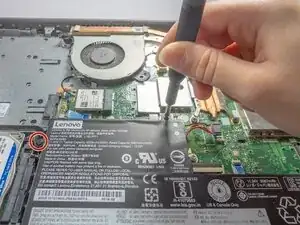
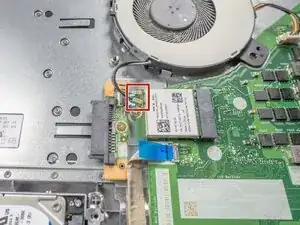
    • Slide a thin, ESD-safe pry tool or angled tweezers under the metal neck of the connectors (as close to the head as possible) and lift straight up from the board to disconnect the black and gray coaxial cables from the Wi-Fi chip.

    • Always lift the connector straight up. Prying at an angle can break the socket off the board and permanently damage the motherboard.

    • Use tweezers to hold the connector in place over its socket and gently press down with your finger or a spudger—the connector should "snap" into place. If you're having trouble, reposition the head and try again.

  11. xW5vBZlWGKrLXO4C
    xW5vBZlWGKrLXO4C
    rHODJKmMyARklrHF
    GFTf6SZc3QC41oK1
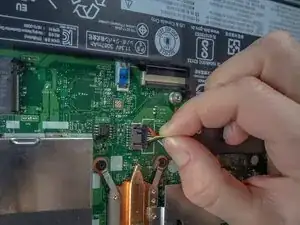
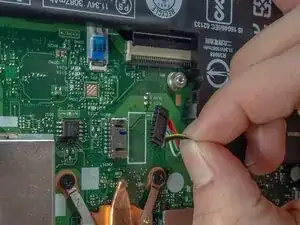
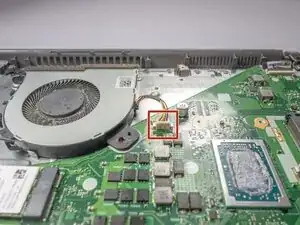
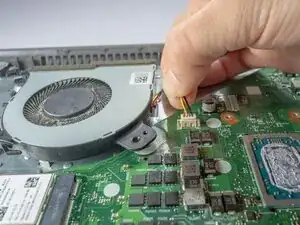
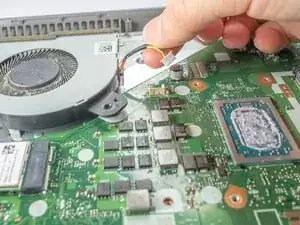
    • Use the point of a spudger to push on alternating sides of the fan connector to "walk" it out of its socket.

    • It may take a lot of alternating before the connector comes out. Be patient, and don't pull on the cables.

    • If that doesn't work, use a pair of tweezers to firmly grip the sides of the connector and pull straight away from the socket.

  12. CattwOObgf5RmNdA
    CattwOObgf5RmNdA
    oeZwumFxJDIKnolV
    • Use a Phillips #1 screwdriver to remove the 6.5 mm screw holding the fan in place.

  13. TgHrRnPad4mFRxyX
    TgHrRnPad4mFRxyX
    3xGWOHhpZqN3kAS5
    agNoArLmvcMOFk6b
    • The fan should be loose but it still has the Wi-Fi cables connected to it.

    • Detach the cables from the cable clips surrounding the fan.

    • The fan should be completely disconnected from the device.

Conclusão

To reassemble your device, follow these instructions in reverse order. Take your e-waste to an R2 or e-Stewards certified recycler.

Jasmyn

Membro desde: 17/10/25

205 Reputação

0 comentários