Introdução

The battery is a critical component that keeps your device powered. It supplies energy to all parts of the laptop and must hold a charge long enough to make the device portable.

If your laptop can’t hold a charge or must remain plugged in to stay on, the battery is likely the cause.

This guide shows how to replace the battery in a Lenovo IdeaPad L340-15API.

Before you begin, power off the laptop and disconnect the charging adapter and any external peripherals.

  1. LtK1YEXJHsQrNsF1
    LtK1YEXJHsQrNsF1
    acPOKi63BoBUauYb
    • Before beginning the repair, make sure that the device is fully powered off.

    • Turn the laptop over so the bottom cover is facing up.

    • The small screw hole near the center of the case, marked with a tiny DVD icon and an arrow, secures the optical drive.

  2. kFgULSNlSMDRKqYX
    kFgULSNlSMDRKqYX
    2CRQje3a2M6vYkn1
    • Use a Phillips #1 screwdriver to remove the 7.5 mm screw securing the optical drive.

    • Place the screw down safely in a container/magnet strip where it will not get lost while you are working. These screws are very small and easily misplaced.

  3. VJqbKgaQ2SRWTpmv
    VJqbKgaQ2SRWTpmv
    VZBGmK1TEdBhKVQL
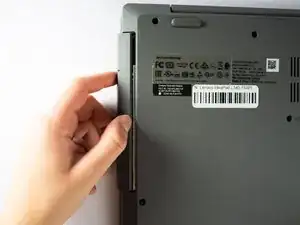
    • Place your thumb at the seam between the optical drive and the device.

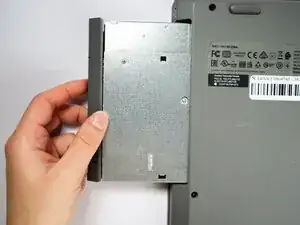
    • Gently pull the component straight out from the device, taking care not to pull at an angle.

  4. kQsKKUGfDyJ4p1vI
    kQsKKUGfDyJ4p1vI
    JxtT6F1FEEqYHwdF
    • Use a Phillips #1 screwdriver to remove the twelve 7.5 mm screws from the back cover.

  5. UFbkylKbyefVAMZq
    UFbkylKbyefVAMZq
    bxYPKbTsthQSdIWh
    JHBqLXGvsrULvg4B
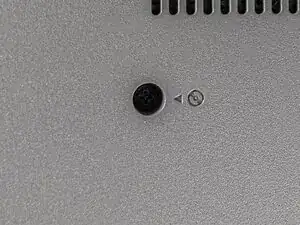
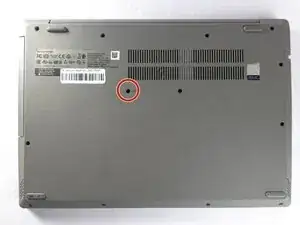
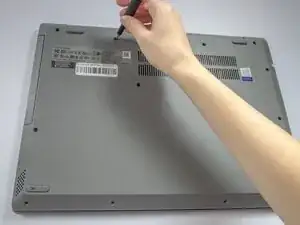
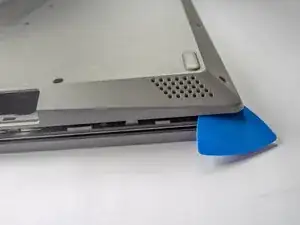
    • Insert a plastic opening pick in the back left corner and wedge the panel open.

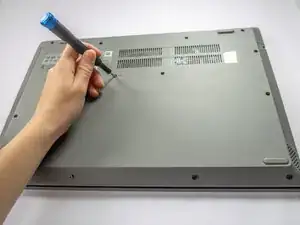
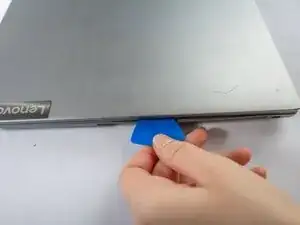
    • Slide the pick around the edge of the laptop to release the clips as you lift the panel.

    • If the opening pick isn’t working, use the iFixit opening tool to gain more leverage.

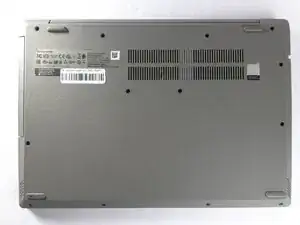
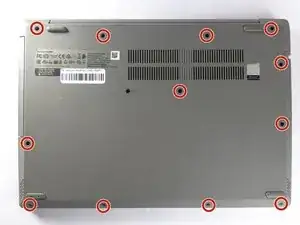
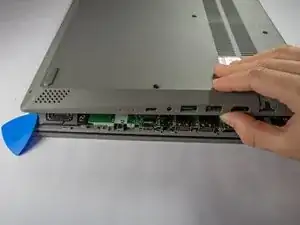
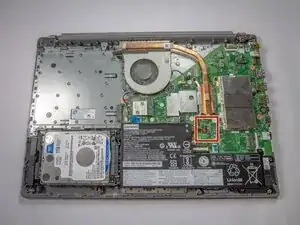
    • Remove the bottom cover.

  6. MYwmFcoYDNTdZFVm
    MYwmFcoYDNTdZFVm
    ueErVcCfFwTXN6Ta
    • Use the Phillips #1 screwdriver to remove the five 6.5 mm screws securing the battery.

    • Use a container/magnet strip to store the screws while working.

  7. SVDdX1kDXevb1GVX
    SVDdX1kDXevb1GVX
    T2nRIVYCpA1ViJPe
    GViQ3WFdZUDjPQ24
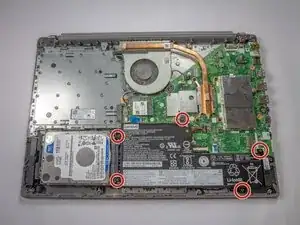
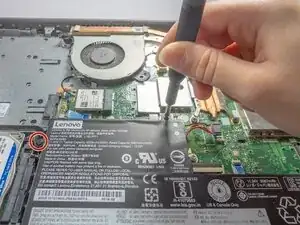
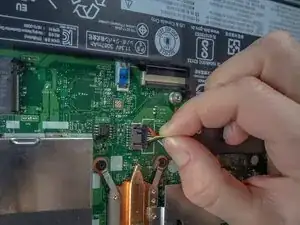
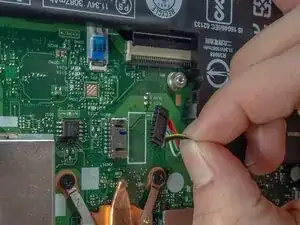
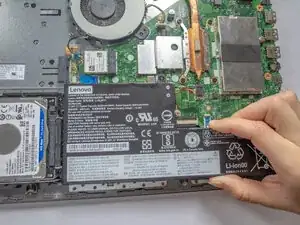
    • Use the wide end of a spudger to push the connector tab, sliding the battery connector out of its socket.

    • It may take a lot of force to disconnect the cable. Go slowly, and don't pull on the cables.

  8. puUEuDf1UPCA4iXO
    • Remove the battery from the laptop.

Conclusão

To reassemble your device, follow these instructions in reverse order. Take your e-waste to an R2 or e-Stewards certified recycler.

For optimal performance, calibrate your newly installed battery after completing this guide.

Ian

Membro desde: 15/10/25

347 Reputação

0 comentários