Introdução

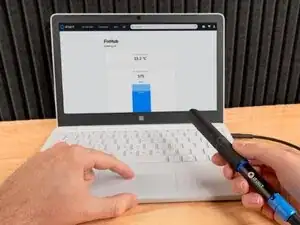
Follow this guide to adjust the settings on your FixHub Smart Soldering Iron using a computer. All changes made will be saved to the iron's onboard storage.

  1. Eac5gYDHP4H4SexD
    • To use the FixHub Web Console, you need a browser with Web Serial enabled. We recommend Brave, Chrome, Edge, or Opera as they include this functionality enabled by default.

    • Firefox and Safari don't support Web Serial at this time.

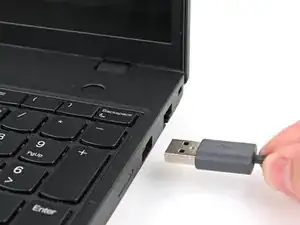
    • Plug the cable included with your iron or any USB cable that supports data transfer into your computer.

    • Navigate to iFixit.com/FixHub/console

    If using Linux, you will need to give yourself serial port permissions (as they are not granted by default).

    To do so, enter the following in your console (where <username> is your Linux username):

    sudo usermod -a -G dialout <username>

    You can verify that the permission was granted successfully with:

    groups <username>

    After that, reboot your PC.

    Credit to George Symeou on the iFixit forums for figuring this out, I just wanted to post it here for anyone who hit the same problem on Linux.

    HAWK_6155 -

  2. an4TEctQ6yHN6RZD
    an4TEctQ6yHN6RZD
    VIYH5KJKI5TSqMNW
    4fb3QKZXvrvMQjBJ
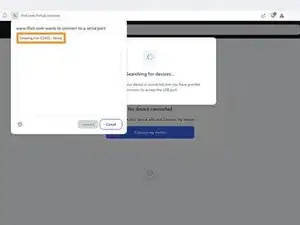
    • Click Connect my device.

    • Select your Smart Soldering Iron from the pop-up window asking you to connect a serial port.
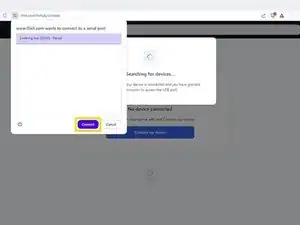
    • Click Connect.

  3. pSirnVvUjhXaSqYt
    • Once the FixHub Web Console opens, you'll see temperature settings, current status, and other information:

    • Current temperature shows the tip temperature in real time.

    • Set temperature allows you to change the iron's temperature with a slider.

    • Status reflects the current status of the iron.

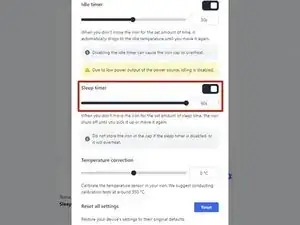
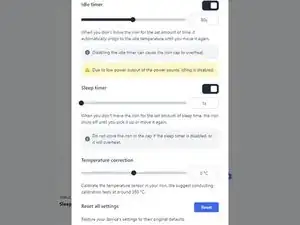
    • Settings allows you to change iron settings such as idle temperature and sleep timer.

    • Serial number shows the serial number of the connected iron.

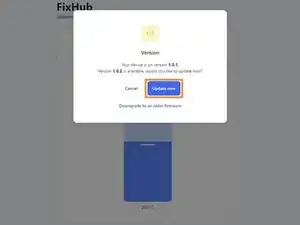
    • Version shows the firmware version of the connected iron.

  4. pyGm1bshgYmchNVL
    pyGm1bshgYmchNVL
    ihoXqQZKXsw4plVo
    GOsHiE2DDYsgb4Wf
    • Before using the FixHub Web Console, ensure your firmware is up to date.

    • Select the Version box.

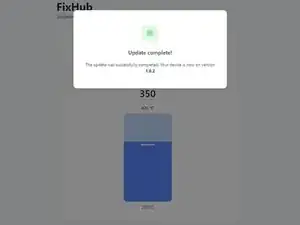
    • Click Update now and wait for the firmware update to complete. Don't disconnect your iron or close the window during the firmware update.

    • If something goes wrong, you can downgrade your firmware by repeating these steps and clicking Downgrade to an older firmware.

    I'm having issues with 1.0.4 , had to downgrade to 1.0.3

    Albert -

  5. PgYcN2PD4Jvd4gFM
    PgYcN2PD4Jvd4gFM
    1TdZxfHVAUQf6Grn
    BXSaGqsSLLJkDGHM
    • Drag the Set temperature slider to your desired temperature from 200 to 420 °C (395 to 790 °F).

  6. D4uUQlYGlcQEeHrG
    D4uUQlYGlcQEeHrG
    kLLTXEUUcsoRohxR
    • You can reset all settings back to default at any time.

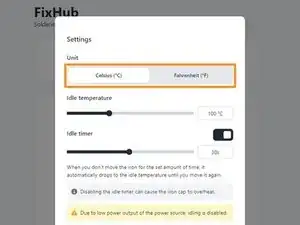
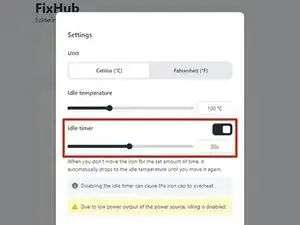
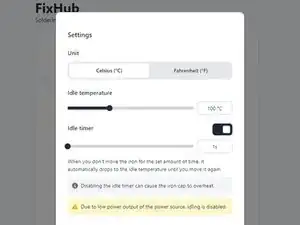
    • Click the Settings box.

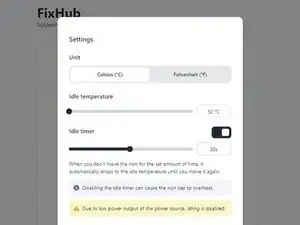
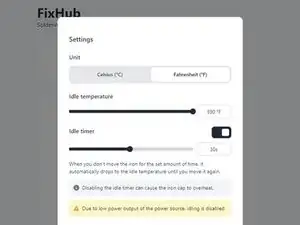
    • At the top of the Settings window, select your desired unit for temperature under the Unit tab.

  7. P1WXVvMRklREsFXd
    P1WXVvMRklREsFXd
    bKcmSI2XVr3oqVcI
    tPFI5BynNdio4odL
    • A lower idle temperature will extend tip life, while a higher one will resume working temperature more quickly.

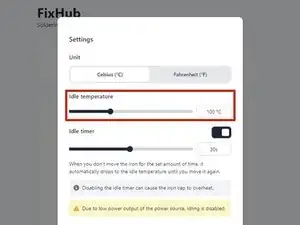
    • Drag the Idle temperature slider to your desired temperature from 50 to 200 °C (125 to 390 °F).

  8. uR2X5MDAbymbDg3b
    uR2X5MDAbymbDg3b
    sh6rmKUXsaIgJ5dA
    jIrcJZZ2ivXsPgHb
    • The idle timer can be disabled, but it's highly recommended to leave it enabled to prevent the iron cap from overheating and to extend tip life.

    • The idle timer setting adjusts how long the iron must be stationary before entering Idle Mode.

    • Drag the Idle timer slider to your desired time from 1s to 60s.

  9. 5oVUVISqpTaeDBwR
    5oVUVISqpTaeDBwR
    EVX3oy1PT4FO6jRg
    • The sleep timer can be disabled, but doing so will cause the iron cap to overheat and the tip to degrade rapidly.

    • Drag the Sleep timer slider to your desired time from 1s to 60s.

  10. Zo1aTkSrn3GWAjE4
    Zo1aTkSrn3GWAjE4
    EBKGmP4gWOXpd2DM
    XTCaejHu4ZL2QH5x
    • This setting lets you offset the temperature settings of your iron tips based on an external temperature sensor.

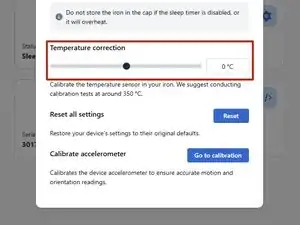
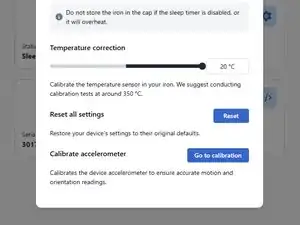
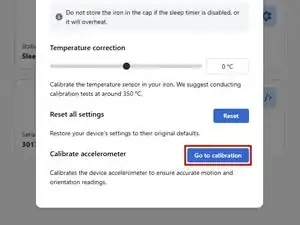
    • Drag the Temperature correction slider to the desired amount from -20 to +20 °C (-36 to 36 °F).

  11. TvyGRhASoQUmQjqI
    TvyGRhASoQUmQjqI
    OGkEQwTBHg1LTuOG
    • This setting lets you calibrate the accelerometer in the iron by setting it completely still.

    • Click Go to calibration to open the Accelerometer Calibration page.

    • Set the iron down on a stationary object with the power switch facing up. Click Calibrate to set the current magnitude (shown in the line graph on the page) as the iron's resting state.

Conclusão

That's it! You're ready to configure your Smart Soldering Iron to your individual preferences.

Still struggling? Try some basic troubleshooting, or ask our Answers community for help.

Nick Schultz

Membro desde: 24/03/24

45909 Reputação

0 comentários