Introdução
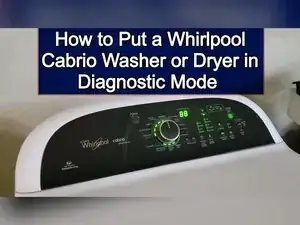
Use this guide to enter diagnostic mode on Whirlpool Cabrio washers and dryers with touchscreen-style controls, check stored error codes, run built-in tests, and clear codes to see what comes back. This procedure is intended for consoles that look like the newer Cabrio touchscreen layouts, and it may not work on older consoles with different button arrangements.
Ferramentas
-
-
Confirm the control panel matches the newer Cabrio touchscreen style before using this procedure.
-
-
-
Turn the machine off so the console is in standby mode and not showing a ready-to-start cycle screen.
-
Unplug the machine, wait a moment, and plug it back in to reset it into a state where diagnostics can be entered immediately.
-
-
-
Pick any three touch buttons that are not the Start button and not the Power button.
-
Write down the three buttons you chose and label them Button 1, Button 2, and Button 3.
-
-
-
Press Button 1, Button 2, and Button 3 in order.
-
Repeat the same sequence two more times so the full input is 1-2-3, 1-2-3, 1-2-3.
-
Complete all nine presses within 8 seconds.
-
-
-
Look at the display after the button sequence completes.
-
If everything is normal, the display shows 88.
-
If the machine has a problem stored, the display shows a numerical code instead of 88.
-
-
-
Use only Button 1, Button 2, and Button 3 for commands while in diagnostics.
-
Tap buttons momentarily to access the main tests and menus.
-
Use Button 1 to access the UI and control system tests that handle error codes and major features.
-
Use Button 2 to access installation diagnostics for testing components to see if something has failed.
-
Use Button 3 to cycle through stored error codes when more than one code is present.
-
-
-
Press Button 1 to enter the UI and control test area where error codes can be displayed.
-
If an error code is shown, press Button 3 to cycle through additional stored codes.
-
-
-
Operate the knobs and press console buttons during the UI test to verify the indicators and lights turn on and off.
-
Press the Start button to run built-in tests while still in the user interface test area.
-
Watch the display for a console identification code at the start of the test.
-
Open the door to stop the test, and look for a door switch code that indicates the type of dryer.
-
-
-
Return to the initial diagnostics menu, and re-enter the 1-2-3 button sequence if the machine requires it.
-
Press Button 2 to enter installation diagnostics.
-
Press the Start-Pause button to begin the installation diagnostics test run.
-
Read the results on the display when the test completes.
-
-
-
Use the tech manual for the specific machine to translate hex results and to confirm error code meanings.
-
Remove two or three screws from the back of the console, lift the console, and locate the manual inside.
-
-
-
Press the Power button twice to end diagnostic mode.
-
Press the Power button once or twice, or open the door, to exit remaining modes and return the machine to standby.
-
Keep a written record of any codes you saw, and use the model-specific tech manual to confirm code definitions and test interpretations. If diagnostics won’t start or the console won’t respond, the control board is a likely suspect.
