Introdução
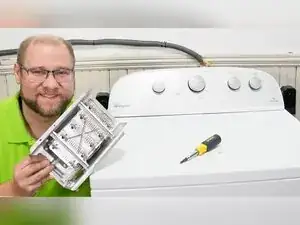
If a Whirlpool dryer runs but doesn’t heat, a failed heating element (often part number 279838) is a common cause. This guide shows how to safely access the heater area, inspect for burnt wires and broken coils, test the element and thermostat with a multimeter, interpret the readings, and repair a damaged wire connection if needed.
-
-
Use a 1/4 inch nut driver to remove the rear panel screws.
-
Remove the plastic cap if the steam port assembly is present.
-
-
-
Look on the right side of the dryer for the heating system components.
-
Locate the thermostat and the heating element assembly near the bottom of the heater housing.
-
-
-
Pull off one spade connector from the heating element to prevent false meter readings.
-
Use pliers to remove the spade connector if it’s too tight to pull by hand.
-
-
-
Cut away any blackened or damaged section of the wire.
-
Use a heavy-gauge splicing connector and a wire nut to reconnect the wire securely.
-
-
-
Set the multimeter to resistance (ohms) or continuity mode.
-
Touch one meter lead to one heating element terminal and the other lead to the other terminal.
-
-
-
Touch one meter lead to a top thermostat terminal and the other lead to the remaining element terminal.
-
-
-
Set the multimeter to continuity mode.
-
Touch one lead to a heating element spade terminal and tap the other lead on the element casing.
-
-
-
Remove the remaining connectors from the thermostat and the heating element housing.
-
Use a 1/4 inch nut driver to remove the two screws holding the heating element, with one screw on each side.
-
Pivot the heating element toward you, pivot it down, and slide it out of the housing.
-
-
-
Check the heater housing for charred dust and clean it before reinstalling a new or used element.
-
Inspect the entire coiled heating wire for breaks or places where the coil is physically separated.
-
-
-
Reinstall the thermostat using the mounting style used by the dryer model.
-
Use needle-nose pliers to slot the metal finger into the thermostat housing if your dryer uses a metal finger mount.
-
Make sure the welded connector is firmly slotted into the left-sided element connector for a solid connection.
-
-
-
Hook the heater canister into place using the two metal protrusions at the top as guides.
-
Insert the canister at a slight angle, then press up, wiggle, and rock it until it seats fully.
-
-
-
Reconnect all spade terminals to the correct thermostat and element terminals.
-
Reinstall the rear panel, plug the dryer back in, and run a cycle to confirm heating.
-
If the element reads 9 to 10 Ω and isn’t grounded, focus on burnt connectors, loose terminals, and other heat-system components. If the element is open (no reading), wildly out of range, visibly broken, or shows continuity to the casing, replace it and don’t use the dryer until the issue is fixed.
