Introdução
If a Whirlpool top-load washing machine won’t fill, fills very slowly, or leaks water into the tub when it shouldn’t, the water supply or the water inlet valve is often the cause. This guide shows how to verify water flow at the wall, clean the inlet filter covers (screens), check the valve for debris, test the solenoids with a multimeter, and replace the valve if needed. These machines commonly use either a three-solenoid or four-solenoid valve, which look similar but aren’t interchangeable.
-
-
Unplug the washing machine from the wall outlet.
-
Turn off the hot and cold water shutoff valves at the wall.
-
Place a towel and a bucket under the water hoses to catch spills.
-
-
-
Use slip-joint pliers to loosen the hot and cold hoses from the back of the washer.
-
Aim each hose into a bucket.
-
Turn the wall shutoff valves on and confirm that water flows strongly from both hoses.
-
Turn the wall shutoff valves off again after the test.
-
-
-
Look into the hot and cold valve inlets on the back of the washer for obstructions.
-
Use needle-nose pliers to pull the inlet filter covers straight out of the valve inlets.
-
Use a dental pick to hook and pull the covers if they’re locked in tightly.
-
Wash debris off the covers and remove any buildup that could block water flow.
-
Inspect inside the valve openings for dirt that may have bypassed the covers and lodged deeper in the valve.
-
-
-
Use a T20 Torx screwdriver or a 1/4 inch nut driver to remove the two top screws on the back of the console.
-
Set the screws aside so they don’t fall into the cabinet.
-
-
-
Release the hidden clips at the left and right front corners of the console to open it.
-
Press a thin plastic card into each corner seam to push the clip inward and pop the console loose.
-
Open the lid and press the clips from underneath the washer’s top edge using a flathead screwdriver or slip-joint pliers if the card can’t reach.
-
Rock the console slightly to confirm both sides have released.
-
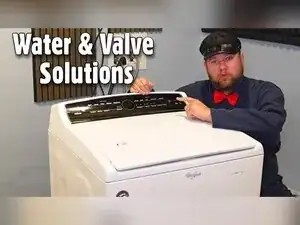
Roll the console forward to expose the control board and water inlet valve assembly.
-
-
-
Set a multimeter to resistance (ohms) with a 200 to 2000 ohm range, or use auto-ranging ohms mode.
-
Touch the meter probes to the exposed metal terminals for each solenoid coil on the valve.
-
Compare readings across all coils and look for a coil that reads far different from the others.
-
-
-
Run a diagnostic cycle or a fill request and check for about 120 VAC at the solenoids when the washer commands a fill.
-
Stop and unplug the washer if you don’t see expected voltage output during a commanded fill.
-
-
-
Use a 1/4 inch nut driver to remove the two screws securing the water inlet valve.
-
Disconnect the wire harnesses from the solenoid coils, starting with the far-side harness to access the harder screw.
-
Use a flathead screwdriver or needle-nose pliers to help press and pull stubborn harness connectors free.
-
Pull the valve assembly out of its rubber grommets once both screws are removed.
-
-
-
Count the solenoid coil packs on the valve to identify the correct replacement style.
-
Choose a three-solenoid valve if it has three green solenoid packs and three matching harness connections.
-
Choose a four-solenoid valve if it has four green solenoid packs and four matching harness connections.
-
-
-
Remove the old harness assembly from the old valve and install it onto the new valve.
-
Disconnect and reconnect the thermistor wire underneath the valve assembly using its small connector.
-
-
-
Press the valve into place so it seats into the rubber grommets.
-
Reinstall the two 1/4 inch screws to secure the valve.
-
Plug the valve harnesses back in and reconnect the harness to the control board.
-
Turn on the water supply, then run a fill test before reinstalling the console so you can confirm the repair.
-
-
-
Roll the console back into position and snap both clips fully into place.
-
Reinstall the two rear console screws.
-
Reconnect the hot and cold hoses, then turn the wall shutoff valves on and check for leaks.
-
Run a normal fill to confirm the washer fills correctly and that the tub doesn’t slowly fill when the washer is off.
-
Most no-fill and slow-fill problems come from a closed wall valve, a restricted hose, or clogged inlet filter covers. If the tub fills when the washer is off, the inlet valve is often sticking open internally, and replacement is a common fix. After any service, double-check hose connections for drips, and keep the area dry so you can spot leaks quickly.
