Introdução
Water in the crisper drawers and heavy frost or an “ice ball” behind the evaporator cover are often linked in Samsung bottom-freezer refrigerators. This guide shows how to access the evaporator area, install the Samsung drain kit (DA82-01415A), add a secondary defrost heater to prevent the ice ball from returning, and verify operation so the leak and icing don’t come back.
Peças
-
-
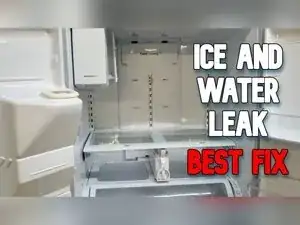
Look for water collecting in the crisper drawers and ice building on the air ducts or behind the evaporator cover.
-
Plan to address both the drain system and the upper-evaporator icing, because these problems commonly occur together.
-
-
-
Remove the shelves that block access to the evaporator cover.
-
Press in the two retention tabs at the top of the water filter housing.
-
Pull up on the crisper drawer shelf to remove it.
-
-
-
Use a Phillips screwdriver to remove the four to five screws securing the evaporator cover.
-
Remove any plastic screw covers hiding screws on the metal shelving bracket.
-
Pull the evaporator cover forward, and expect resistance if ice is stuck behind it.
-
Disconnect the two wire clusters on the right side by releasing their small retention clips with a small screwdriver or fingers.
-
Leave the defrost heater wires connected unless you need the extra slack for the heater splice later.
-
-
-
Check for a large ball of ice near the top of the evaporator area.
-
Check whether ice has seized the evaporator fan, because a stuck fan can stop airflow and worsen icing.
-
-
-
Use a Phillips screwdriver to remove the eight to 10 screws holding the rear cover panel on the refrigerator.
-
Twist and pull down to remove the old rubber drain tubes.
-
Clean the condenser coils while the rear cover is off.
-
Seat the new drain tubes into the drain pan indentations on the bottom side first.
-
Insert the top of each new drain tube into the plastic housing on the refrigerator.
-
Reinstall the rear cover panel.
-
-
-
Use a flathead screwdriver or a putty knife to slowly work the thin metal drain tray out of its plastic housing.
-
Locate the four locking metal tabs on the back of the drain tray that hold it to the evaporator coil housing.
-
Use needle-nose pliers, a flathead screwdriver, or fingers to bend the tabs back toward the rear of the refrigerator to unlock the tray.
-
Separate the drain tray from the evaporator coil housing.
-
-
-
Dry the drain tray before sticking on the foam-backed foil pieces from the drain kit.
-
Peel off the paper backing to expose the adhesive on each foam strip.
-
Stick the two smaller strips vertically about a third of the way in from each side, roughly centered on the tray.
-
Stick the larger piece starting at the bottom of the tray and working upward, keeping the center drain hole aligned.
-
Reattach the drain tray to the evaporator coil housing, and bend the locking tabs back into place to secure it.
-
-
-
Use wire cutters to cut and remove the old thermal probe from the defrost heater.
-
Slide the new larger thermal probe onto the defrost heater.
-
Route the metal tip of the probe into the defroster hole.
-
Use needle-nose pliers to crimp the probe’s metal fingers onto the heater so the probe can’t move.
-
-
-
Insert the refrigerator defrost heater wire into the displacement connector side that allows the whole wire to pass through.
-
Insert the secondary heater wire into the displacement connector side with the closed end.
-
Use locking pliers or slip-joint pliers to clamp the connector’s metal blade fully down so it cuts into both wires.
-
Close the blue flap on the connector to help seal it and prevent the connection from backing out.
-
Seal the connector with silicone grease to keep moisture from ruining the connection if the connector isn’t pre-greased.
-
-
-
Use heat-resistant cable ties to mount the heater to the aluminum and copper line at the top of the evaporator area.
-
Contour the heater around the area where the ice ball typically forms, covering most of the copper tube.
-
Trim the excess from the cable ties after the heater is secured.
-
Add cable ties around the displacement connectors to keep them from opening, and add a tie below the splice as strain relief.
-
Reinsert the wires into the defrost heater wire harness, and bundle excess wire with cable ties so it stays out of the way.
-
-
-
Move the evaporator cover aside, keep the fan and thermistor connectors plugged in, and restore power for testing.
-
In forced defrost, verify the main bottom heater heats strongly and the new upper heater warms the top area.
-
If frosting returns after a few days, recheck the displacement connectors and fully clamp the metal blade down, because a loose clamp can prevent heating.
-
-
-
Use an alternate approach if you aren’t comfortable splicing wires by applying additional Mylar foam pieces around the copper refrigerant line.
-
-
-
Plug in the thermistor and fan connections behind the cover in the top left corner.
-
Tuck all wiring fully into the evaporator housing so the cover fits snugly despite the added heater wiring.
-
Reinstall the evaporator cover and its four to five screws.
-
Reinstall the crisper drawer shelf and any other shelves you removed.
-
If water still leaks into the drawers, recheck that the new drain probe’s metal tip is routed into the defroster hole and that the rear drain tubes are fully seated at both ends. If heavy frost or an ice ball returns, focus on the secondary heater splice quality, connector sealing, and keeping the thermistor away from both heaters so defrost doesn’t shut off early.
