Introdução
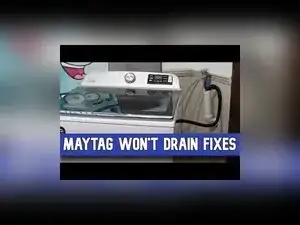
If a newer Maytag top-load washer won’t drain, it often won’t spin, and it may show a drain-related error code such as F9E1. This guide walks through common causes, including a kinked drain hose, standpipe setup issues, trapped debris, wiring problems, or a failed drain pump, and shows how to access and inspect the drain pump system on several similar model variations.
Peças
-
-
Check the drain hose for kinks, crushing, or damage that could block water flow.
-
Check how deep the drain hose sits in the standpipe, and keep it from inserting more than 8 inches.
-
Confirm the standpipe height supports the drain hose at about 30 inches from the floor.
-
-
-
Place a bucket near the floor and lower the drain hose into it as low to the ground as possible.
-
Let gravity drain water from the tub into the bucket until the flow stops.
-
-
-
Turn off the hot and cold water valves, and remove the water supply hoses.
-
Tape the lid shut with painters or masking tape so it can’t swing open while the washer is on its side.
-
Carefully lay the washer on its side so you can access the drain pump area underneath.
-
-
-
Locate the drain pump system near the lower right corner of the washer base.
-
Inspect the drain pump wire harness and the wire trunk underneath for loose plugs, frayed insulation, or damage.
-
Reseat the pump harness connector so it’s fully plugged in.
-
-
-
Use slip-joint pliers to squeeze the retaining clips on the two pump hoses, and slide the clips away from the pump.
-
Pull both hoses off the drain pump ports.
-
-
-
Inspect the hose path from the tub to the pump for trapped objects or debris.
-
Use needle-nose pliers to pull out any debris you find inside the hose openings.
-
Flush the hose with water if needed to circulate and clear out residue.
-
Inspect the inside of the black hose after it’s removed, and clear any obstructions you find.
-
-
-
Use a 5/16-inch hex-head screwdriver or nut driver to remove the three pump mounting screws.
-
Remove the pump from the washer and keep a bucket underneath to catch any remaining water.
-
Drain any water still inside the pump housing before testing or disassembling it.
-
-
-
Set a multimeter to resistance or continuity mode.
-
Touch the multimeter leads to the pump motor spade connectors.
-
-
-
Remove the pump housing screws to open the pump so the impeller paddles can be checked.
-
Press and turn the impeller paddles, and feel for strong resistance and a firm spring-back in three or four segments as it rotates.
-
Replace the pump motor if the impeller feels soft and spins easily with little or no resistance, because the internal magnet is likely broken.
-
-
-
Replace the pump with either a complete assembled pump or a compatible universal motor that fits the existing bracket and housing.
-
Reassemble the pump so the four housing screws are installed correctly, with three from the bracket to the pump and one between the motor and white housing.
-
-
-
Inspect the drain hose from the pump outlet toward the standpipe for obstructions before reconnecting it.
-
Reinstall the black hose onto the tub, and secure it by seating the clamp into the hose grooves.
-
Mount the pump to the tub and reinstall the three pump mounting screws.
-
Reseat both hose clamps fully on the pump ports so they seal evenly.
-
Snap the drain pump wire harnesses back into place and route them so they won’t bind or catch on anything.
-
-
-
Stand the washer upright, reconnect the water hoses, turn the water valves on, plug the washer in, and run a drain or spin function to test.
-
If draining still fails with a known-good pump and clear hoses, suspect a wiring problem between the control and pump, or a failed control board output.
-
Drain and spin failures are commonly caused by drain hose setup issues, a clogged hose path, a loose or damaged pump harness, or a drain pump with a broken internal magnet. Recheck hose depth in the standpipe, confirm clamps are seated in the hose grooves, and verify the pump wiring is fully connected and routed clear of moving parts before returning the washer to service.
