Introdução
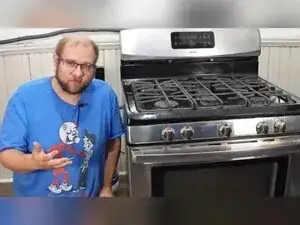
Use this guide to track down why your Kenmore gas oven will not heat and to install a new bake igniter. You will confirm gas supply, test key components, safely remove the door and interior panels, fit a universal replacement igniter, and verify operation so the oven once again reaches cooking temperature.
Ferramentas
Peças
-
-
Verify other gas appliances in your home operate to confirm household gas flow.
-
Make sure the range is plugged into a working outlet because the igniter needs electricity.
-
-
-
Open the door slightly and locate the metal locking tabs at the hinges.
-
Use a flat screwdriver to pry each tab down toward the door.
-
Push the door toward the oven, lift up, then pull it away to remove it from the chassis.
-
-
-
Unscrew the two rear thumb screws securing the floor panel; use a screwdriver or vice grips if rusted.
-
Lift the panel up, slide it back, then pull it out while clearing the front lip.
-
-
-
Take out the two screws at the front edge of the baffle.
-
Pull the baffle up slightly and slide it out to reveal the burner bar and igniter.
-
-
-
Trace the igniter leads to their harness or splice point inside the cavity.
-
Disconnect the plug or cut the wires midway to preserve the factory harness.
-
-
-
Choose a replacement igniter that visually matches the original style.
-
Secure it to the burner bar with the original screws and any supplied heat shield.
-
-
-
Strip insulation from both old harness leads and new igniter leads.
-
Twist like-colored wires together and secure each pair with a high-temperature ceramic wire nut.
-
-
-
Position the burner bar on its rear and front mounting holes.
-
Reinsert and tighten the back wall and front screws to lock the bar in place.
-
-
-
Plug the range into power and set Bake to 350 °F.
-
Confirm the igniter glows cherry red within one minute and flame appears within two minutes.
-
-
-
Unplug the range and access the safety valve beneath the oven.
-
Pull one wire from the bake terminals and read resistance with a multimeter.
-
Continuity or low resistance means the valve is good; OL indicates replacement is required.
-
-
-
Clamp an amp meter around one igniter lead and set the meter to the 20-amp range.
-
Restore power, select Bake, and observe or record the amperage.
-
A healthy igniter draws 3.0-3.6 A; readings below 2.6 A indicate a weak igniter.
-
-
-
Test the oven thermostat probe in the upper left cavity for proper resistance.
-
If all other parts test good, suspect a failed bake relay or trace on the electronic control board.
-
-
-
Seat the flame spreader baffle into the two rear slots and install its two screws.
-
Place the floor panel onto the front lip, slide it rearward, and tighten the thumb screws by hand.
-
-
-
Slide the door arms fully into the hinge slots on the chassis.
-
Open the door, flip both locking tabs toward the cavity, and close the door to lock it.
-
Insert the warming drawer onto its rails and push until it locks in place.
-
Your Kenmore gas oven should now preheat quickly and maintain temperature. Always verify that wires are clear of the flame path and that all panels and screws are secure before regular use.
