Introdução
Use this guide to track down and correct the most common reasons your GE refrigerator stops cooling. You will clean airflow passages, test simple electrical parts, and decide whether a part must be replaced before paying for a costly sealed-system repair or service call. Every task can be done with basic hand tools and a multimeter.
-
-
Pull the cabinet straight out far enough to reach the rear panel without straining the power cord or water line.
-
-
-
Shine a flashlight on the black condenser coils and note any mat of dust or pet hair blocking the fins.
-
-
-
Brush debris from the coils with a long condenser brush, working in the direction of the fins to avoid bending them.
-
Vacuum loosened dust with a narrow hose, then sweep or vacuum the floor so dirt is not pulled back in.
-
-
-
Check for additional condenser tubing under the front kick plate and clean it with the same brush and vacuum if needed.
-
-
-
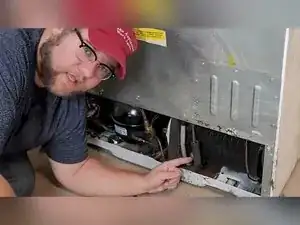
Locate the fan between the compressor and coils and spin the blade by hand to check for free movement while power is off.
-
Plug the refrigerator in; the fan should start within a few seconds and run continuously while the compressor is on.
-
-
-
With power applied, grasp the compressor shell carefully; a slight vibration or low hum confirms it is running.
-
-
-
Unplug the refrigerator, pull the plastic relay off the compressor pins, and shake it next to your ear.
-
For confirmation, set a multimeter to continuity and probe the start and run terminals; no reading equals a bad relay.
-
-
-
Locate the round defrost thermostat clipped near the top of the evaporator tubing.
-
For a functional test, chill the thermostat below 30 °F and check continuity; it should read closed when cold.
-
-
-
Disconnect the heater wires and set the multimeter to ohms, then probe both heater terminals.
-
-
-
Replace any failed heater, swollen thermostat, or damaged sensor before reassembling the freezer compartment.
-
-
-
Remove one screw anchoring the ice maker auger guard, disconnect its wire plugs, and lift the ice maker out.
-
Take out two screws on the rear plastic brace and four screws holding the top shelf rails to free the fan cover.
-
Pull the entire plastic shroud forward to reveal the evaporator fan motor.
-
-
-
Reconnect power and close the freezer door switch; the evaporator fan should spin steadily.
-
Measure DC voltage on the fan harness; 8–14 V with a stationary fan confirms a failed motor.
-
-
-
Press the freezer light switch and watch that the fan starts and stops; a faulty switch can mimic a bad fan.
-
-
-
If dirty coils, a seized fan, or a bad relay was found, replace or clean the part and reassemble the refrigerator.
-
Reinstall every panel and shelf, restore power, and allow at least 24 hours for temperatures to stabilize. Regularly brushing the condenser coils and clearing airway obstructions every six months prevents most cooling complaints and extends the life of your GE refrigerator.
