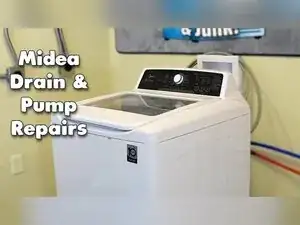
Introdução
If your Criterion top-load washer won’t drain, it’s often caused by a drain hose setup problem, a blockage in the pump or hoses, a failed drain pump, or a wiring/control issue. This guide walks you through the common fail points, how to safely access the drain pump from the bottom, how to check for obstructions, and how to test the pump and its wiring with a multimeter.
Some models show an E2 code for a drain pump problem, but the washer can still have a drain issue without that code. This guide also applies to other similar top load Midea, Insignia, or Frigidaire washing machines.
Ferramentas
Peças
-
-
Unplug the washer from the wall outlet before any inspection or disassembly.
-
Turn off the water supply valves to reduce the chance of leaks while moving the washer.
-
-
-
Check that the drain hose outlet is positioned about 100 cm (39 inches) up from the floor.
-
Set the hose height to roughly the same level as the rear of the washer so it drains properly.
-
Adjust the hose if it’s much higher or lower than the back of the washer, because either condition can cause siphoning and poor draining.
-
-
-
Lower the drain hose to near floor level to siphon as much water out of the tub as possible.
-
Watch for steady flow from the drain hose, which indicates the hose path is at least partially open.
-
If water won’t siphon out at floor level, treat it as a likely obstruction in the drain pump or hoses and continue with pump access.
-
-
-
Look for a pump cleanout at the bottom rear of the washer if your model includes one.
-
Unscrew the cleanout and check for blockages if it’s present.
-
-
-
Tape the lid closed, or hold it securely, so it can’t flip open while the washer is tipped.
-
Tilt the washer onto its front or onto its side to access the underside.
-
-
-
Find the drain pump by locating the large hose connected to it on the underside of the washer.
-
Place a towel under the pump area to catch water that may spill when hoses are removed.
-
Use a Phillips screwdriver or a 10 mm driver to remove the three screws securing the pump housing area.
-
-
-
Use slip-joint pliers to loosen the clamp and remove the tub hose from the pump.
-
Inspect for obstructions inside the tub outlet and inside the tub hose you removed.
-
Inspect the hose path from the pump outlet to the external drain hose for blockages.
-
Use a flashlight to look inside hoses and ports if the tub didn’t siphon earlier.
-
Remove any debris you find, because clearing a blockage may restore normal draining without replacing parts.
-
-
-
Locate the wire bag near the rear of the washer where many harnesses bundle together and route to the control board.
-
Remove the screws from the back of the washer to access the wire bag more easily if needed.
-
Trace the drain pump wire from the pump into the wire cluster, because wire colors can be hard to distinguish and may vary by model.
-
Remove any cable ties required to free the pump wire, including any surface-mounted cable tie holding it in place.
-
Unwrap any cotton wrap around the wire cluster slowly and plan to tape it back up during reassembly.
-
-
-
Set a multimeter to resistance (ohms).
-
Press the multimeter probes into the drain pump wire harness terminals to measure the pump’s resistance.
-
Replace the pump if the reading is far from 16–17 Ω, using about a 20% margin as a practical pass-fail range.
-
-
-
Use a Phillips screwdriver to remove the three or four screws holding the pump housing to the pump motor.
-
Separate the pump housing from the pump motor to access the impeller.
-
Move the impeller paddles by hand and feel for three or four firm segments that resist and spring as the internal magnets pass.
-
Replace the pump if the impeller feels very loose, slips, or seems stripped, because the pump won’t move water reliably.
-
-
-
Route the drain pump wiring back through the wire cluster the same way it was originally installed.
-
Re-tie the harnesses and reassemble the wire bag so the wires can’t jostle around during operation.
-
Mount the wire bag back onto the side of the machine with its metal wire tie.
-
Reattach the tub hose to the pump and secure it with its clamp.
-
Reinstall the three screws that secure the pump housing to the drum area.
-
-
-
Access the control board wiring from the back of the washer, or while the washer is laid on its front as shown during bottom access.
-
Disconnect the drain pump wiring at the control board connector labeled CN5.
-
Test for continuity or resistance between pin 3 and pin 6 on the wires going to the pump.
-
If you have continuity, suspect a failed control board that isn’t triggering the drain pump.
-
If you don’t have continuity, suspect broken or damaged wiring between the control board and pump, often within the wire bag area.
-
-
-
Set the washer upright and remove any tape securing the lid.
-
Restore the drain hose to the correct height of about 100 cm (39 inches) from the floor.
-
Plug the washer in and run a drain or spin cycle to confirm the tub empties normally.
-
Check underneath and behind the washer for leaks around the pump and hose connections.
-
A no-drain problem is usually caused by an incorrect drain hose height, a blockage in the pump or hoses, a failed pump motor or stripped impeller, or a wiring/control-board issue. Re-secure all harnesses, wraps, and cable ties exactly as found so wires can’t rub, vibrate, or snag during operation.
