Introdução
Use this guide to put a Whirlpool-built refrigerator (including many KitchenAid models) into service diagnostics, run built-in tests from the control board, and read error codes. This is especially helpful for “won’t cool,” icing, fan, defrost, dispenser, and ice maker problems without checking every component one-by-one.
Ferramentas
-
-
Move food and glass shelves only if you need more room to work around the dispenser and doors.
-
Plug the refrigerator back in when you’re ready to run diagnostics.
-
-
-
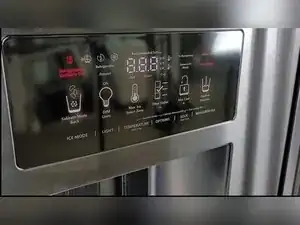
Check the dispenser area for a digital ice-and-water user interface with an on-screen display.
-
-
-
Use a ladder to reach the upper right corner of the refrigerator cabinet.
-
Use a Phillips screwdriver to remove the plastic cover in the upper right corner.
-
Pull out the technician tech sheet and keep it nearby for model-specific test numbers and codes.
-
-
-
Find the buttons labeled Ice Mode and Light on the dispenser interface.
-
Locate the + button to move forward through test numbers and the − button to move backward.
-
-
-
Press and hold the Ice Mode button and the Light button at the same time for three seconds.
-
Release both buttons when you hear a chime.
-
Watch the display for flashing codes indicating the refrigerator is in service diagnostics.
-
Press the + button to increase the test number.
-
Press the − button to decrease the test number if you need to return to a previous test.
-
-
-
Go to Service Test 01 to check the freezer (FC) thermistor resistance result on the temperature display.
-
Read 01 as pass, 02 as open, and 03 as shorted.
-
Go to Service Test 02 to check the refrigerator (RC) thermistor resistance result on the display.
-
Read 01 as pass, 02 as open, and 03 as shorted.
-
Go to Service Test 37 to view the icebox thermistor resistance value on the display.
-
Go to Service Test 39 to check the refrigerator evaporator thermistor status as pass, fail, or short.
-
Go to Service Test 65 to check the pantry thermistor status as pass, fail, or short.
-
-
-
Go to Service Test 03 to test the evaporator fan motor and the air baffle motor.
-
Press Software Button Three to advance through the available fan and baffle modes shown on the display.
-
Press and hold to the mode labeled 04 to run both fans simultaneously.
-
Go to Service Test 36 to check whether the icebox fan is on or off.
-
-
-
Go to Service Test 04 to run the compressor, condenser fan motor, and evaporator fan service test.
-
Wait for the three-second delay before the first step starts.
-
Use the + button to advance to Service Test 05 unless you specifically need to stay in Test 04.
-
In Service Test 05, press Software Button Three to ramp the compressor to max speed and show 01 on the display.
-
Press Software Button Three again to show 04, ramp down from max to minimum speed, and then show 02.
-
-
-
Go to Service Test 06 to check the defrost and bimetal thermostat status.
-
Read 01 as bimetal closed and 02 as bimetal open.
-
Go to Service Test 07 to select the defrost control mode.
-
Set 01 for ADC on, or set 02 for basic mode that defrosts every eight hours.
-
Go to Service Test 38 to put the refrigerator into forced defrost.
-
Read OF as forced defrost off, and cycle the status to select a short defrost or a long defrost.
-
-
-
Go to Service Test 08 to turn on UI indicators and verify the refrigerator’s lights and display segments work.
-
Go to Service Test 09 to run the UI button and pad test and confirm each button registers.
-
Use the dispenser lighting test when it appears to verify dispenser lighting operation.
-
Go to Service Test 63 for the pantry UI indicator test if your model has a pantry UI.
-
Go to Service Test 64 for the pantry UI button test if your model has a pantry UI.
-
-
-
Go to Service Test 15 to check the ice level sensor status for whether the ice bin is full.
-
Go to Service Test 16 to check the refrigerator door switch input and read the open or closed status on the display.
-
Go to Service Test 17 to check the lower door switch input and read the open or closed status on the display.
-
Go to Service Test 18 to check the ice door motor status for whether the ice door is open.
-
Go to Service Test 19 to check the ice maker fill tube and fascia heater status.
-
Go to Service Test 33 for humidity sensor control, if present on your model.
-
Go to Service Test 34 for vertical mullion heater mode and Service Test 25 for vertical mullion heater status.
-
-
-
Go to Service Test 20 for the water filling usage rating system test.
-
Go to Service Test 21 for the water filler time rating test.
-
Go to Service Test 22 for the water filter usage test.
-
Go to Service Test 23 for the water filter time test.
-
Go to Service Test 24 for the water filter reset test.
-
Use the water dispensing test when it appears to force water dispensing.
-
Go to Service Test 67 for the water filter switch status indicator.
-
-
-
Run Service Test 57 to harvest and eject any ice before attempting to fill the ice maker with water.
-
Go to Service Test 45 and use the temperature cycle selector to command an ice harvest for ice maker testing.
-
Open the ice maker error code screen to view ice-system error codes labeled E0 through E5.
-
Go to Service Test 58 for the ice maker heater activation and thermistor test, and go to Service Test 59 for the ice maker motor test.
-
-
-
Go to Service Test 26 to view the main control software version.
-
Go to Service Test 27 to view the dispenser UI control software version.
-
Go to Service Test 29 to view the low voltage IDI software version if it appears on your model.
-
Go to Service Test 31 to view the touch input module software revision number if it appears on your model.
-
Go to Service Test 42 to view the UI control software version if it appears on your model.
-
Go to Service Test 60 to view the pantry UI software version if your model has a pantry UI.
-
Go to Service Test 66 to view manufacturing codes labeled E0, E1, E2, E3, E4, E5, E6, and ER if present.
-
-
-
Press and hold the same two entry buttons together for three seconds to return the refrigerator to normal operation.
-
Unplug the refrigerator for about five minutes and plug it back in if you can’t exit diagnostics normally.
-
Diagnostics let the control board report what it “sees” from sensors, switches, and major loads like fans and the compressor. Use the technician tech sheet to match your exact model’s test list and code meanings, especially when test numbers are skipped or features like a pantry UI aren’t present.
